Introduction
If you’ve ever wanted to learn how to draw a fire breathing dragon 🐉🔥, this is the perfect place to start! Dragons are some of the most exciting creatures to draw because they combine fantasy, adventure, and incredible details, from their fierce eyes and sharp claws to their powerful wings and fiery breath. And even though they look impressive, drawing one doesn’t have to be hard. With the right beginner step drawing guide, you’ll see just how simple it can be.
In this easy drawing tutorial, you will learn how to draw a fire breathing dragon by creating your own dragon drawing. We’ll begin with basic shapes to sketch the head and body, then move on to the wings, legs, tail, and finally, the most exciting part the fire! You’ll learn tricks for making your flames look bright and alive, and how to give your dragon a personality that’s fierce but still fun to look at.

By the end of this guide, you’ll know exactly how to draw a fire breathing dragon from scratch. Whether you’ve been wondering “how can I draw a dragon that’s breathing fire?” or “how do I draw a dragon that looks amazing but is still easy?”, this guide will give you everything you need.
So grab your pencils, markers, and paper, and let’s create an awesome drawing of a dragon breathing fire together! 🎨✨
Table of Contents
With our simple tips, you’ll be an expert on how to draw a fire breathing dragon in no time, making your own magical masterpiece.
Materials Needed 🎨
Before we start our step-by-step drawing, let’s make sure you have everything you need! You don’t need anything fancy, just a few basic tools to bring your drawing to life:
✅ Paper or Sketchbook – A blank page for your drawing. 📄
✅ Pencils (HB or 2B) – Light pencils help with outlining the drawing. ✏️
✅ Eraser – To fix mistakes while sketching. 🔄
✅ Black Marker or Fine Liner – For outlining and defining clearly. ✍️
✅ Colored Pencils – To color your drawing.
Now, let’s learn how to draw a fire breathing dragon step by step…
How to Draw a Fire Breathing Dragon Step by Step
Are you ready for the most amazing part of all? It’s time to learn how to draw a fire breathing dragon! Get your pencils ready, because we’re about to start this exciting step-by-step drawing adventure.
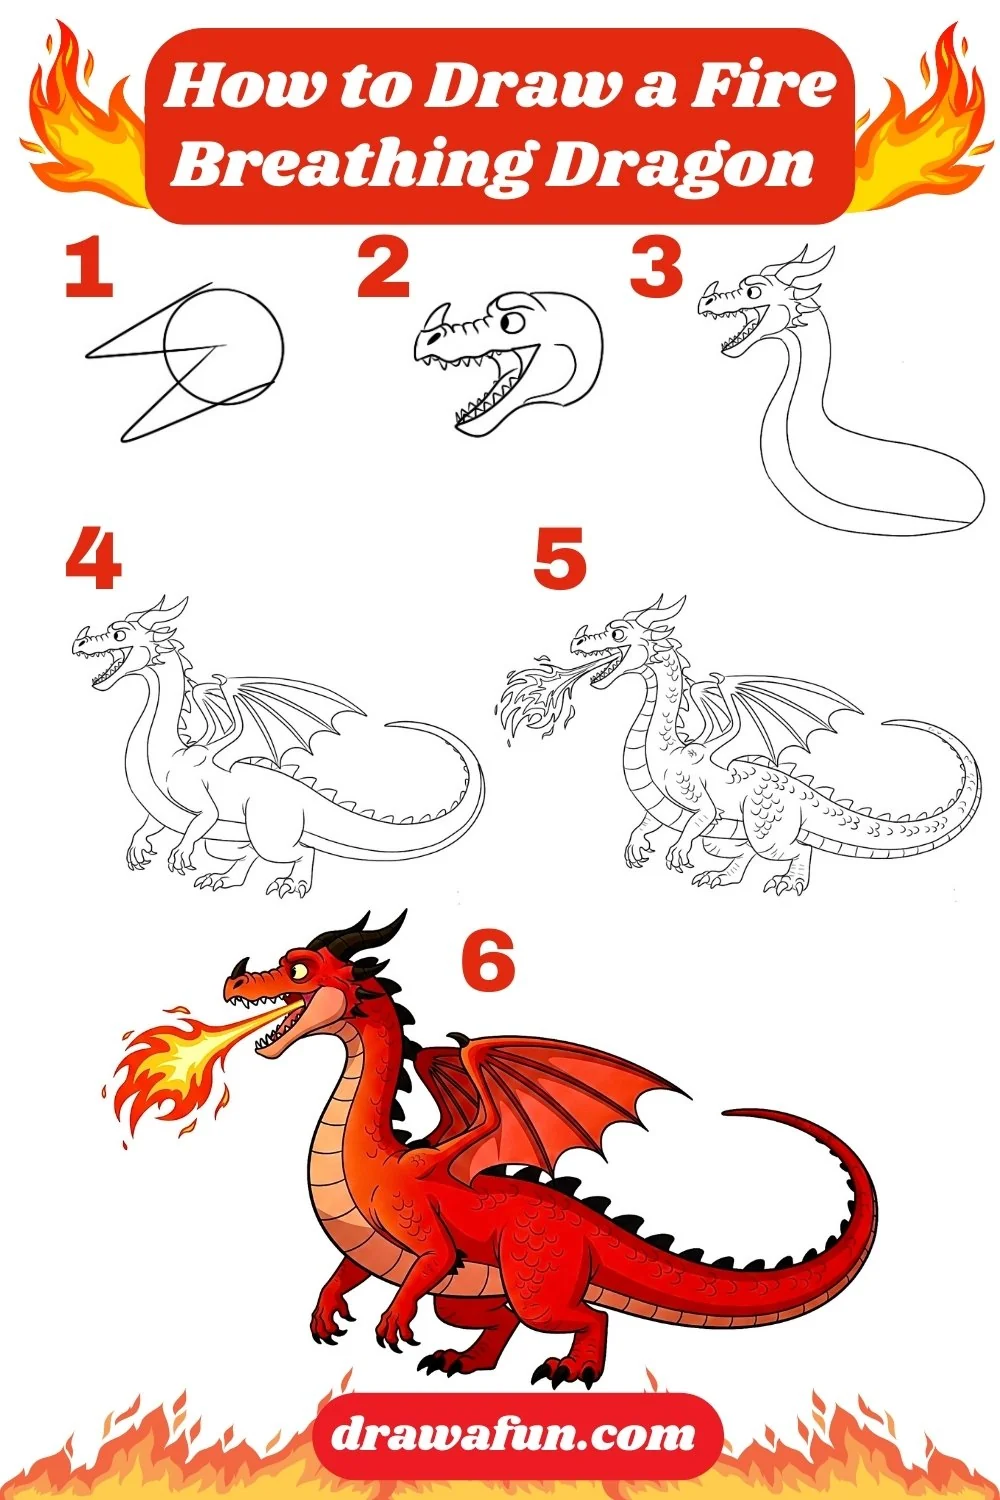
We’ll bring a roaring, fire-breathing dragon to life on your paper!
Step 1: Draw the Head Shape 🐲
Begin your dragon drawing by drawing a long, oval shape for the basis of head shape. Dragons have powerful jaws, so draw two triangles at the front of the oval, one above and one below, to indicate the location of the jaws. You can use the image below as a reference.

This shape will form the basis for your later drawing of a fire breathing dragon.
Tip: When you’re learning how to draw a fire breathing dragon, start light so you can erase and refine your shapes easily.
Step 2: Add the Mouth and Jaw 🔥
Give a head shape to the oval we drew for the dragon’s head. Then from the front of the oval, draw an open mouth shape, almost like a stretched-out letter “C.” This is where the flames will come from in your dragon drawing breathing fire.

We’re almost there! Let’s keep going with our awesome guide on how to draw a fire breathing dragon! Now for the fun part: we get to add all the little details to its face, like its big, powerful eyes and its fierce teeth and jaw.
Step 3: Draw the Facial Details for the Dragon 👀
Above the mouth, add a curved line for the brow and place a large oval eye just below it. Add a small oval on the nose for the dragon’s nostril. Sketch a line inside for the mouth opening and sketch sharp teeth along the top and bottom.

As you work on the facial details, you’ll see that learning how to draw fire breathing dragon is a creative and rewarding journey.
Step 4: Sketch the Neck and Body 🦕
From the back of the head, draw two slightly curved lines going down to form the neck. Add two curved horns on top of the head, pointing backward. Horns make your drawing of a dragon breathing fire look more powerful.
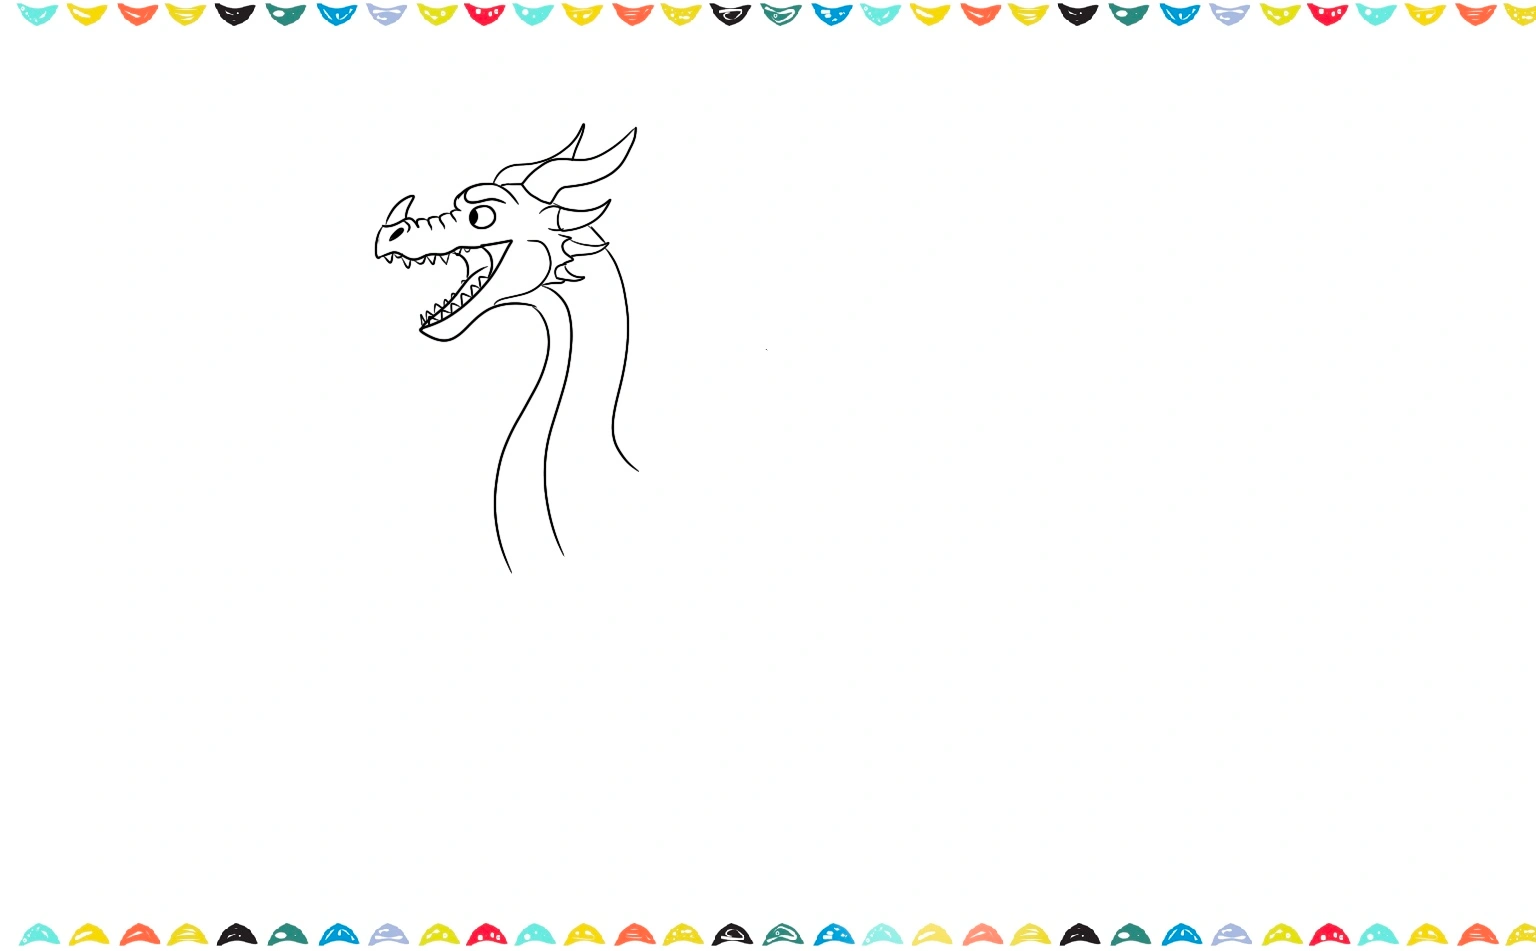
Then, sketch a large oval for the body. This step is important in how to draw a fire breathing dragon because it connects the head to the rest of the body naturally.
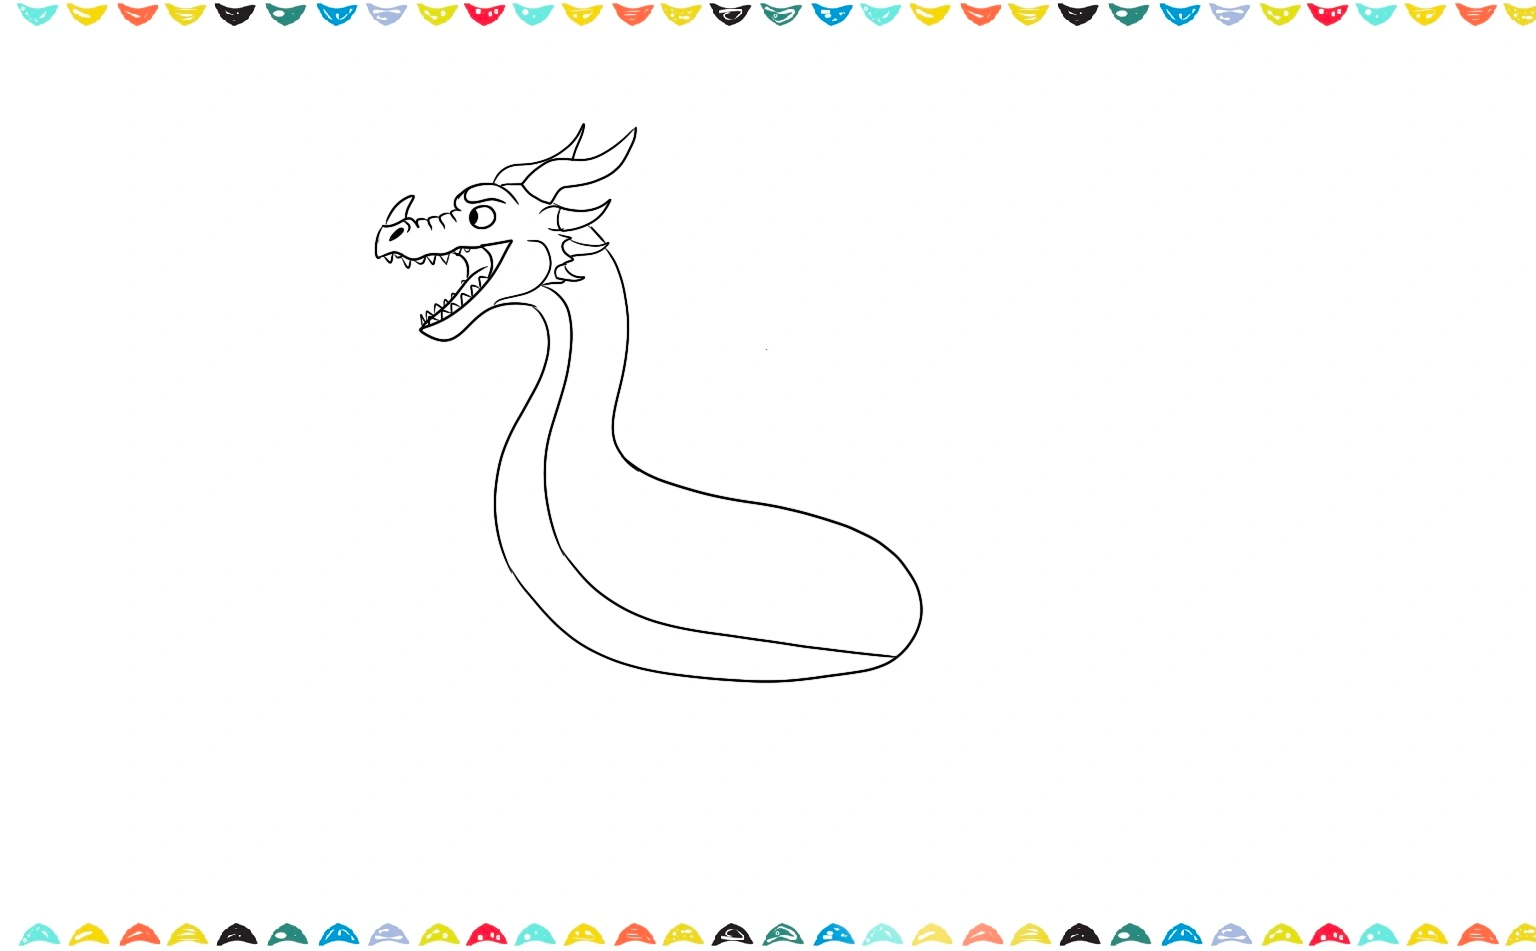
Let’s keep going with our guide on how to draw a fire breathing dragon! We’ll sketch its big, strong limbs so it can stomp through its kingdom and fly wherever it wants to go.
Step 5: Add the Front Legs and Claws 🦖
Alright, let’s give your dragon some power! From the front of its big body, draw two strong legs. At the end of each one, add three super sharp claws, these will help it hold onto treasure!
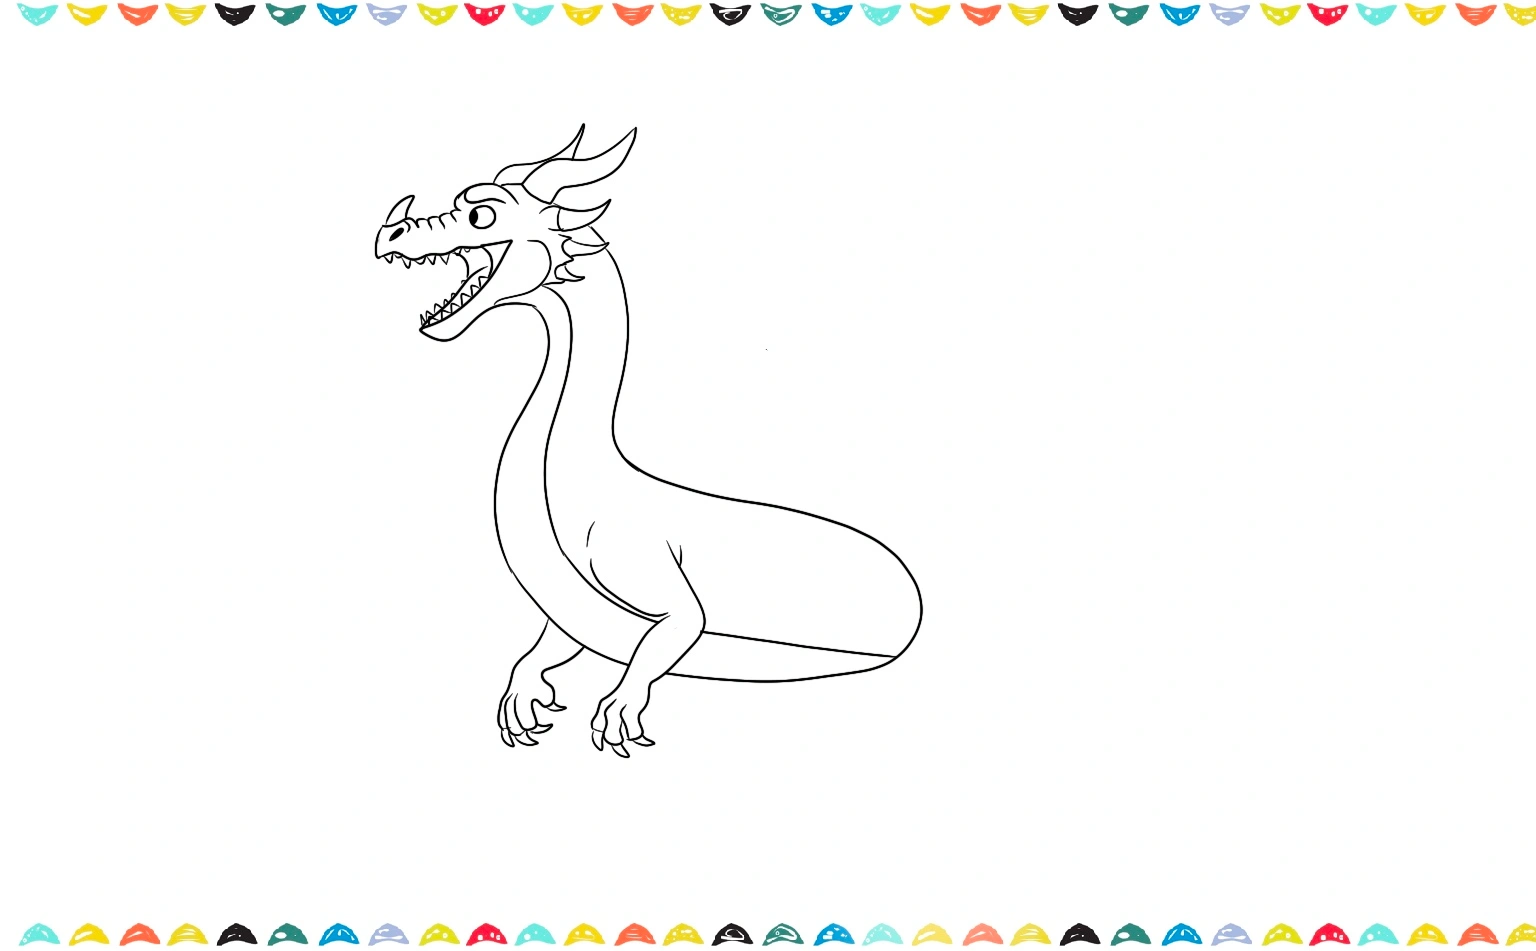
To make your fire-breathing dragon look like it’s ready to leap into the sky, bend its legs just a little bit at the joint.
Fun Option: If you want a friendlier look, make the claws rounded instead of sharp.
Step 6: Draw the Back Legs and Feet 🦵
Now, let’s give our dragon some seriously powerful legs! Draw the back legs a little bit bigger and thicker than the front ones. These strong legs will help your dragon stay balanced and sturdy, which is super important when it’s getting ready to breathe fire!
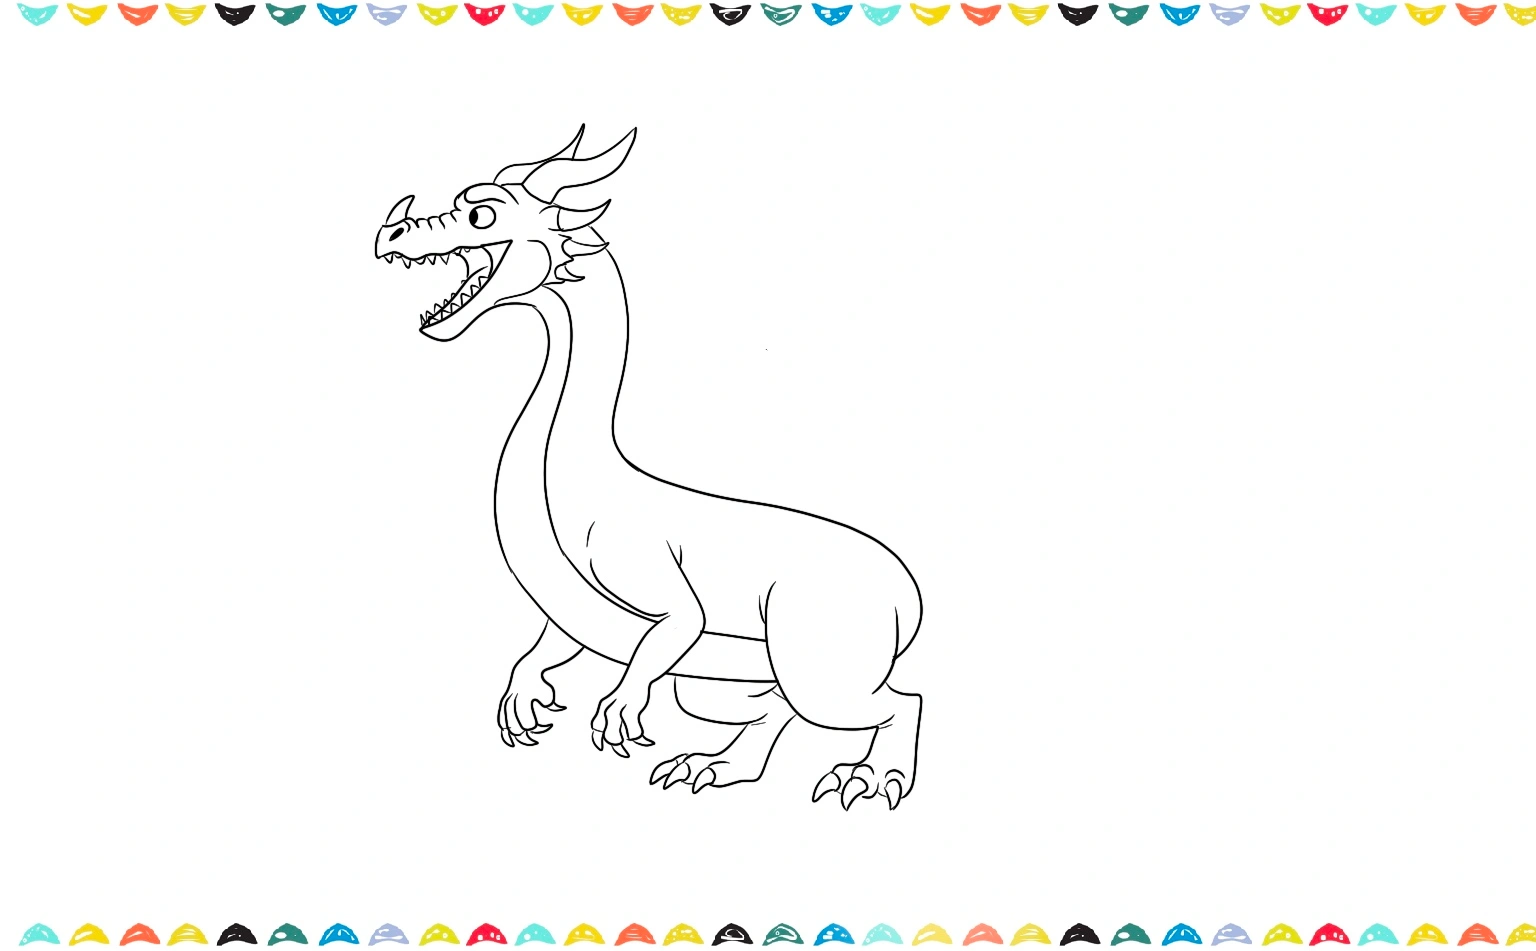
Once you’ve done that, be sure to add those sharp, powerful claws to the back feet to match the ones on the front.
Enjoyed drawing today? Dive into How to Draw a Fire Truck next and discover more easy guides. Mix them together to create a big, story-style artwork!
Step 7: Add the Wings
Ready for the next step? It’s time to draw the wings! On the dragon’s back, let’s draw two great big wings. First, draw a long, curvy line that looks like an arm for each wing. Then, draw big, curved lines that connect back to the body to fill in the rest of the wing.
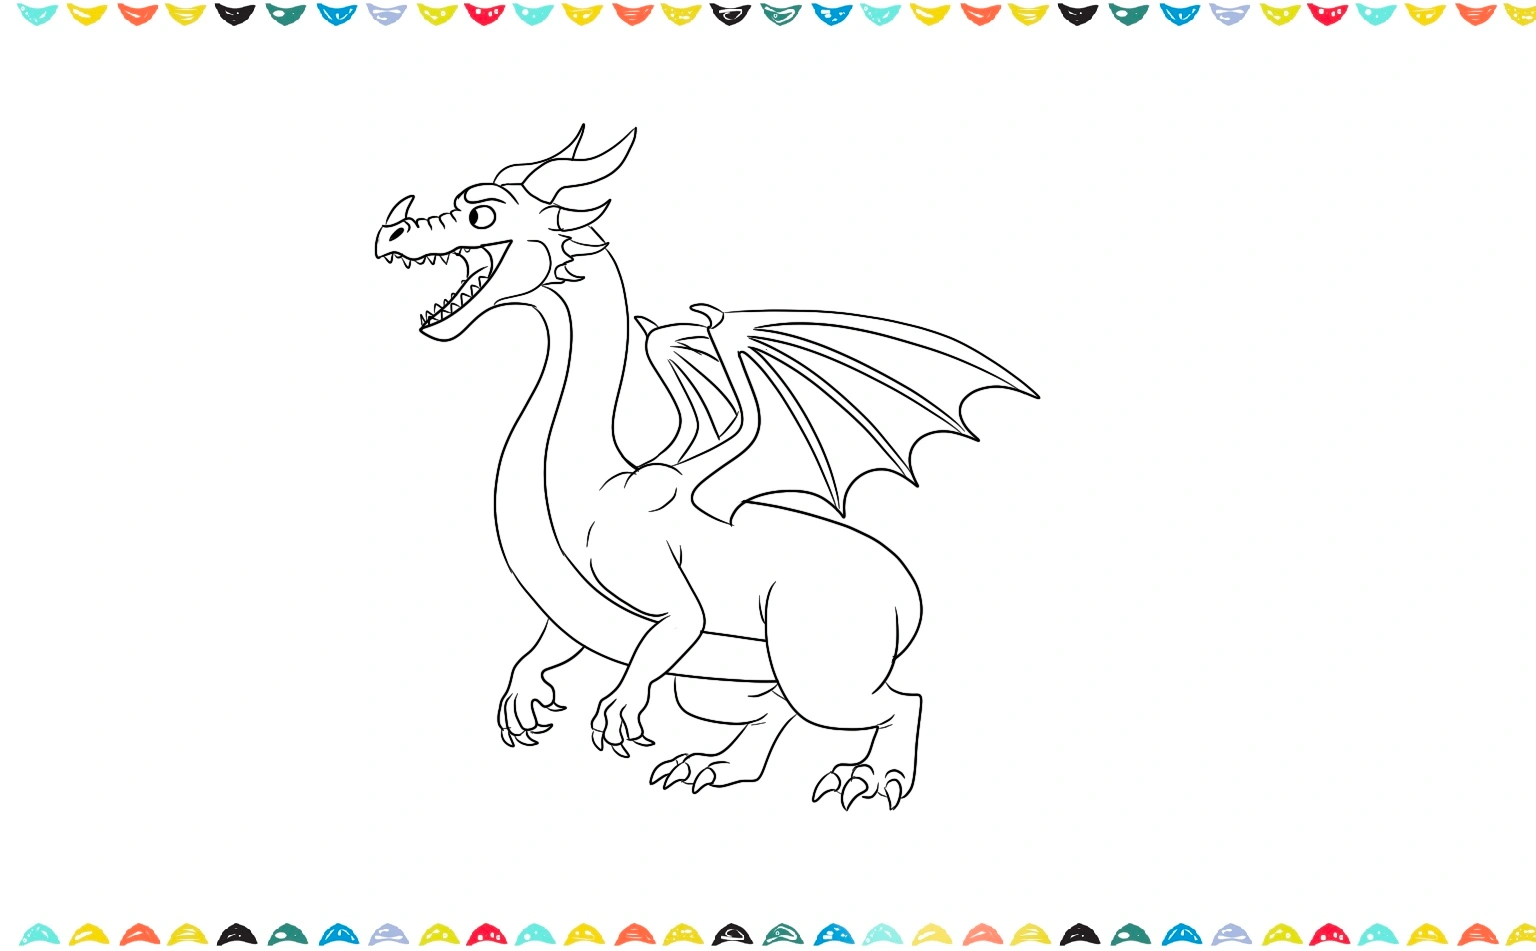
Big wings are a signature part of any fire dragon drawing, especially when combined with fiery breath!
Step 8: Draw the Tail 🌀
It’s time to give our dragon a super long and curvy tail! Starting from the back of its body, draw a long, wiggly line that comes to a sharp point at the end. For some extra cool style, you can even make the tip of the tail curl up, like a superhero’s cape! Once you have the shape you want, add some small, pointy spikes along the top of the tail to make it look even more amazing.
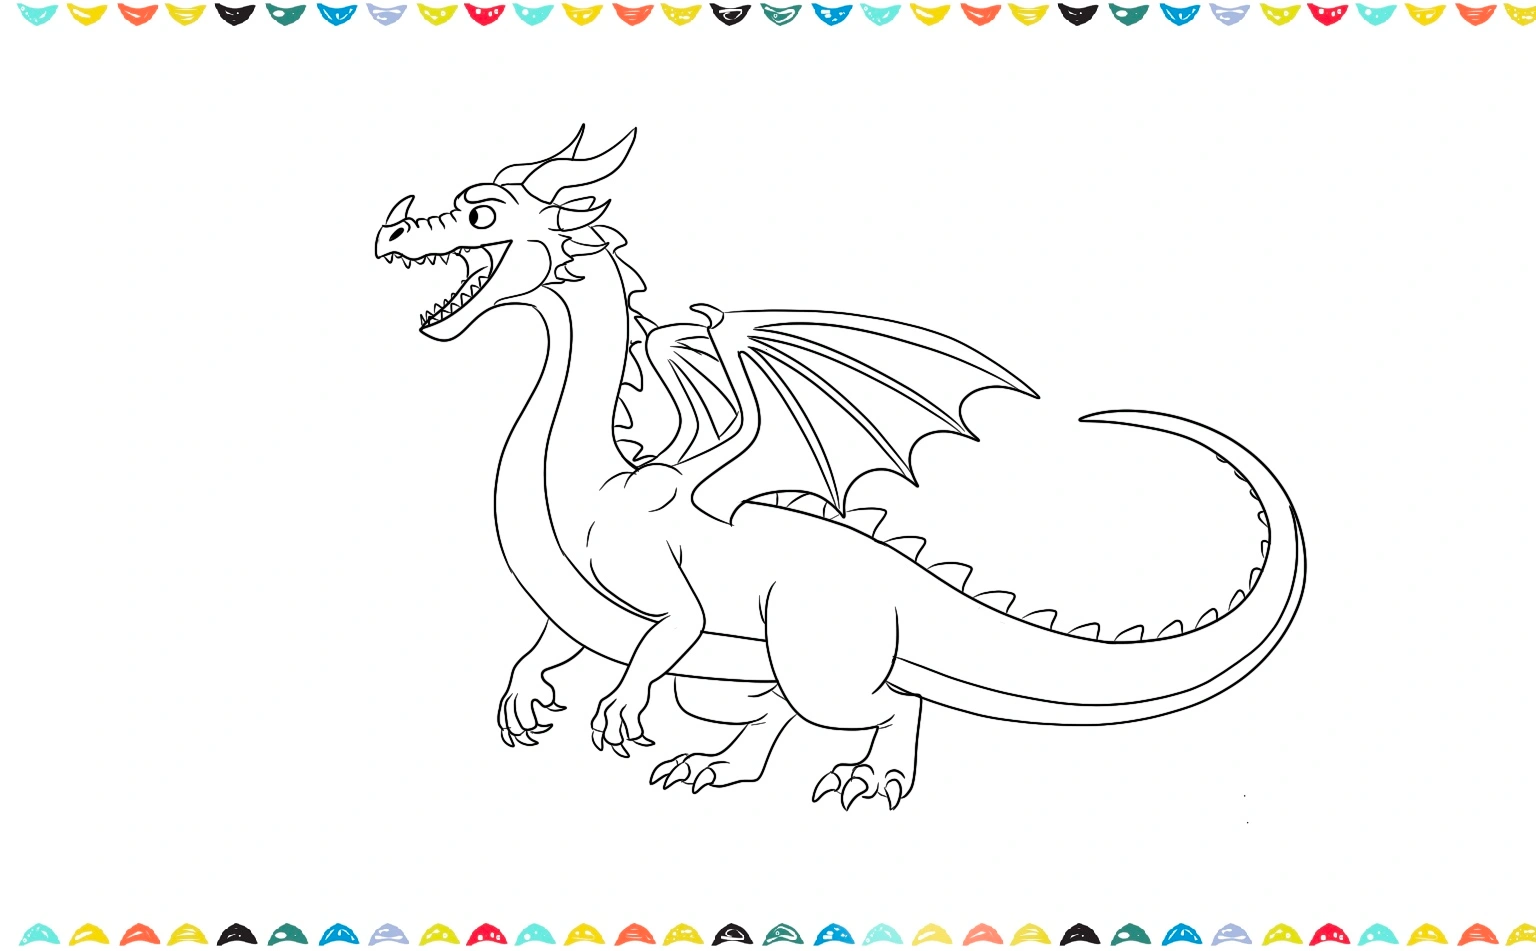
Now let’s give our fire breathing dragon some amazing, scaly armor on its belly! Inside the neck and belly, draw some curved lines that are close together and go all the way down. This creates a bumpy, tough texture for its scales!
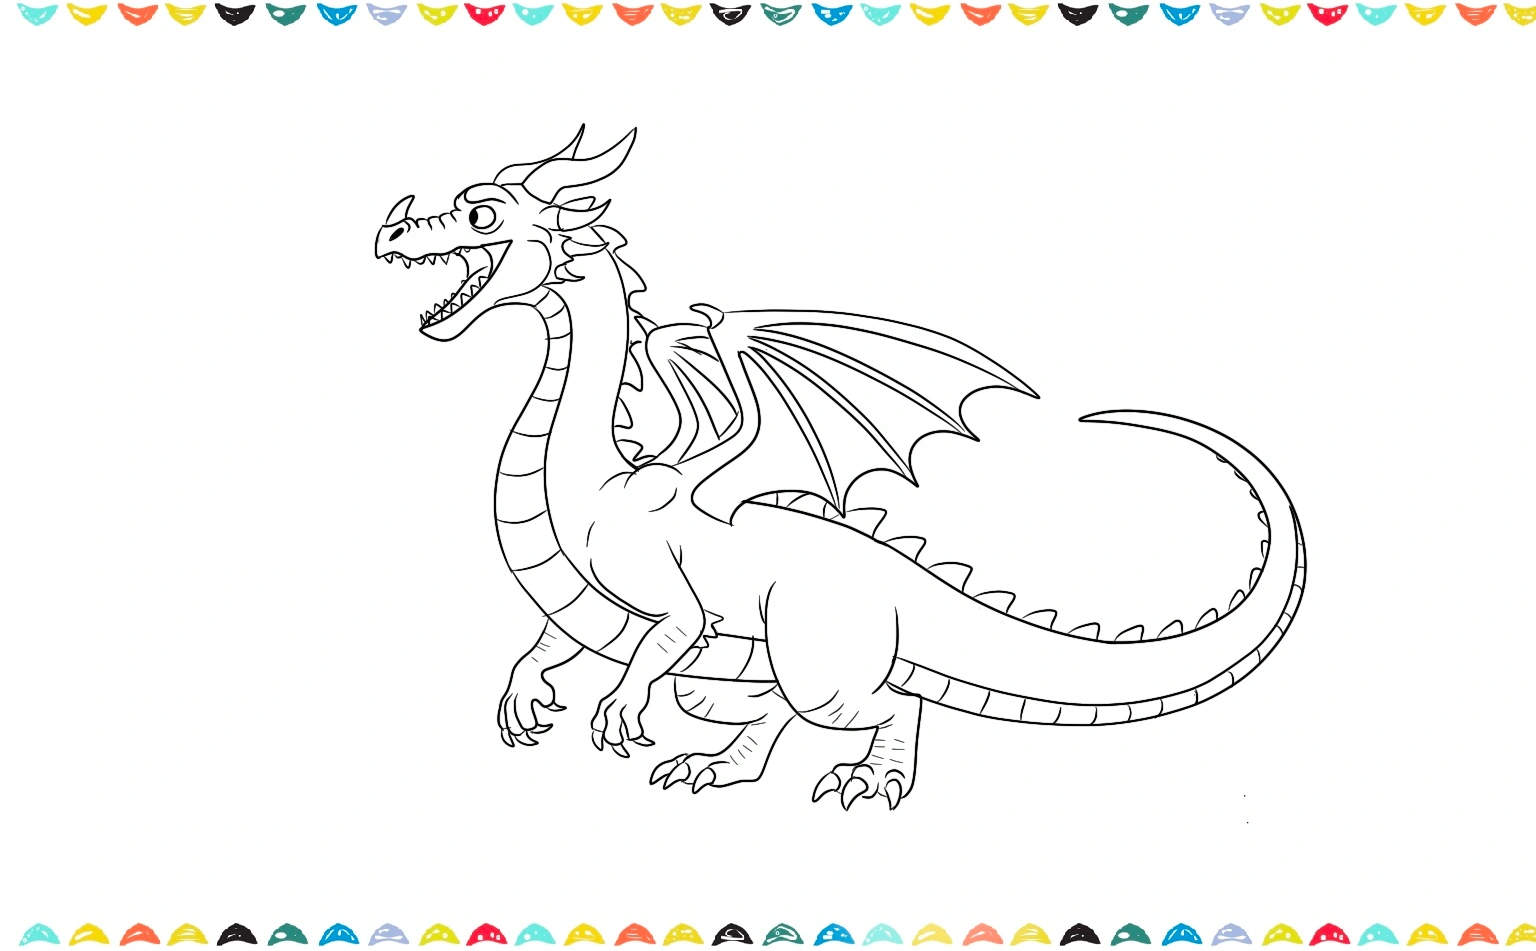
After learning how to draw a fire breathing dragon, you might also enjoy drawing a tiger our fun post on How to Draw a Tiger.
Step 9: Add Texture and Details ✏️
Are you ready for the coolest part of learning how to draw a fire breathing dragon? It’s time to add those awesome, spiky scales! Imagine they are little protective shields, and draw lots of tiny, curved lines along the dragon’s neck, all the way down its long, powerful back, and even onto its strong, stomp-ready legs to make it look super fierce! This extra detail will make your dragon sketch truly magnificent!
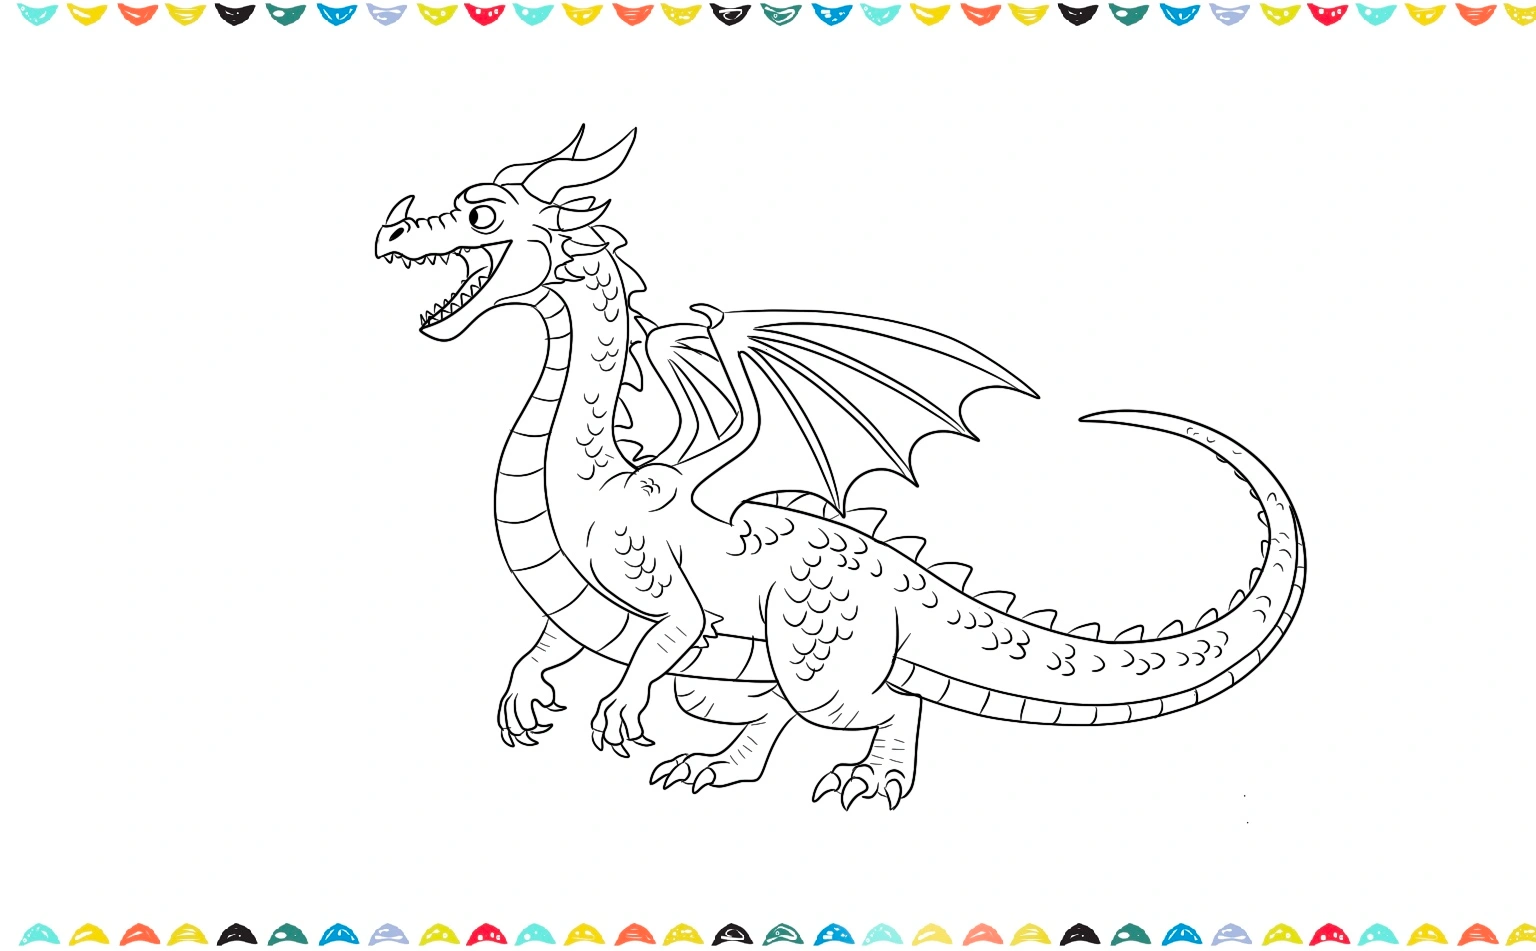
Add some extra lines to make the fire blowing dragon drawing look tough and realistic. These little touches are what will turn your drawing from good to an amazing masterpiece!
Step 9: Add Fire to the Mouth 🔥🔥
Here’s the most exciting part of how to draw a fire breathing dragon! From the open mouth, draw flame shapes stretching outward. Start with wavy lines to form the outer edge of the fire, then add smaller flame shapes inside.
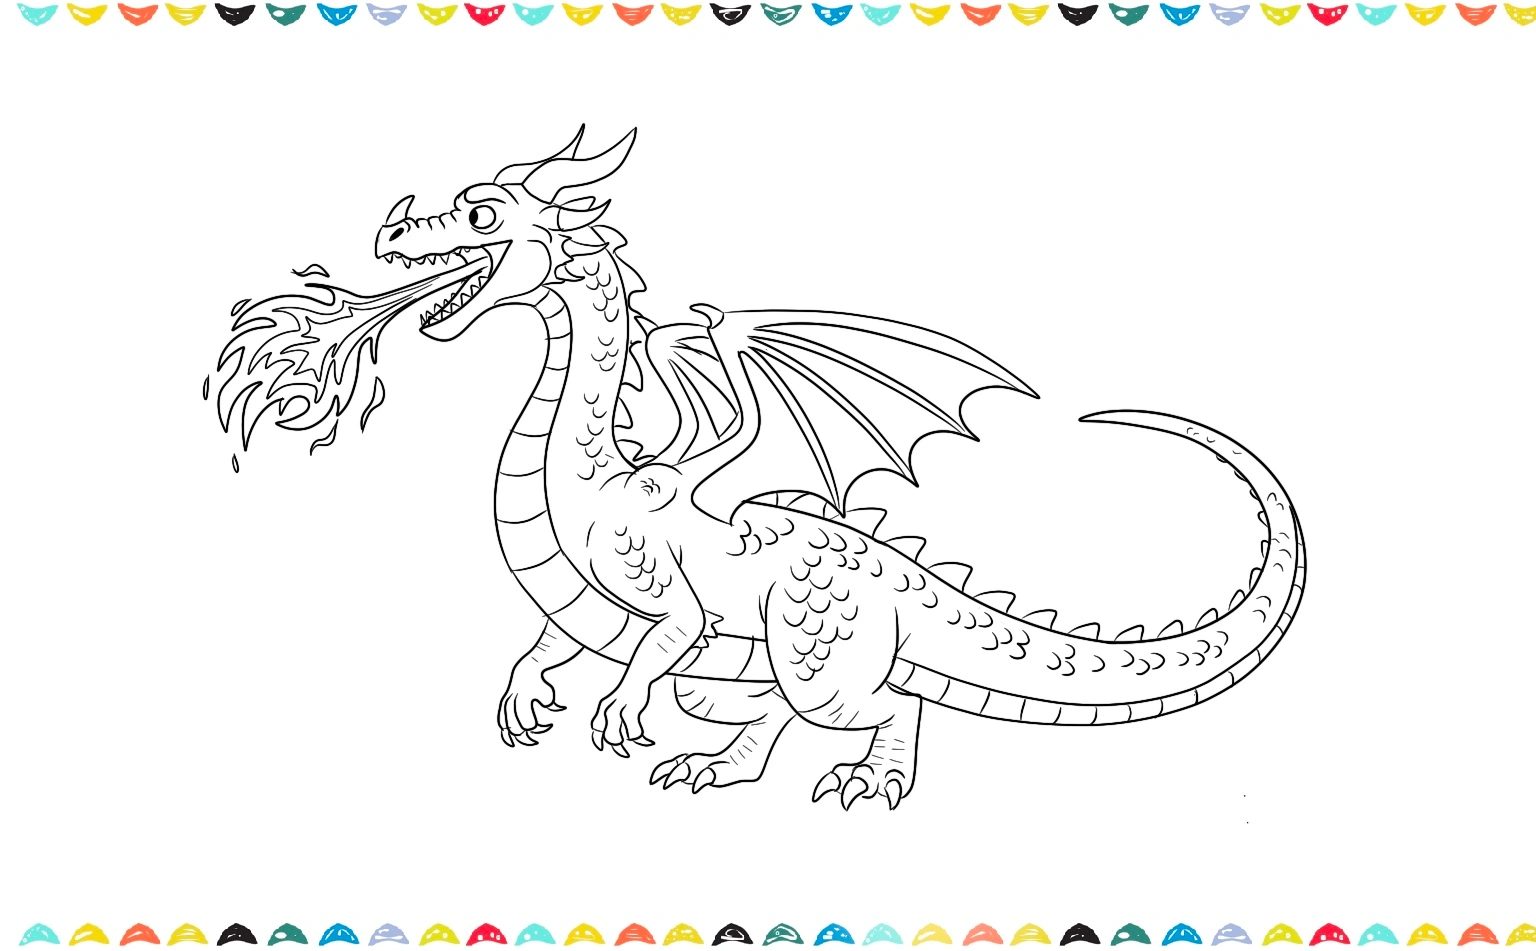
To make your how to draw dragon flames step more dramatic, use layered flame shapes, big ones outside, smaller ones inside, so it looks hot and intense.
If you want to make your fire breathing dragon look extra awesome, you can check out our other fun, step-by-step tutorial all about How to Draw a Fire. It will show you exactly how to draw the perfect flames!
Step 11: Outline Your Drawing 🖊
Use a black pen or marker to go over your pencil lines. This makes your fire dragon drawing bold and ready for coloring. Once the ink is dry, erase the pencil marks.
Step 12: Color Your Dragon 🎨
For a classic look, color the dragon’s body red or green, the belly a lighter yellow or cream, and the horns a dark shade. Make the fire bright yellow, orange, and red, blending the colors so it glows.
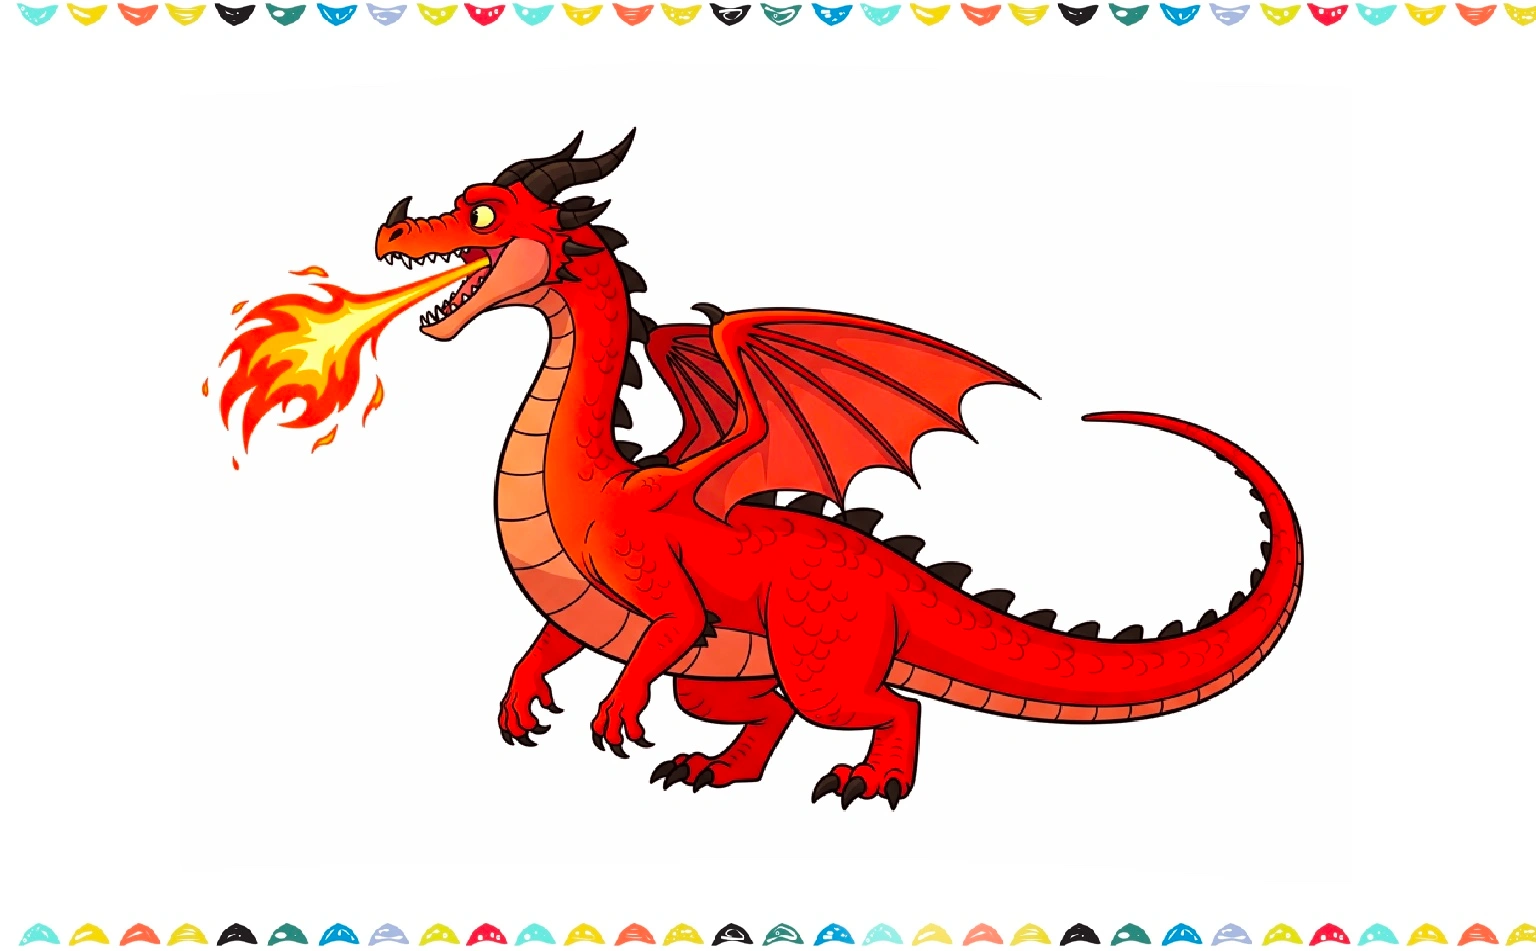
This is the most fun part of how to draw a fire breathing dragon, because you get to bring it to life with color!
We’ve reached the final step! You did it! You just finished learning how to draw a fire breathing dragon step-by-step, and your drawing looks so awesome! If you like fire breathing dragon drawing tutorial you may also like our step by step tutorials about How to Draw a Soccer Ball or How to Draw a Book.
Explore All Kinds of Dragon Drawings!
Drawing mythical creatures is a great way to let your imagination run wild! Now you learned how to draw a fire breathing dragon and in this section, you’ll find step-by-step tutorials on how to draw a dragon for artists of all levels. Whether you want to sketch a simple dragon, a friendly cartoon dragon, or a chinese dragon, each guide is designed to be fun, easy, and full of personality. Choose your favorite type of dragon below and start your creative journey today! 🐉✨

Learn how to draw a simple dragon step by step in this cheerful, kid-friendly tutorial!

Learn how to draw a Chinese dragon step by step in this fun, kid-friendly tutorial!

Learn how to draw a cartoon dragon step by step in this fun, kid-friendly drawing tutorial for beginners.
You can check How to Draw a Dragon – The Ultimate Step-by-Step Guide.
Fun Facts About Dragons🌟
Now that you know how to draw a fire breathing dragon, let’s explore some fun facts! Here are some cool facts to enjoy as you finish your masterpiece:
- In many myths, dragons guard treasures like gold and jewels.
- Fire-breathing dragons are especially popular in European legends.
- Some dragons in stories can control other elements like ice or lightning.
- The idea of dragons breathing fire might come from ancient tales of volcanoes.
- In cartoons, dragons can be fierce, friendly, or even silly!
This step-by-step guide is the perfect way to learn how to draw a fire breathing dragon, whether you’re a beginner or an xperienced artist. Want to learn more about dragons, click here: 33 Amazing Dragon Facts.
FAQ – How to Draw a Fire Breathing Dragon ❓
Q1: How can I draw a fire breathing dragon if I’m new to drawing?
A1. Follow a beginner step drawing guide like this one, starting with simple shapes and adding details slowly.
Q2: How do I make the flames look real?
A2. Use wavy, uneven lines and blend warm colors like yellow, orange, and red. you can check out our other fun, step-by-step tutorial all about How to Draw a Fire.
Q3: How long does it take to draw a fire breathing dragon?
A3. If you keep it simple, you can draw in 5 minutes. Adding details and colors might take 20-30 minutes.
Q4: Can I use different colors for the fire?
A4. Yes! Try blue fire for a magical look or green fire for a poisonous effect.
Q5: What’s the easiest part to start with?
A5. The head and body are the best starting point for an easy draw a dragon project.
Conclusion: You Did It, Artist! 🎨
Now you’ve learned exactly how to draw a fire breathing dragon from start to finish. You’ve drawn the head, wings, tail, and most importantly, the flames! The more you practice, the better your dragon drawing will become, so try making different versions: some with longer tails, bigger wings, or different fire shapes.
Want to get even better at drawing? Keep practicing our how to draw a fire breathing dragon guide, and soon you can try out all sorts of new poses! Remember, with just a little bit of imagination and a few simple steps, you can draw anything you can dream up!
👉 If you loved this tutorial, don’t stop here! Explore more of our tutorials like How to Draw a Camel, How to Draw a Fox or How to Draw a Cow to grow your art collection. Don’t close your sketchbook yet!
👉 For artists who love cartoon and anime characters, our step-by-step tutorial on How to Draw Goku, How to Draw Sonic or How to Draw Charmander are another fun projects to try next. 🌟
Looking for creative inspiration? Check out our Pinterest page for some magical ideas!
Keep drawing and having fun with it, just like playing your favorite game every day! The more you draw, the better you’ll get, and you might even discover new ways to draw that you never knew before. Check out our blog post about Drawing Ideas for Beginners – 100 Easy and Fun Things to Draw for more inspiration about drawing.
Share Your Drawing With Us! 💯🎁
We’d love to see your amazing artwork! When you finish your drawing, send us a picture of it. Whether it’s your first try or your masterpiece, we’re excited to cheer you on. Your creativity could even be featured on our site – so grab your crayons and show us what you’ve made! 🎉🖍️
Looking for more step-by-step drawing tutorials? Visit the A-Z Drawing Tutorials Index to browse all lessons, organized alphabetically.