Introduction
Have you ever wondered how to draw a book that looks both simple and realistic? 📚 You’re in the right place! In this easy and fun tutorial, you’ll learn how to draw a book step by step, perfect for kids, beginners, and anyone who loves drawing creative things. Books are not just symbols of knowledge and imagination; they’re also great practice for learning perspective and straight lines. Whether you want to draw an open storybook, a stacked pile of books, or a cute cartoon-style notebook, this guide will show you exactly how!
With just a pencil, paper, and a few easy steps, you’ll create a book drawing that looks neat, clean, and full of life. ✏️ Each step includes clear instructions, simple shapes, and fun details to help your artwork come alive. You’ll also discover how to add shadows and pages to make your book look more 3D and realistic. By the end, you’ll have a beautiful drawing that captures the magic of reading and creativity, ready to color or turn into your next art project! 🌟,

Grab your pencils, follow along, and let’s start this fun drawing adventure together! ✏️🎨 Follow our step-by-step book drawing tutorial for beginners.
Table of Contents
Materials Needed 🎨
Before we start our step-by-step drawing, let’s make sure you have everything you need! You don’t need anything fancy, just a few basic tools to bring your drawing to life:
✅ Paper or Sketchbook – A blank page for your drawing. 📄
✅ Pencils (HB or 2B) – Light pencils help with outlining the drawing. ✏️
✅ Eraser – To fix mistakes while sketching. 🔄
✅ Black Marker or Fine Liner – For outlining and defining clearly. ✍️
✅ Colored Pencils – To color your drawing.
Now, let’s learn how to draw a book step by step…
How to Draw a Book (Open Book) Step by Step
Follow this step-by-step drawing guide to learn how to draw a book (opened) to create your very own book drawing. We’ve broken it down into 6 simple and exciting steps!
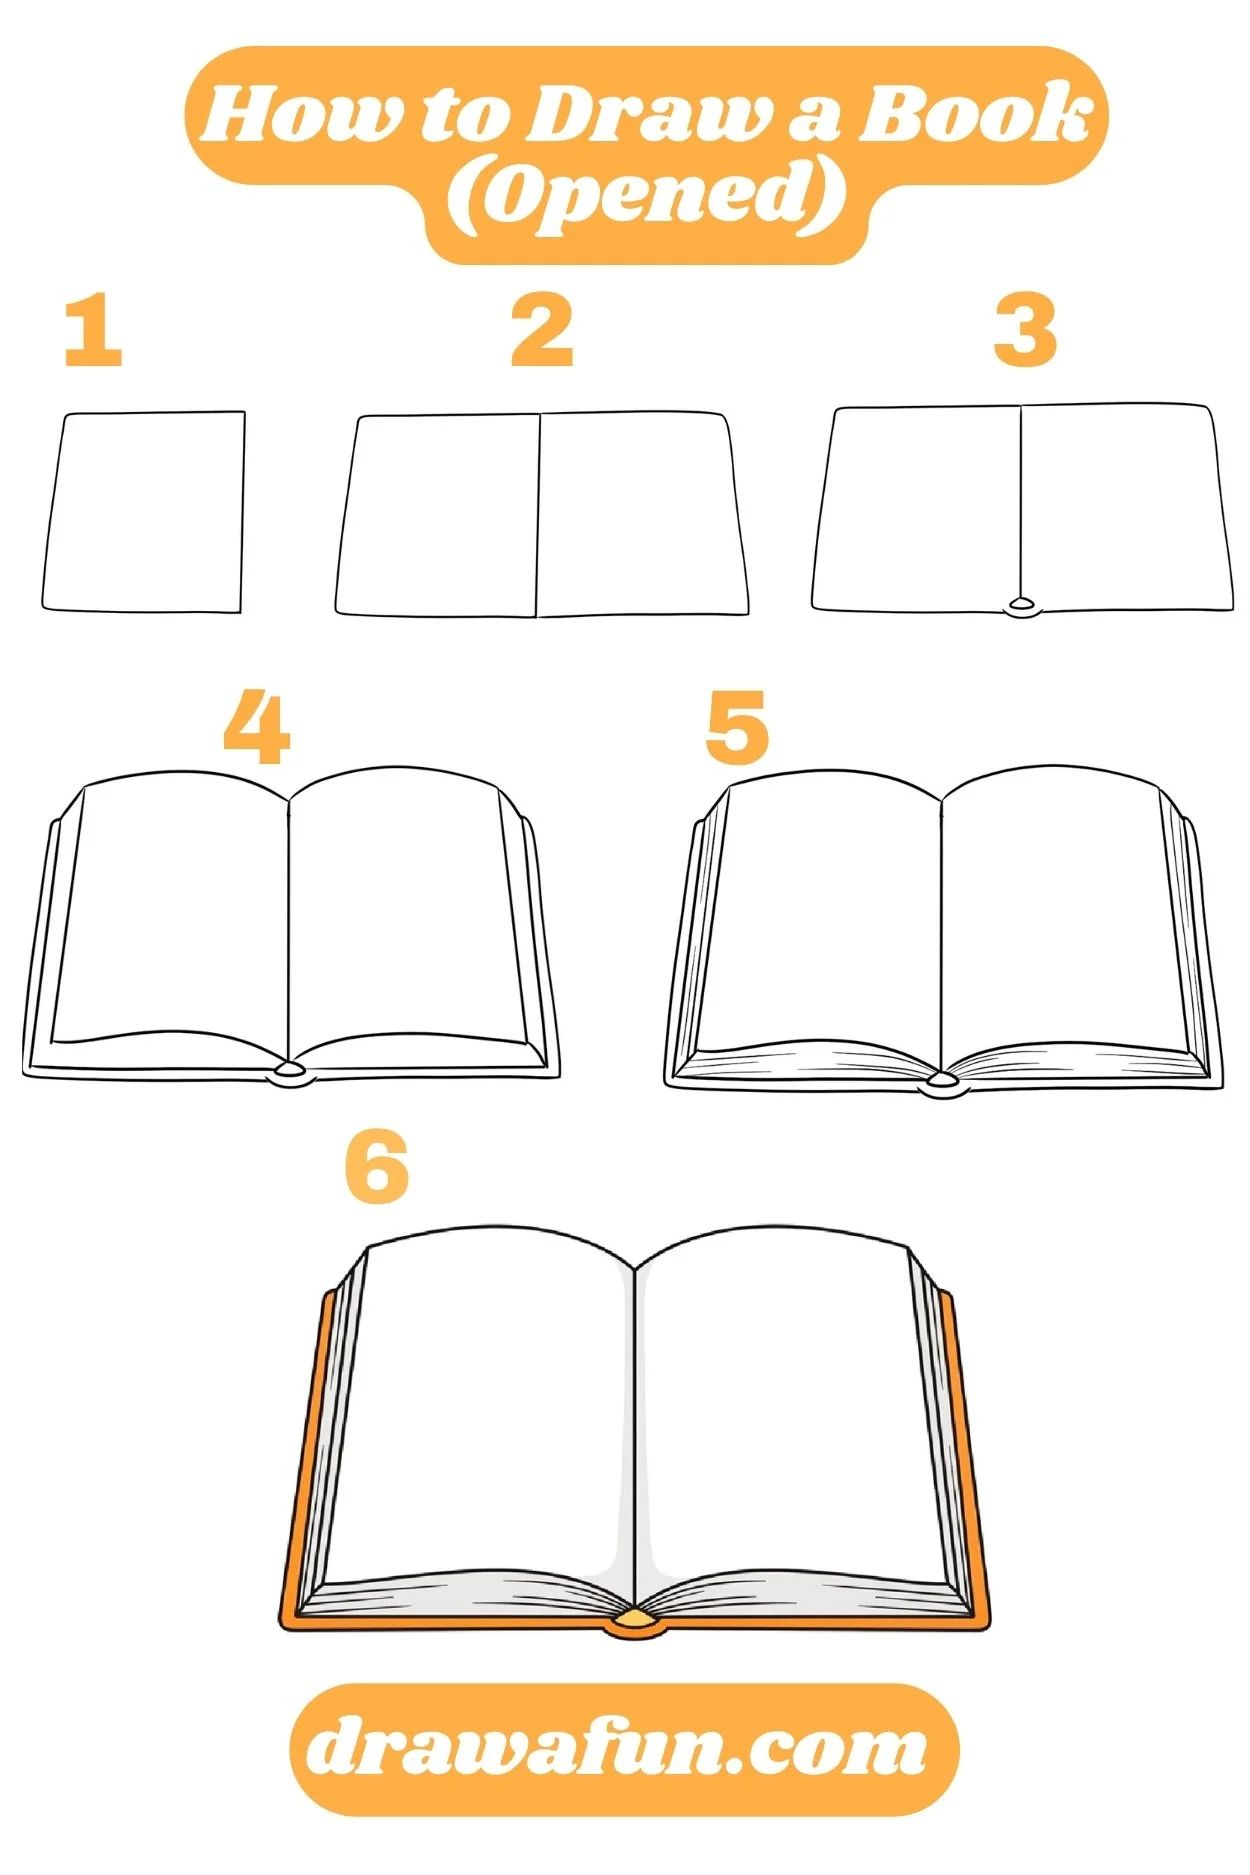
Step 1. Draw the Book Cover 📙
Are you ready to dive into how to draw a book? To kick things off, imagine your favorite story and let’s draw a tilted rectangle, give it a slight slant so it looks like a real book ready to be opened!

Step 2. Sketch the Back Cover 📗
Ready for the second cover? Simply draw another rectangle right behind the first one, making sure it’s the exact same size. And just like that, our book now has both its front and back covers!

Now that we have the covers, it’s time to learn how to draw a book spine. This is the part that connects the two sides and makes our book look complete and ready to read!
Step 3. Add the Spine 📕
Draw a thin rectangle connecting both covers. This forms the book’s spine, holding everything together!

Step 4. Draw the Pages 📄
Now, let’s fill in our book! Between the front and back covers, draw lots of little curved lines. This is how we show all the pages packed inside, just waiting to be read!

Now for the fun part: let’s give our book drawing some volume! We can add a few curved lines on the pages to make them look like a real book, not just a flat drawing. It’s an easy way to give your book drawing some depth!

Once you finish how to draw a book, try animals next by exploring our easy tutorial on How to Draw a Cow.
Step 5. Outline and Add Details 🖋️
Time to make our book drawing look super sharp! First, grab a pen or a marker to carefully trace over all the lines of your book sketch. Then, to make it look even more real, you can add tiny lines to the pages and the edges of the cover. This will give it some cool details and texture!
Step 6. Color Your Book 🎨
Now for the most fun part! It’s time to choose your favorite colors and make your book beautiful. You can give it a bright cover, colorful pages, or even a rainbow spine!
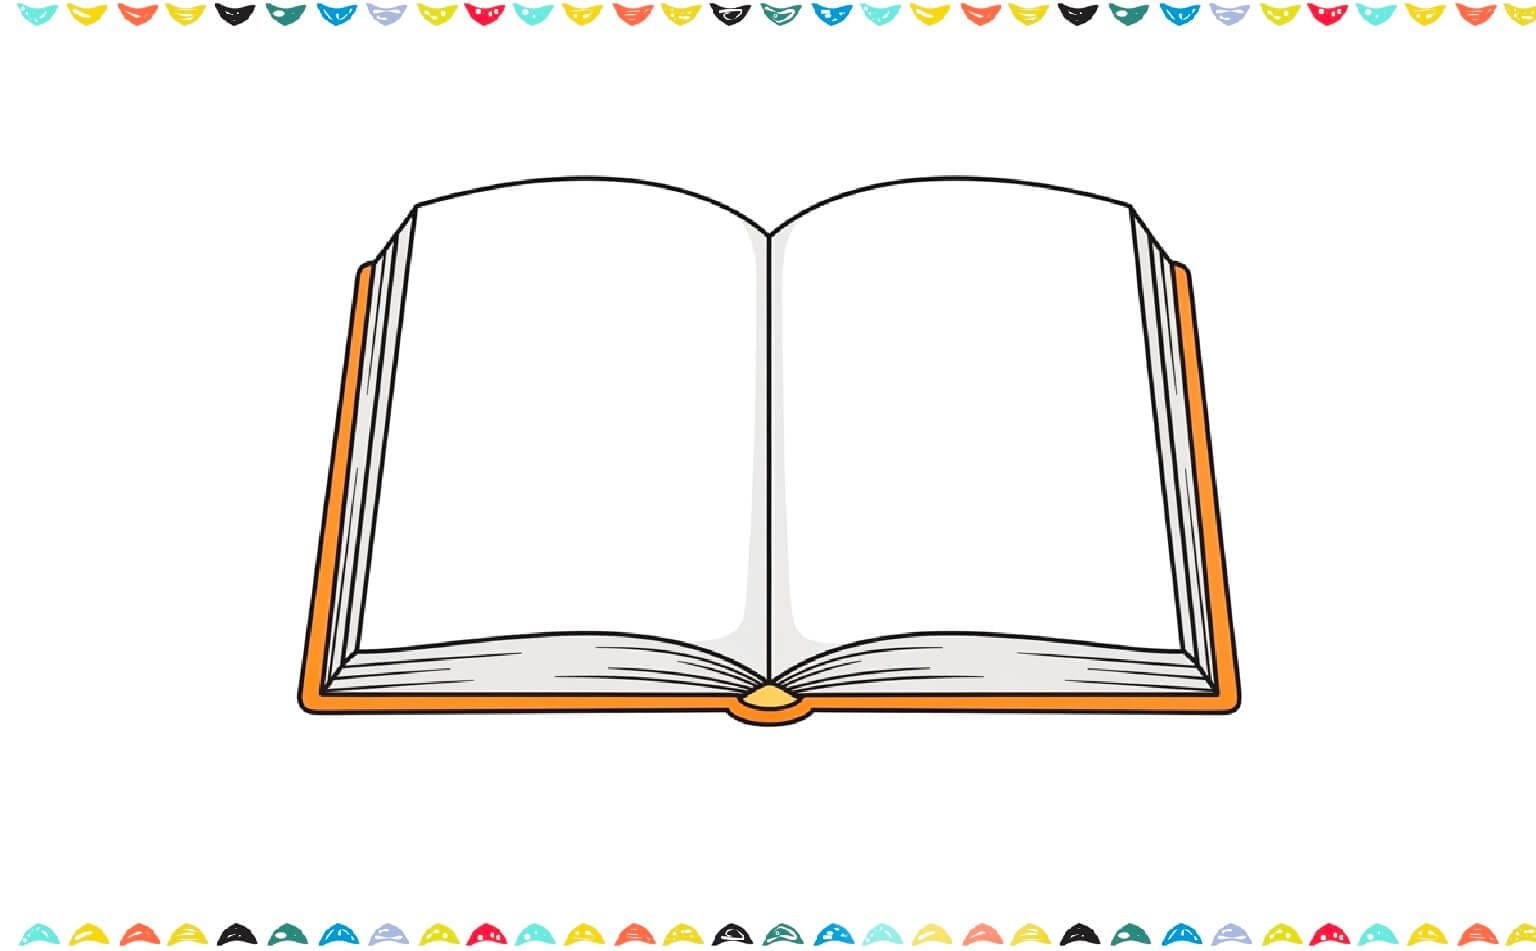
Remember, your imagination is the only limit, so let your creativity shine!
🎉 Good job! Show your drawing to a friend or send it to us! Now you learned how to draw a book. If you like this tutorial about drawing a book you may also like our step by step tutorials such as How to Draw a House or How to Draw a Boat.
How to Draw a Book (Closed Book) Step by Step 📖🎨
Ready to create your very own book? Follow our easy step-by-step drawing guide to learn how to draw a book that’s closed and ready for a story! We’ve made the steps simple and exciting, so you’ll be able to make your very own book drawing in no time.
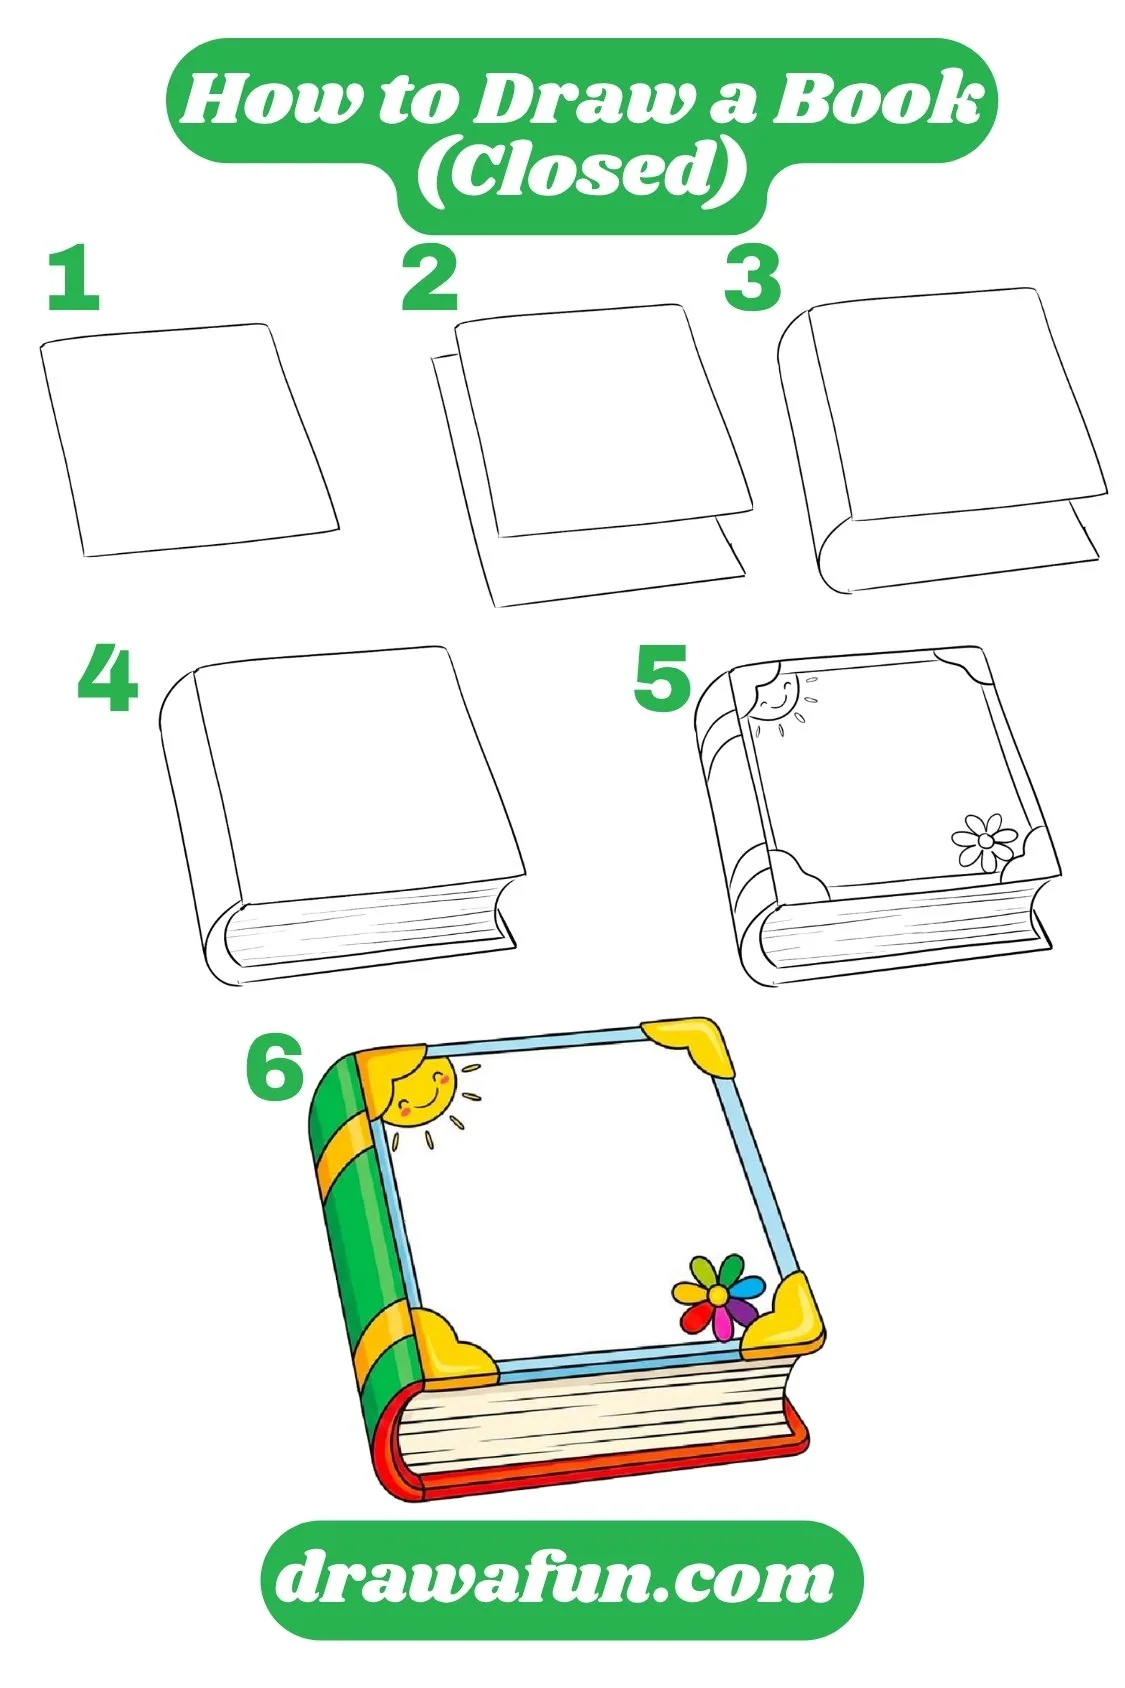
Step 1. Sketch the Book Cover 📔
Let’s start our drawing adventure! First, draw a rectangle that is tilted a little bit. This fun, tilted shape will be the front cover of your book, making it look like it’s popping right off the page and making it more realistic! ✏️

Step 2. Sketch the Back Cover 📗
Now let’s add the second cover for our book! Draw another rectangle that’s the exact same size as the first one, and place it right behind it. It’s like magic, we now have both covers for our book, all ready to go!

Let’s continue to learn how to draw a book with drawing the book spine.
Step 3. Draw the Book Spine 📗
Now for the fun part: adding the spine! Draw a curved rectangle on the left side of your book. It’s like the part that holds all the pages together. Make sure it connects smoothly to the front cover!

Want more practice with simple shapes after how to draw a book? Learn How to Draw a Bow step by step.
Step 3. Add the Pages 📚
Time to make our book drawing look real! Let’s draw some lines along the side and bottom to show all the pages inside. If you make your lines a little bit curved, it will look like a big, thick book! 📚

Step 4. Decorate the Corners 🌟
Ready for the most how to draw a book decorating fun? You can add cute little heart-shaped decorations or tiny swirly designs on the corners of the front cover. This will give your book a super cheerful and fun design that’s all your own! 💖

Step 5. Add Cute Designs 🌞🌸
Include a smiling sun at the top-left corner and a colorful flower at the bottom-right corner. These adorable decorations make your book look super happy! 😊
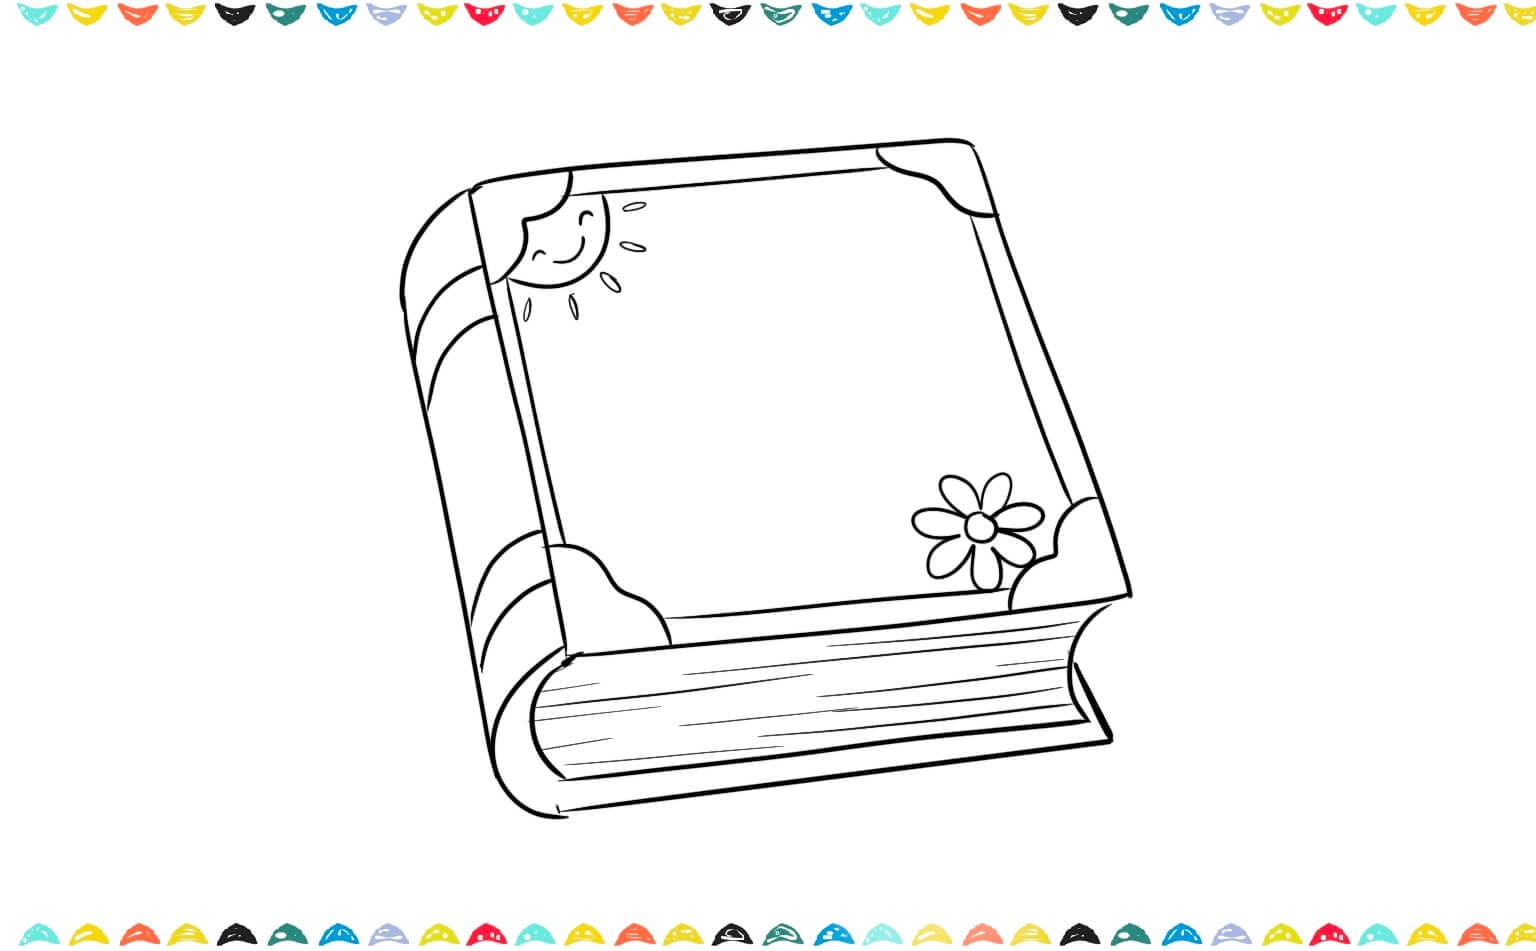
Step 6. Color Your Book 🎨🖍️
Finish by coloring your book with bright, cheerful colors like green, yellow, blue, and red. Don’t forget to color your cute designs with your favorite colors, too! 🌈

🎉 Great job! Show your drawing to a friend or teacher! Now you learned how to draw a book. If you like drawing a book you may also like our step by step tutorial about How to Draw a Soccer Ball or How to Draw a Cat.
Fun Facts About Books🌟
As you practice, remember the steps on how to draw a book, and enjoy these amazing facts while coloring your masterpiece. Books are amazing! Here are some cool facts to know:
- The first books were written on clay tablets thousands of years ago! 📚
- Johannes Gutenberg invented the printing press around 1440, making books easier to make. 🖨️
- The world’s largest book is over 5 meters tall! 🌎
- The most popular children’s book series include Harry Potter, Diary of a Wimpy Kid, and Dr. Seuss books. 📖
- Reading regularly can help your brain grow smarter and stronger! 🐛
Learning drawing a book is even more fun when you know how amazing they are in real life! Want to learn more about books: check: Top 10 Facts About Books.
Frequently Asked Questions ❓
Q1: How do I draw a book easily step by step?
A: Start with a rectangle for the cover, add a smaller inner rectangle for the pages, then draw the spine and details like lines for the page edges. Our easy tutorial makes it perfect for kids and beginners.
Q2: Can I use different colors for my book drawing?
A: Absolutely! You can use your favorite colors and be as creative as you like!
Q3: How long will it take to draw a book?
A: You can easily draw in 5 minutes, but take extra time to add cool details if you want.
Q4: What tools do I need to draw a book?
A. You only need paper, a pencil, and an eraser. For coloring, you can use crayons, markers, or colored pencils to bring your book drawing to life.
Q5: Can I draw both an open and a closed book?
Yes! This guide includes tips for sketching both an open book with visible pages and a closed book with a spine and cover design.
Conclusion: You Did It, Artist! 🎨
Fantastic job! 🎉 You’ve successfully learned how to draw a book step by step. Whether you came here wondering “how do I draw a book?” or you’re looking for a cheerful, simple drawing tutorial, we hope you had lots of fun!
Keep exploring our beginner step drawing guides to enjoy more artistic adventures. Happy drawing, little artists! 📖✨
👉 If you liked this easy book drawing tutoral, don’t stop! Explore more of our tutorials like How to Draw a Diamond, How to Draw a Mushroom or How to Draw a Skeleton to complete your art collection.
👉 For artits who love flower drawing tutorials, our step-by-step tutorials on How to Draw a Hibiscus, How to Draw a Lotus or How to Draw a Lily are another fun projects to try next. 🌟
Looking for creative inspiration? Check out our Pinterest page for some magical ideas!
Keep drawing and having fun with it, just like playing your favorite game every day! The more you draw, the better you’ll get, and you might even discover new ways to draw that you never knew before. Check out our blog post about Drawing Ideas for Beginners – 100 Easy and Fun Things to Draw for more inspiration about drawing.
Share Your Drawing With Us! 💯🎁
We’d love to see your amazing artwork! When you finish your drawing, send us a picture of it. Whether it’s your first try or your masterpiece, we’re excited to cheer you on. Your creativity could even be featured on our site – so grab your crayons and show us what you’ve made! 🎉🖍️
Looking for more step-by-step drawing tutorials? Visit the A-Z Drawing Tutorials Index to browse all lessons, organized alphabetically.