Introduction
Learning how to draw a hibiscus is a joyful way to practice bold shapes, flowing lines, and beautiful tropical colors. In this kid-friendly tutorial about hibiscus drawing for kids, we’ll turn simple circles and curves into a bright flower that looks ready to bloom. Even if you’re a beginner, you’ll learn an easy, step-by-step method that keeps things simple and fun.
We’ll also show you how to draw a hibiscus by sketching leaf shapes, gentle veins, and a soft cast shadow to make your hibiscus pop off the page. Want a cartoon style? Try bigger petals, a smiling face, or a sunny background.
Choose The Hibiscus You Want To Draw

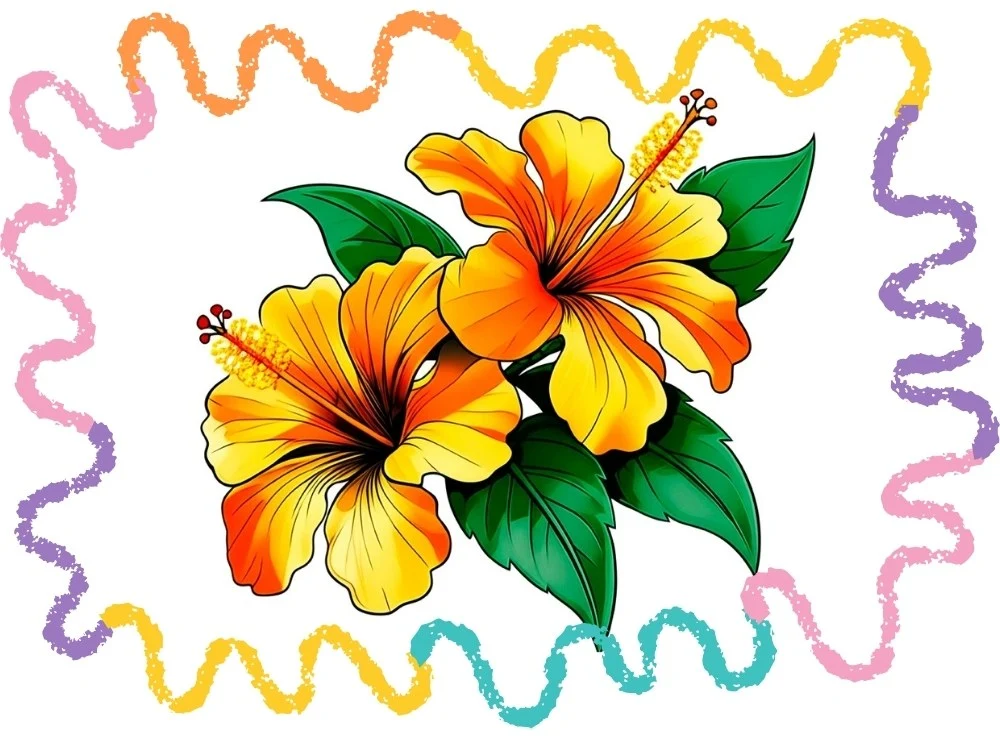
We’re going to learn how to draw a hibiscus with 2 different ways! Will you choose
👈🏻 the bright red hibiscus or
👉🏻 the double hibiscus?
Grab a pencil, an eraser, and colored pencils or crayons, no fancy tools needed. By the end, you’ll have a cheerful hibiscus drawing that you’ll be proud to share and the confidence to draw more flowers and plants. Let’s begin and bring your tropical bloom alive!
Table of Contents
Now, let’s learn how to draw a hibiscus step by step…

Need more inspiration? 🌸
Explore our most popular collection of easy flower drawing ideas for beginners with 15 fun and simple designs to try.
Visit: 15 Easy Flower Drawing Ideas – Step-by-Step Guide for Beginners
How to Draw a Hibiscus – Step by Step (Single Flower) ✏️
Ready to learn how to draw a hibiscus flower step by step? Let’s go! This beginner step drawing guide is super easy and helps you create a graceful hibiscus using only six steps.

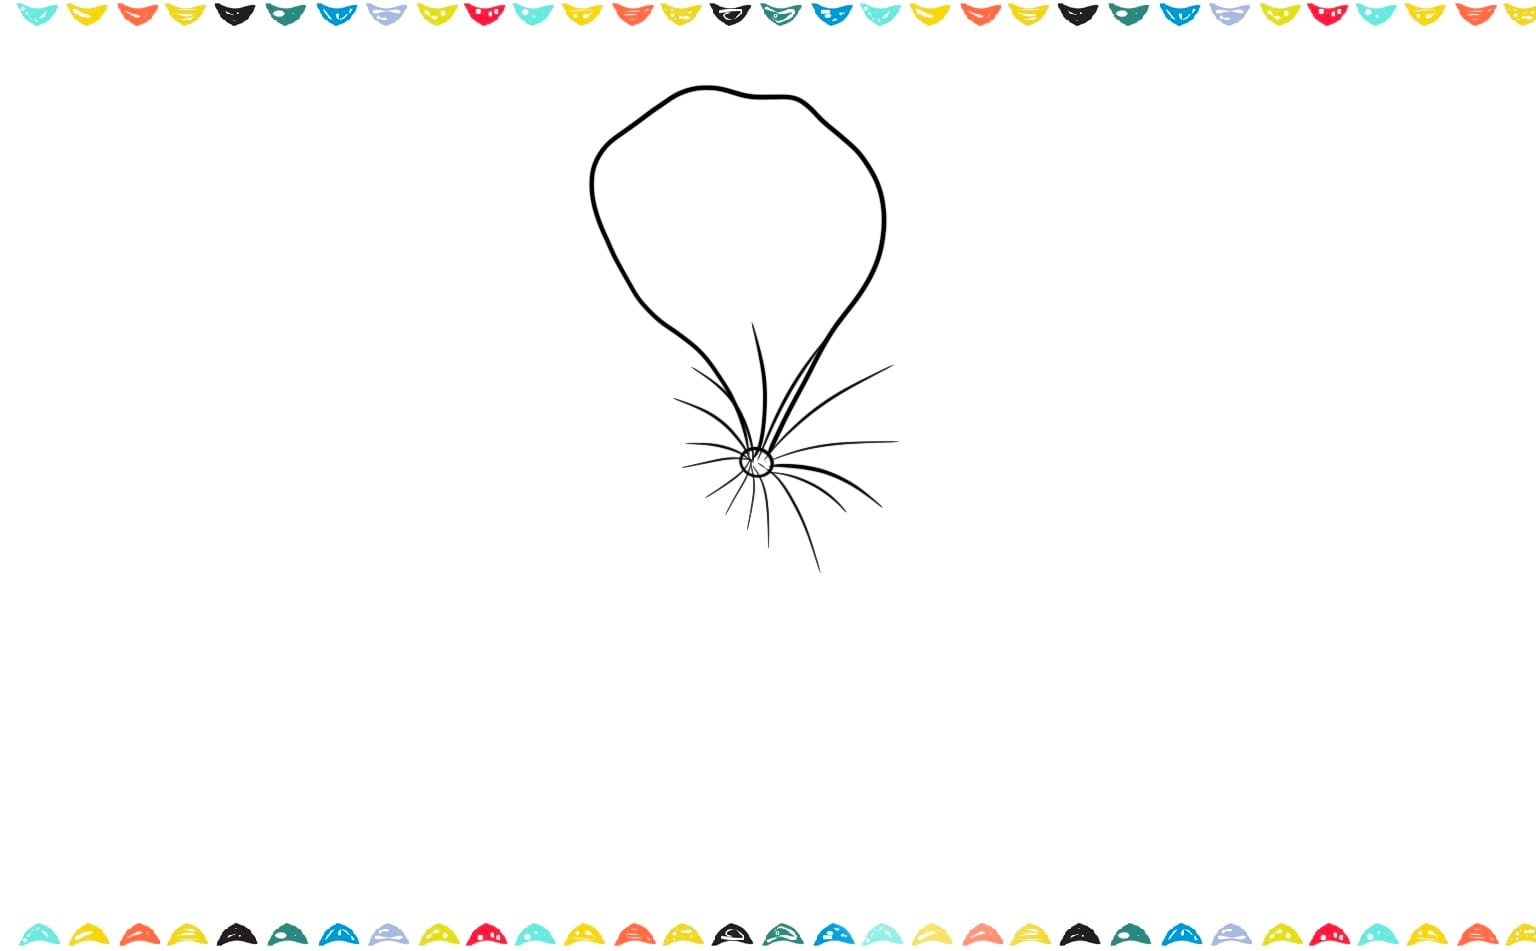
Step 1: Draw the Flower Center
1️⃣ Start by drawing a small shaded circle in the middle of your page. This will be the center of the hibiscus flower, where all the petals begin.
2️⃣ Now, let’s make your hibiscus flower drawing pop with energy! Draw a few short, quick lines shooting out from that center dot, like tiny rays of sunshine. This amazing little burst effect makes your flower look totally alive and glowing!
Step 2: Draw the Five Petals
1️⃣ Now for the spectacular part of our how to draw a hibiscus guide! Imagine you’re drawing five big, soft scoops of ice cream around your center shape. Make sure each of these five petals is super wide and rounded, with slightly happy, wobbly edges, almost like five big, puffy hearts.
2️⃣ Now, here’s a secret for making a perfect hibiscus drawing! Try to make those beautiful petals roughly the same size, like a group of five best friends holding hands.

After learning how to draw a hibiscus, maybe you’d like to draw a buzzing visitor for your flower? Check out our next super fun post How to Draw a Bee!
Step 3: Add the Pistil and Stigma
1️⃣ Now for the super important center of your beautiful hibiscus flower! Draw a long, happy, curved line that starts right in the middle and reaches up toward the sky, just like a little antenna. At the very top of that line, add a little pom-pom of tiny, fuzzy circles, that’s called the stigma✨
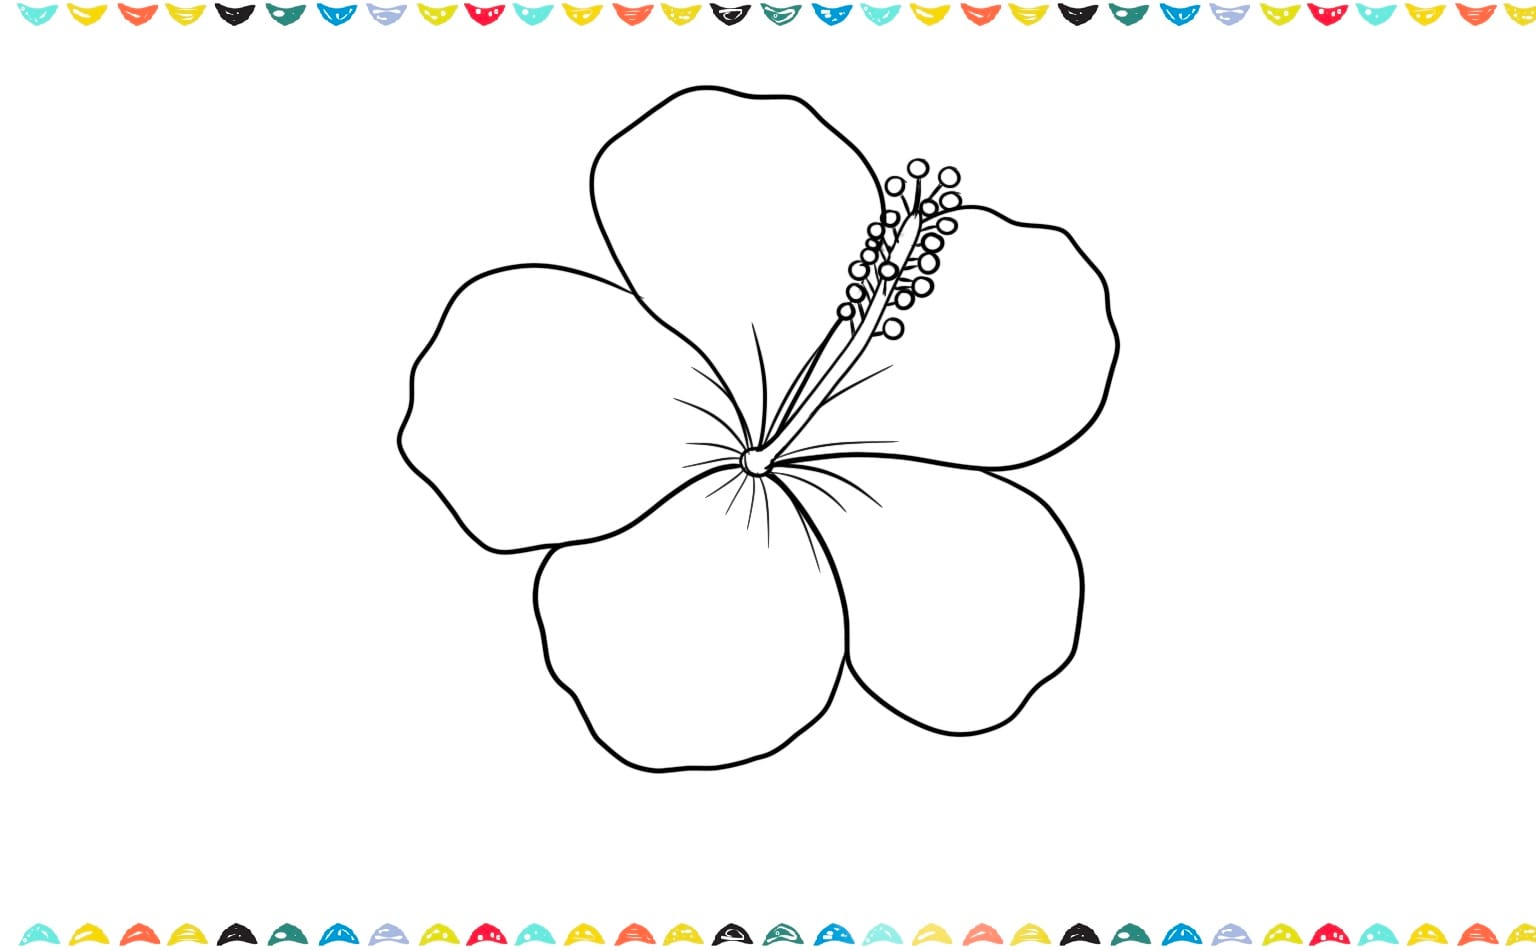
2️⃣ Color these small dots yellow and red later for a bright look. Add tiny short lines coming off the pistil near the tip to show the stamens.
Step 4: Draw the Leaves
1️⃣ Time to add the cool, crisp leaves to our beautiful how to draw a hibiscus flower! At the very bottom, draw two big, happy leaves that curve slightly outward, like they’re waving hello. Remember to give the edges of the leaves tiny, fun little zig-zags, these are called jagged edges.

2️⃣ These are the super cool hibiscus flower plant leaves, and they help balance the whole picture beautifully. They are like the perfect green frame for your amazing bloom, making your drawing look complete and alive!
Step 5: Add Texture and Details
1️⃣ Now for the secret ingredient that makes your hibiscus flower drawing pop! Inside each beautiful petal, gently draw a few thin, wiggly lines; imagine them fanning out like tiny rays of sunshine from the very center of the flower.

2️⃣ You can also add a few light lines on the leaves to show veins.
Step 6: Outline and Color
1️⃣ Get ready for the most exciting step, bringing your gorgeous hibiscus flower drawing to life! Grab your favorite black marker and carefully trace over all your pencil lines so your flower pops right off the page! Then we’re coloring the big, beautiful petals a bold red or a cheerful pink, making sure to use a sunny yellow for that tall little stem in the middle!

- Outline everything with a black marker
- Color the petals a bold red or pink
- Color the pistil yellow with red dots at the tip
- Use green for the leaves
- Shade the center of the flower dark red or black
Now you learned how to draw a hibiscus step by step. Your hibiscus looks as beautiful as one you’d find in a tropical garden! If you like drawing a hibiscus flower you may also like How to Draw a Cherry Blossom (sakura) or How to Draw a Tulip. Or if you want to learn how to draw a bokay of flowers try this: How to Draw a Flower Bouquet.

Explore 12 easy and aesthetic hibiscus flower drawing styles. Visit:
12 Hibiscus Drawing Ideas You’ll Love – Easy, Aesthetic & Beginner-Friendly
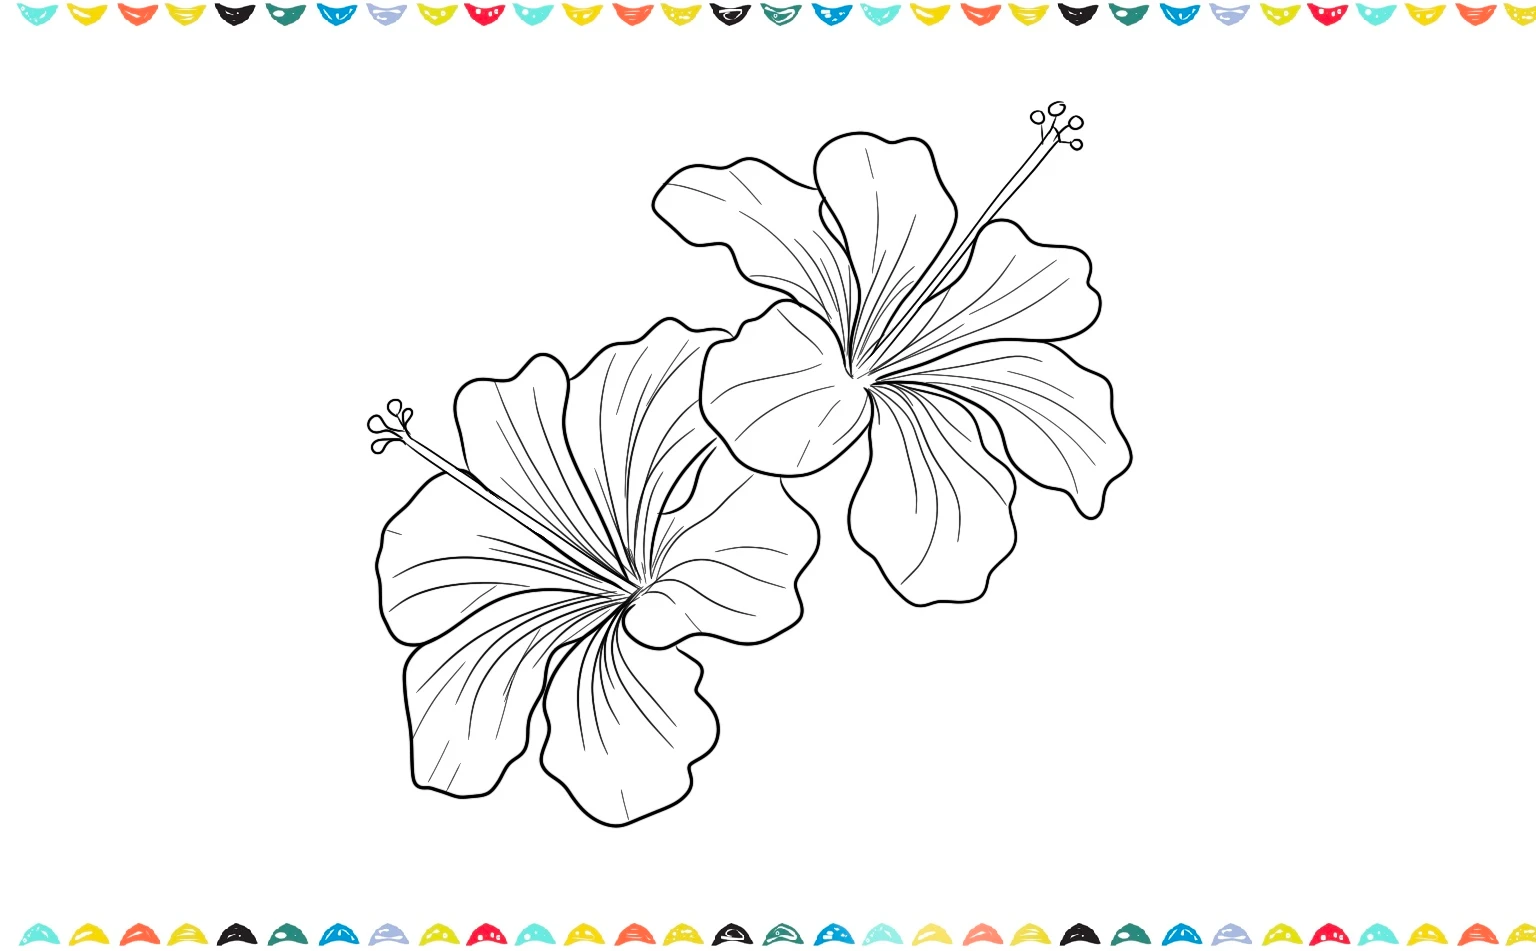
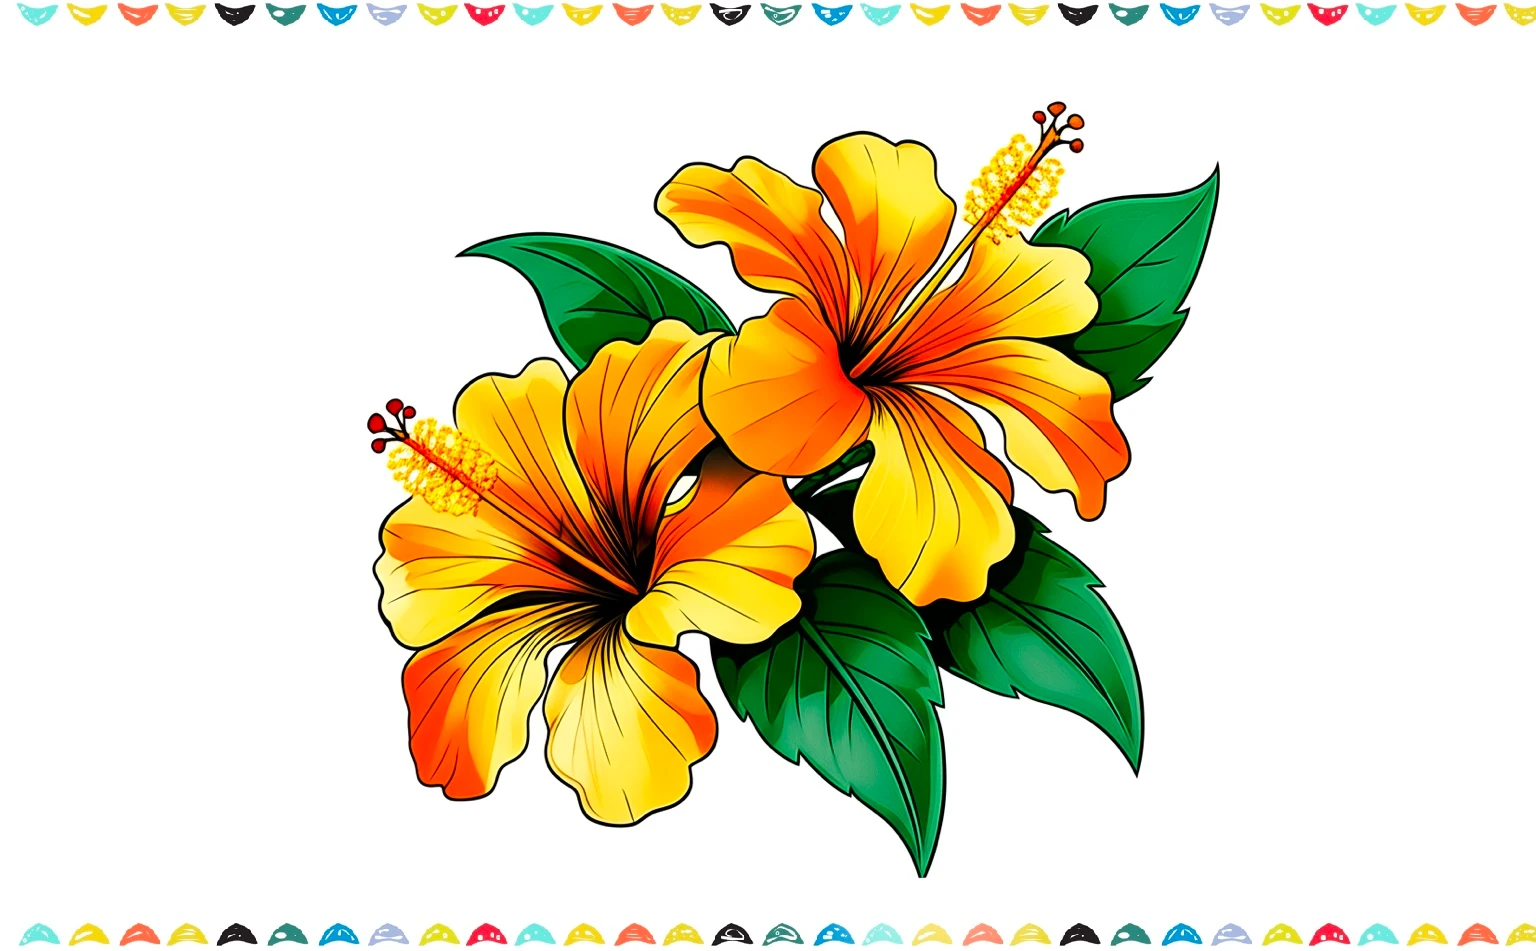
How to Draw a Hibiscus – Step by Step (Double Flower Version) ✏️
Are you ready to bring some tropical sunshine to your paper? Today, we are learning how to draw a hibiscus flower by creating not just one, but two beautiful yellow-orange blossoms! These fantastic flowers have a secret: we’ll use overlapping petals and learn about symmetry to make them look super full and realistic, nestled amongst some bright green leaves!
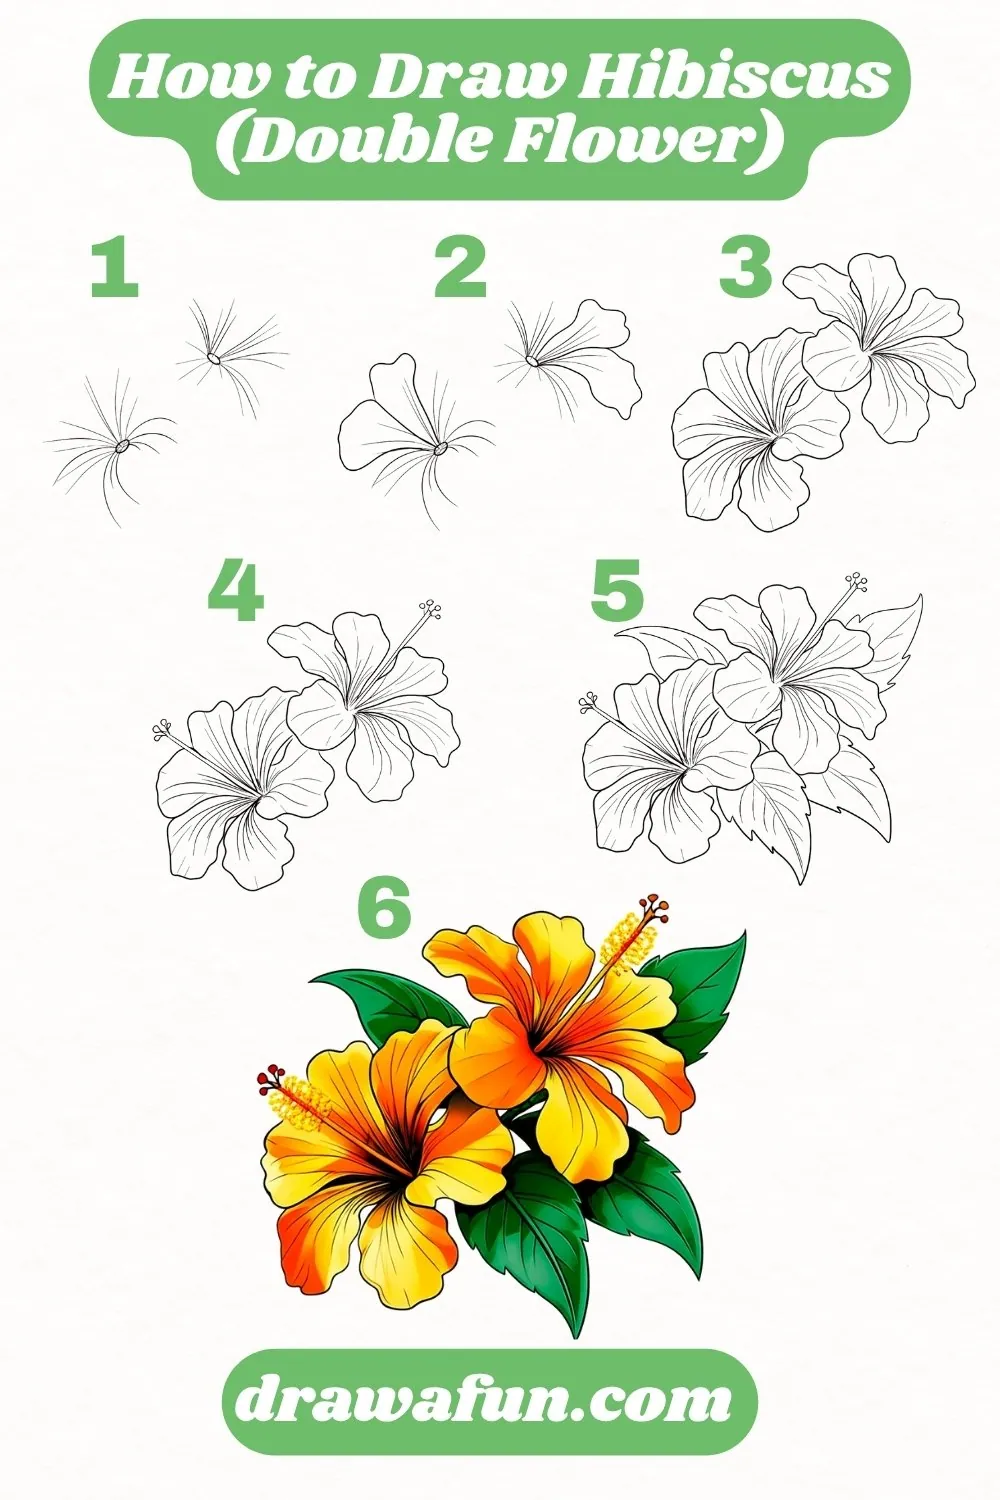
Step 1: Draw Two Circles for Flower Centers 🔵
1️⃣ Start by drawing two small circles, a bit apart from each other. These will be the centers of each hibiscus flower. Keep space around them for the petals!
2️⃣ To make your beautiful hibiscus look like it’s glowing, draw a few tiny lines coming out from the center. It’s like adding a little burst of magic!

Add a garden friend to your page by following How to Draw a Monarch Butterfly next. Let’s keep going with our awesome guide on how to draw a hibiscus flower’s petals.
Step 2: Sketch Five Petals Around Each Center 🌸
1️⃣ Around each circle, we’ll draw five large petals. Make each petal wide and curvy, like soft waves. Let’s get started on our beautiful hibiscus flower! First, draw a big, beautiful petal for each flower. See those lines coming out from the center? They’re like little guides to help you draw each petal in the perfect spot.
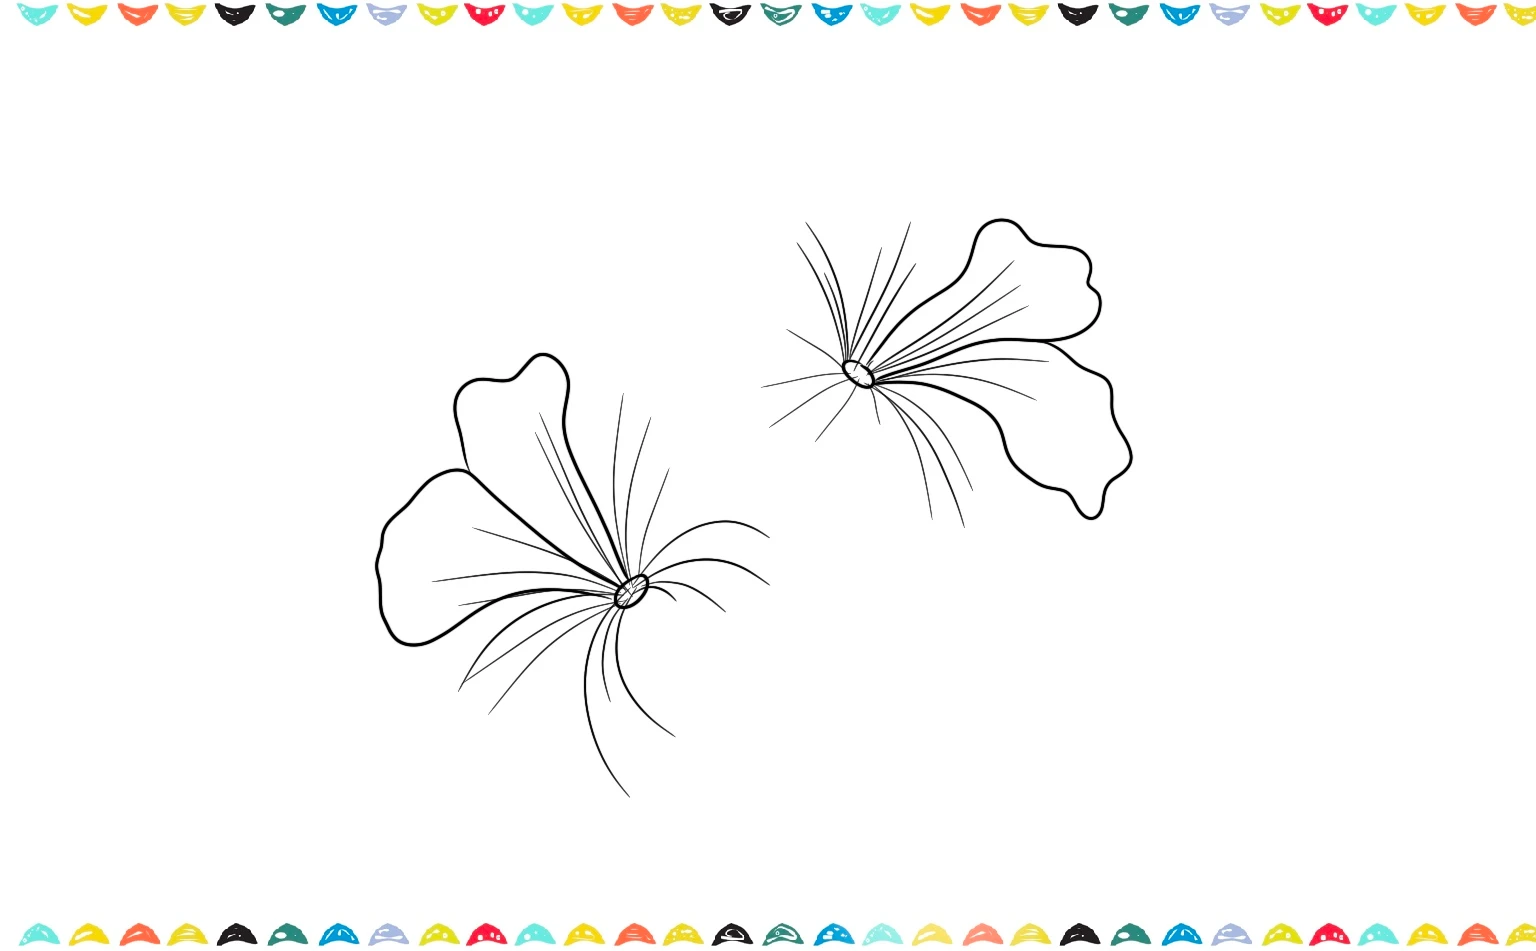
2️⃣ Time to add the rest of the petals to our hibiscus! Draw more of those wavy petal shapes all around the middle to make your flower really blossom. The top flower can tilt slightly upward, and the lower one can tilt to the side.
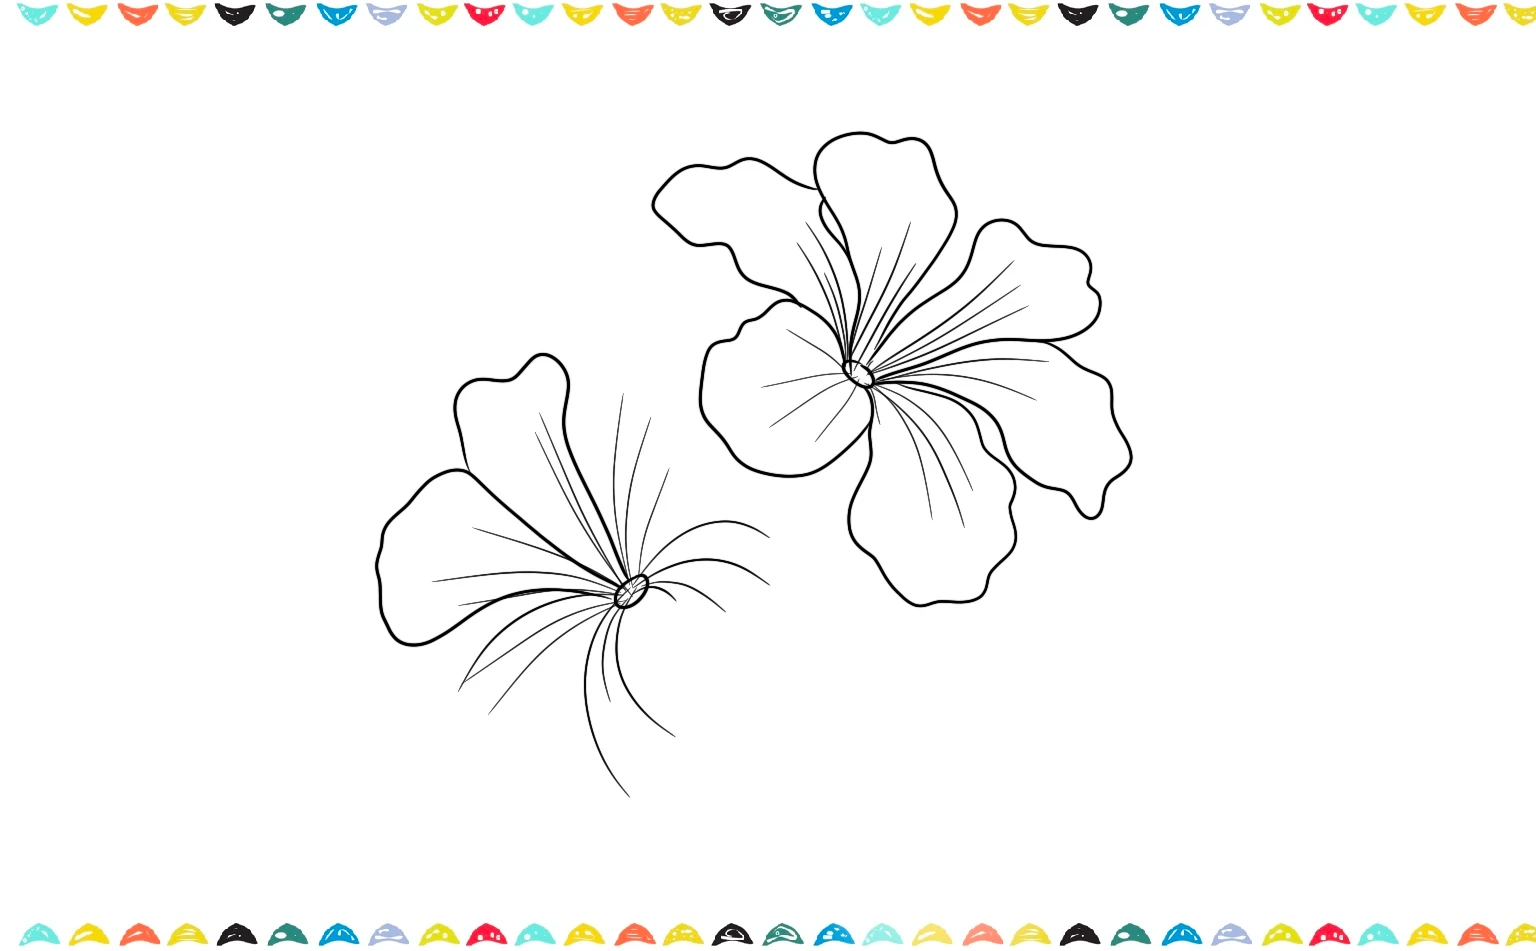
Step 3: Add Petal Details with Curved Lines ✨
1️⃣ Now for the magic touch on your how to draw a hibiscus flower masterpiece! Inside each petal, add gentle curved lines starting from the center outward. These lines show the folds and texture of the petals. Don’t worry about making them perfect!
Step 4: Draw the Flower Stamen 🌼
1️⃣ Let’s continue to learn how to draw a hibiscus stamens. Now, draw the long, thin stamen sticking out from each flower center.
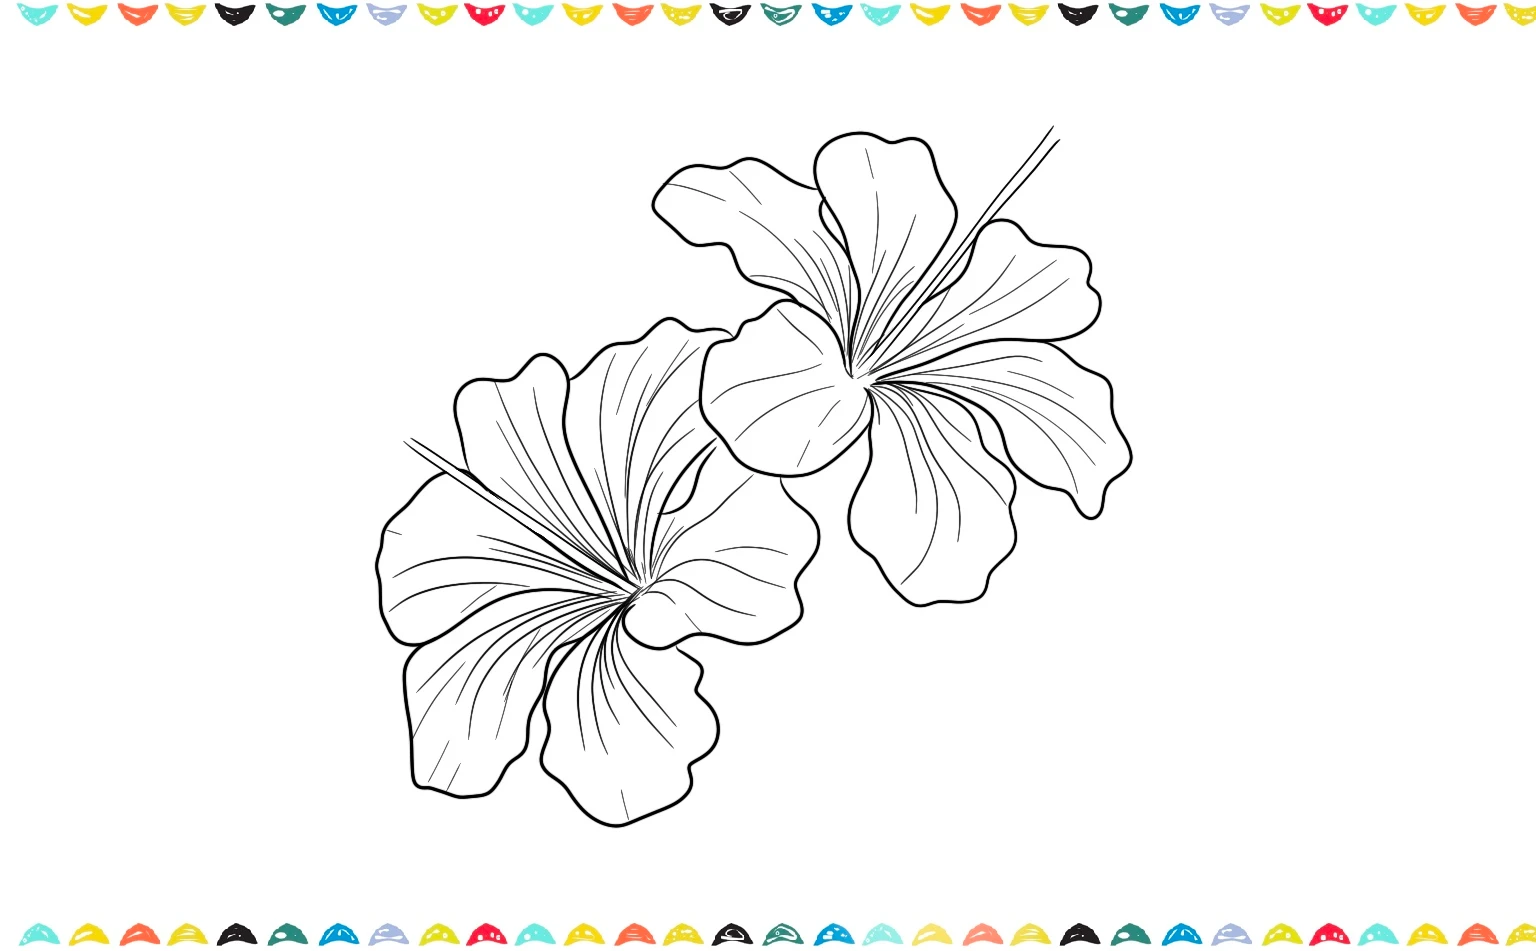
2️⃣ At the tip of each stamen, draw small circular pollen balls. Add 3-4 dots on each tip to make it look realistic.
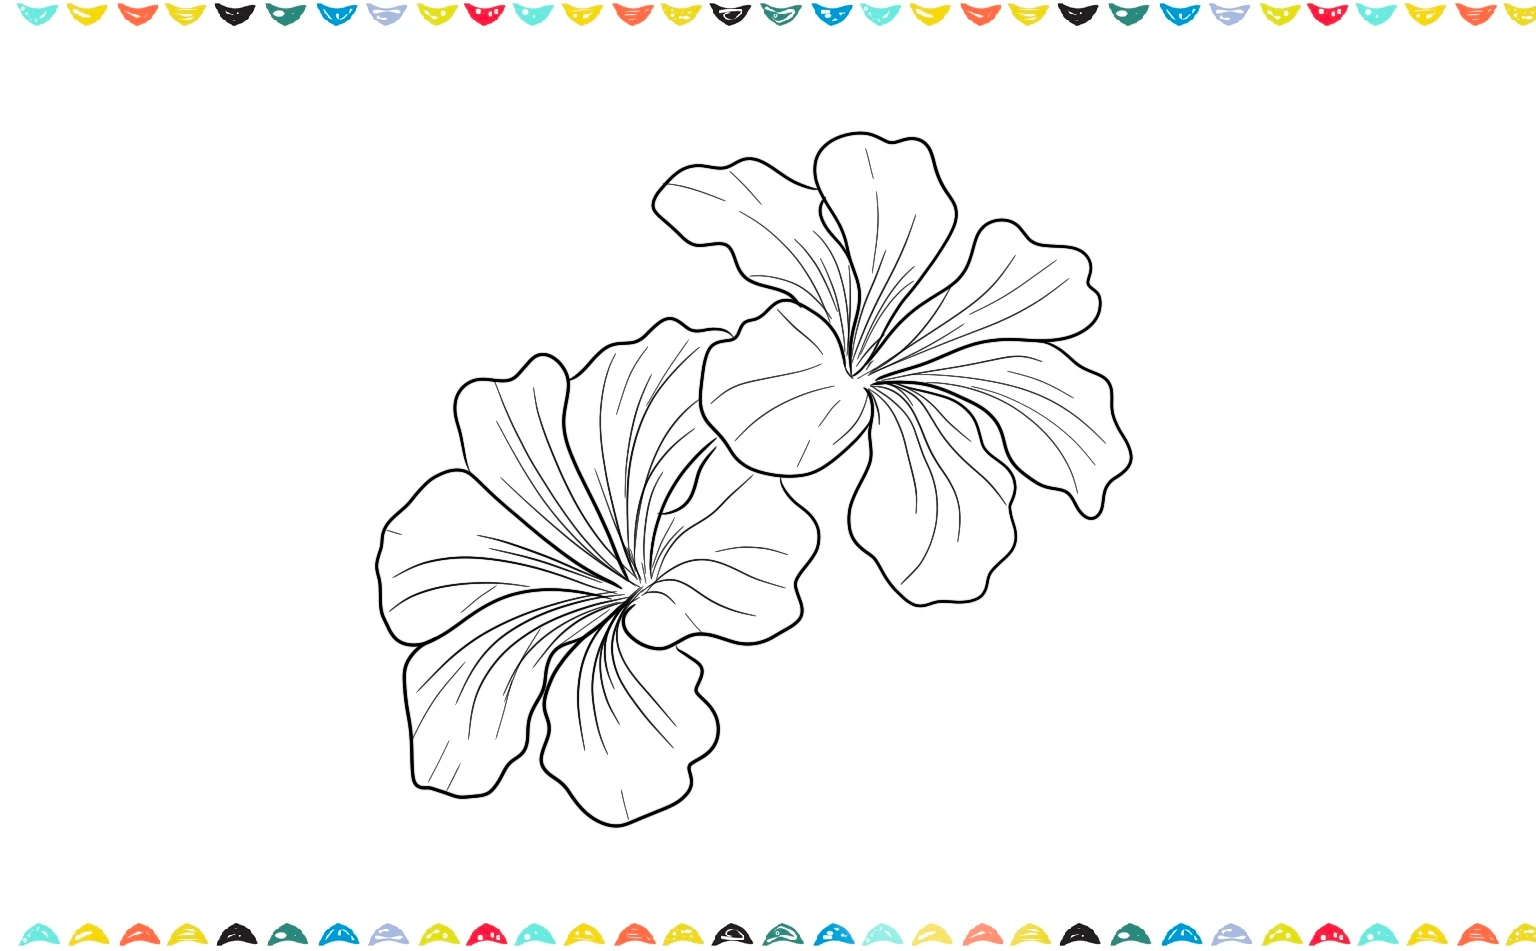
Step 5: Add Overlapping Leaves 🍃
1️⃣ Now, let’s give our beautiful how to draw a hibiscus flower a green setting! Draw big, pointy leaves that hug the back of your bright petals. Make sure they just peek out around the edges, like little green fans saying “hello” from behind the flower!
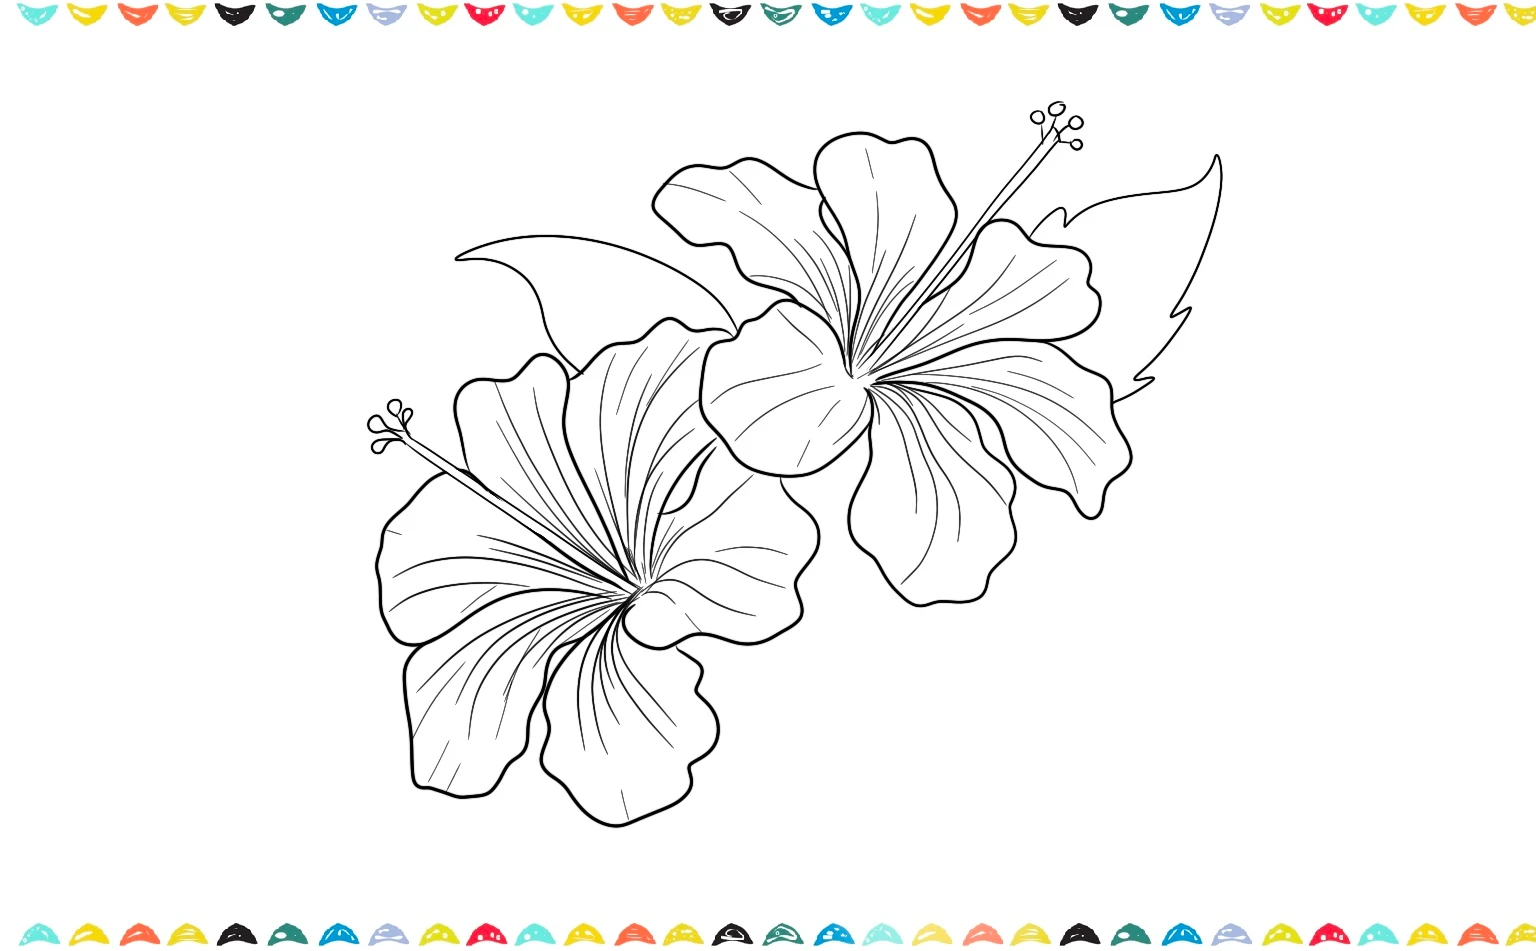
2️⃣ Now let’s make our hibiscus flower drawing look even more real! We’re going to add some pointy leaves peeking out from behind the flowers to give them a natural, lifelike look.
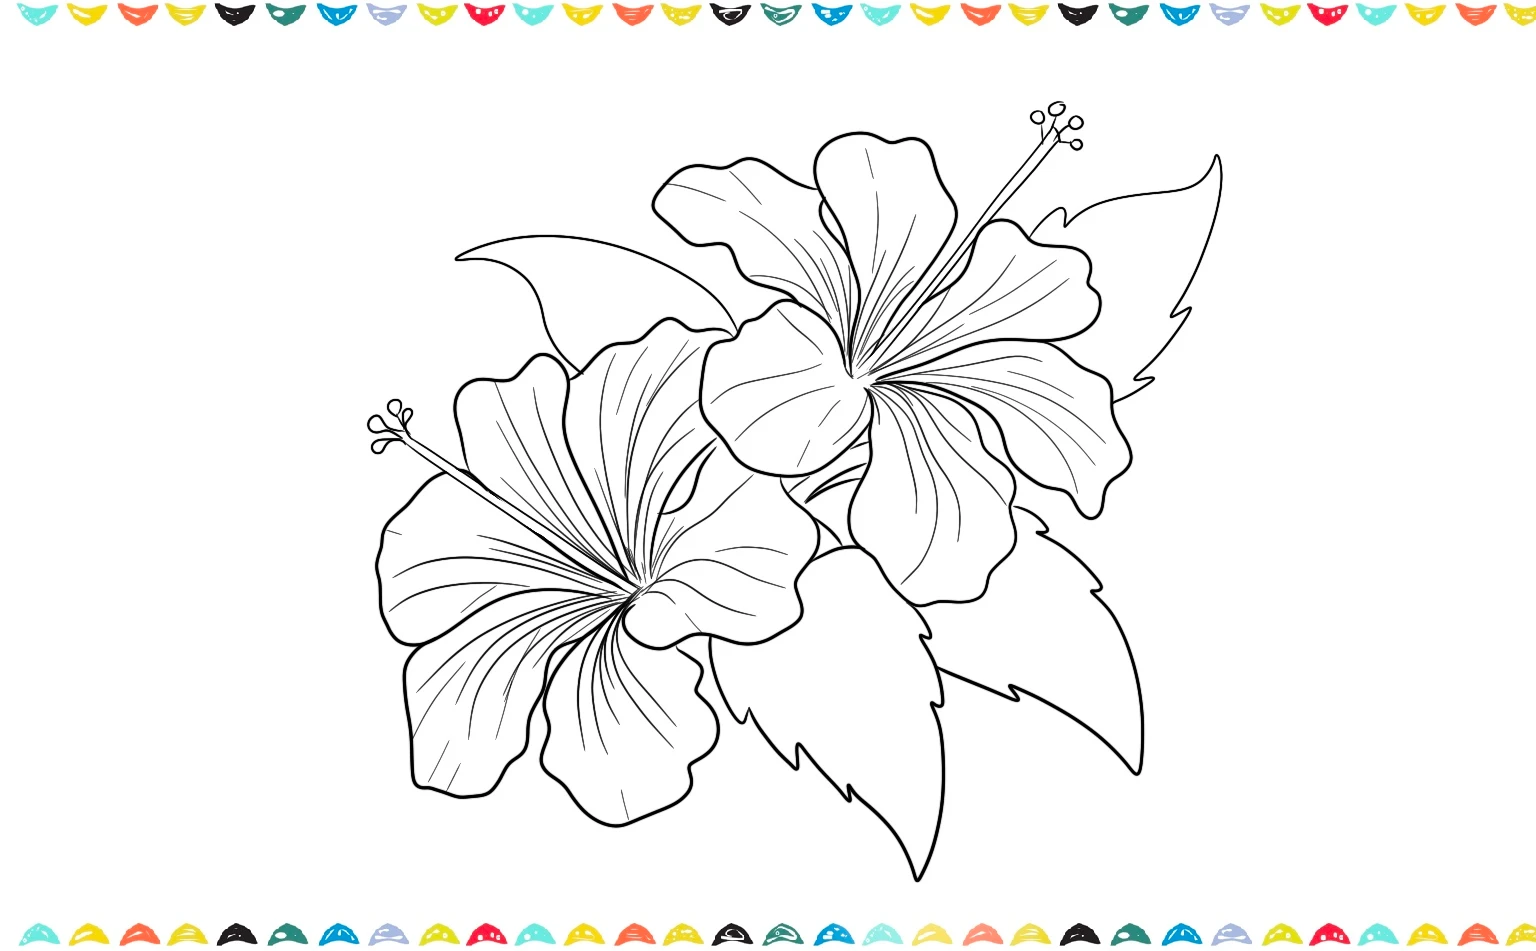
Step 6: Outline and Clean Up 🖊️
1️⃣ Use curved lines with little zigzags to show the veins of each leaf. Trace over your pencil lines with a black pen or marker. Erase any extra sketch lines. You’ll now see two fully drawn hibiscus flowers with layered petals and leaves!
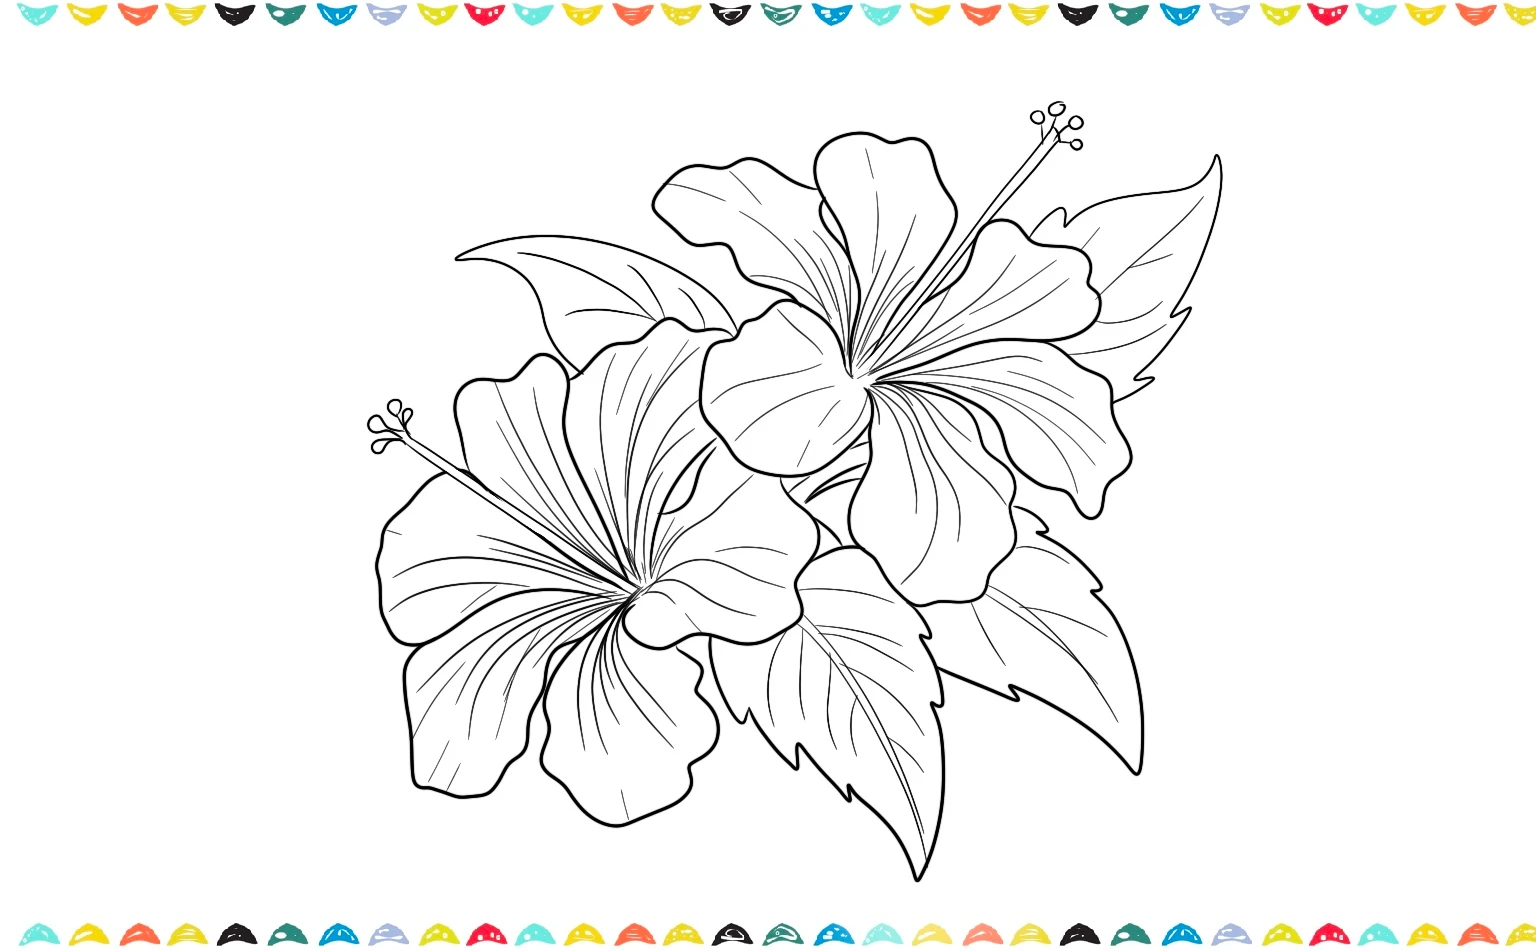
Step 7: Color It In! 🎨
1️⃣ Time for the fun part, coloring! Now it’s time to bring your beautiful bloom to life with a splash of color! To truly master how to draw a hibiscus flower. Grab your brightest yellows and oranges for the petals and blend those colors together like a tropical sunset, giving your flower a truly vibrant and happy look! Use a deep, dark green for the leaves and then make the flower’s center pop with a bright, cheerful red, don’t be afraid to try the awesome color ideas below to make your hibiscus flower drawing shine!
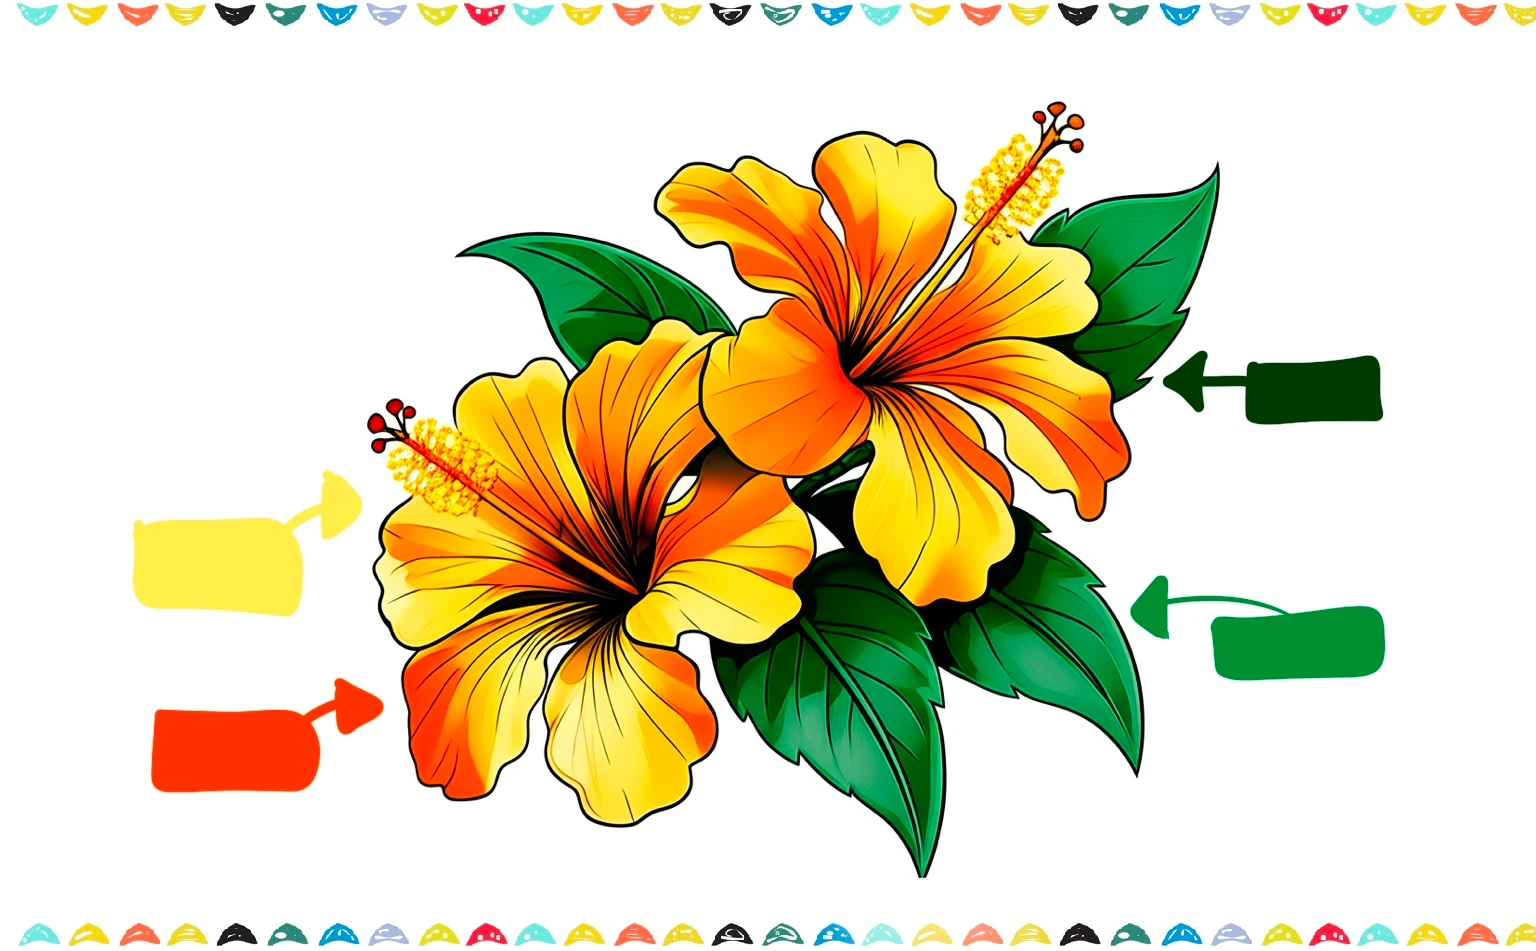
2️⃣ And there you have it! This is our finished hibiscus flower drawing, all brought to life with color. We hope you love your beautiful masterpiece!
Awesome job! Look at that amazing hibiscus flower you’ve drawn! You’ve just learned how to draw a hibiscus, and it looks absolutely fantastic. If you had fun with this, you’re going to love our other super easy drawing guides such as How to Draw a Lily Flower or How to Draw a Palm Tree
Fun Facts About Hibiscus Flowers 🌟
As you practice, remember the steps on how to draw a hibiscus, and enjoy these amazing hibiscus facts while coloring your masterpiece:
- The hibiscus plant is often found in warm places like Hawaii and the Caribbean.
- It’s the national flower of Malaysia!
- Some hibiscus flowers are used to make herbal tea that’s both tasty and healthy.
- Hibiscus blooms are known to attract butterflies and hummingbirds.
- The flowers only last one day – but they bloom again the next!
Do you want to learn more about hibiscus: Hibiscus Facts.

Want to practice more? Learn how to draw flowers step by step with simple tutorials. Follow our complete guide on how to draw flowers step by step.
FAQ – How to Draw a Hibiscus ❓
Q1: How do I draw a hibiscus flower for beginners?
A1: Start with a small circle for the center, place five light petal ovals around it, add the long stamen, then refine the outlines, erase guides, and color.
Q2: Can I use different colors for my hibiscus?
A2: Yes! While red is traditional, hibiscus flowers also come in pink, yellow, orange, and even purple.
Q3: How do I keep petals symmetrical?
A3: That’s totally okay, real flowers aren’t perfectly symmetrical either. Your flower is unique! Bu you can lightly mark a plus-sign (+) and an “X” over the center to make five equal wedges; place a petal in each wedge before you refine curves.
Q4: Is this a good flower to draw for school projects?
A4: Definitely! Hibiscus flowers are bright, easy to draw, and full of details you can explore.
Q6: How to draw a cartoon hibiscus for kids?
A6: Use bigger, rounder petals, a shorter stamen, bold outlines, and a smiling face on the center. Keep details simple and bright.
Q7: What tools do I need and how long will it take?
A7: Pencil, eraser, paper, and colored pencils/crayons. A simple cartoon: 10-15 minutes; a shaded flower with leaves: 25-35 minutes.
How to Draw a Hibiscus – Free Printable Worksheet

Make learning to draw even more fun with our free printable worksheet! This 5-page worksheet is the perfect companion to the tutorial above and includes everything need to practice:
- 🎨 Step-by-step drawing instructions to follow easily
- 📦 A blank drawing box to try it by yourself
- 🧩 A grid drawing exercise for better proportion and accuracy
- 🖍️ A coloring page to finish with creative flair!
It’s a great tool for home practice, classroom activities, or just a fun art break. Click below to download, print, and start drawing!
Conclusion: You Did It, Artist! 🎨

Great job, now you understand how to draw a hibiscus from first sketch to finished color! Begin with a small center, map five petals using light ovals, and place a graceful stamen that curves outward. Refine edges with smooth, confident lines, then add leaf shapes and gentle veins for a natural look. For color, layer light pinks, reds, or yellows first, deepen the outer petal edges, and leave soft highlights toward the middle. A subtle shadow beneath overlapping petals instantly adds depth.
Want to grow your skills? Try three quick drills: (1) redraw the five-petal layout in 60 seconds, (2) practice three stamen angles, and (3) add two different leaf clusters. Explore styles, cute cartoon with bold outlines or a realistic bloom with careful blending. The more you practice how to draw a hibiscus, the faster your lines flow and the richer your colors look. Keep your sketchbook handy, draw a little each day, and celebrate progress, petal by petal!
👉 If you loved this lesson, don’t stop here! Explore more of our tutorials like How to Draw a Poinsettia, How to Draw a Peony or How to Draw a Rose to complete your flower art collection. You can even combine them all into one big garden drawing idea for an awesome scene!
👉 For who love animal drawings, our step-by-step tutorial on How to Draw a Cat – The Ultimate Step-by-Step Guide or How to Draw a Turtle are another fun projects to try next. 🌟
Looking for creative inspiration? Check out our Pinterest page for some magical ideas!
Keep drawing and having fun with it, just like playing your favorite game every day! The more you draw, the better you’ll get, and you might even discover new ways to draw that you never knew before. Check out our blog post about Drawing Ideas for Beginners – 100 Easy and Fun Things to Draw for more inspiration about drawing.
Share Your Drawing With Us! 💯🎁
We’d love to see your amazing artwork! When you finish your drawing, send us a picture of it. Whether it’s your first try or your masterpiece, we’re excited to cheer you on. Your creativity could even be featured on our site – so grab your crayons and show us what you’ve made! 🎉🖍️
Looking for more step-by-step drawing tutorials? Visit the A-Z Drawing Tutorials Index to browse all lessons, organized alphabetically.