Introduction
Do you want to learn how to draw a camel step by step? 🐪 Camels are fascinating animals known as the “ships of the desert,” and they make a fun and unique subject for kids and beginners to sketch. Whether you’re just starting your drawing journey or looking for a simple and clear tutorial, this guide will show you exactly how to draw a camel easily using basic shapes and smooth lines. By breaking the process into small, kid-friendly steps, you’ll discover that drawing a camel is not as tricky as it might seem at first. With each step, your sketch will grow from a few circles and lines into a recognizable camel, complete with its long legs, gentle eyes, and signature hump.
In this tutorial, you’ll learn not only how to draw a camel but also pick up helpful tips for drawing animals in general. Perfect for school projects, creative play, or just doodling for fun, this lesson will help kids improve their observation and artistic skills.

In this tutorial you will learn:
- How to draw a camel using 6 simple steps
- Fun facts about camels
- How to turn your sketch into a cute camel drawing
- Tips for coloring and customizing your camel sketch
Grab your pencil, follow along, and by the end of this guide, you’ll have a desert-ready camel drawing to show off to friends and family! 🌟✏️
Table of Contents
Get ready to be a camel drawing pro! With our easy tips on how to draw a camel, you’ll soon be creating your very own colorful masterpiece. It’s so much fun to bring this beautiful cat to life on your paper!
Materials Needed 🎨
Before we start our step-by-step drawing, let’s make sure you have everything you need! You don’t need anything fancy, just a few basic tools to bring your drawing to life:
✅ Paper or Sketchbook – A blank page for your drawing. 📄
✅ Pencils (HB or 2B) – Light pencils help with outlining the drawing. ✏️
✅ Eraser – To fix mistakes while sketching. 🔄
✅ Black Marker or Fine Liner – For outlining and defining clearly. ✍️
✅ Colored Pencils – To color your drawing.
Now, let’s learn how to draw a camel step by step…
How to Draw a Camel Step by Step
Get ready to create your very own camel! We’ve broken it down into 6 super-duper easy steps, so you can zoom through it in just 5 minutes or take your time to make every detail absolutely perfect!

Step 1. Draw the Camel’s Head 🧐
Let’s begin our camel adventure! Grab your pencil and let’s get started by drawing the head. Imagine a big, yummy egg or a perfectly round pebble, and gently sketch that shape an oval right on your paper. This is the very first step to bringing your camel to life and making sure it looks just right!

Instead of drawing the entire face at once, let’s start with a tiny, gentle bump for your camel’s nose. This fun little curve will give your camel a super special and unique look!

Now for the best part; let’s give our camel a super friendly face! Draw a cute, round nose, then add two little dots for its nostrils and a big, happy smile underneath. Can you see our camel friend starting to come to life?
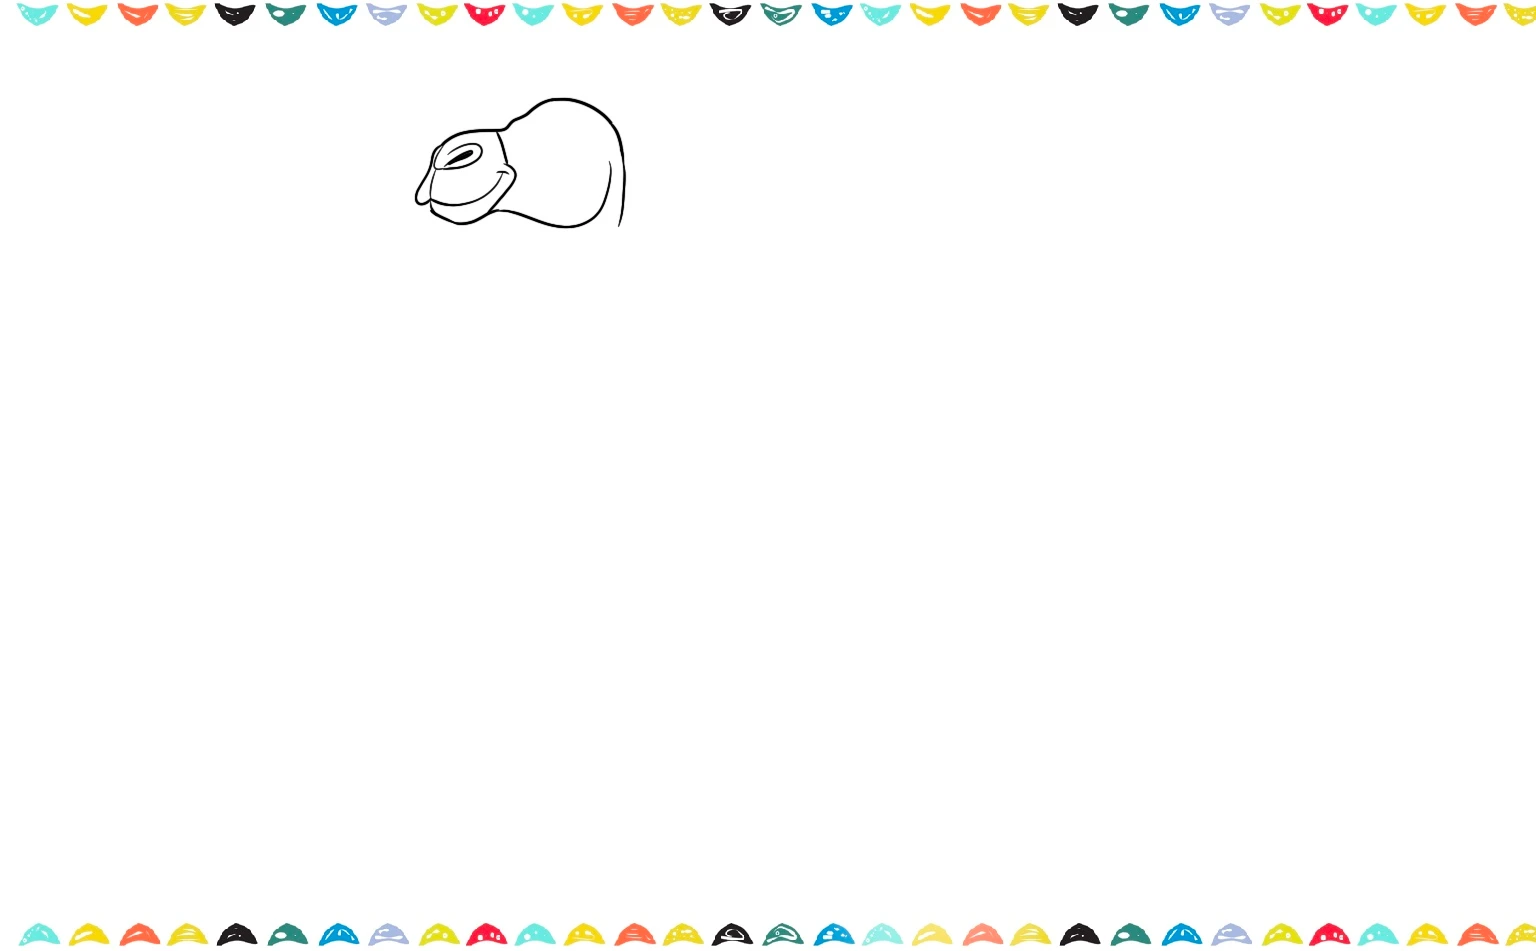
Now sketch more facial details: adding all those special details that will bring your camel to life! Let’s start with two cute, little ears perched right on top of its head. And what’s a friendly camel without a happy expression? Give your camel some kind, curved eyebrows right above its eyes to make it look extra friendly and approachable!
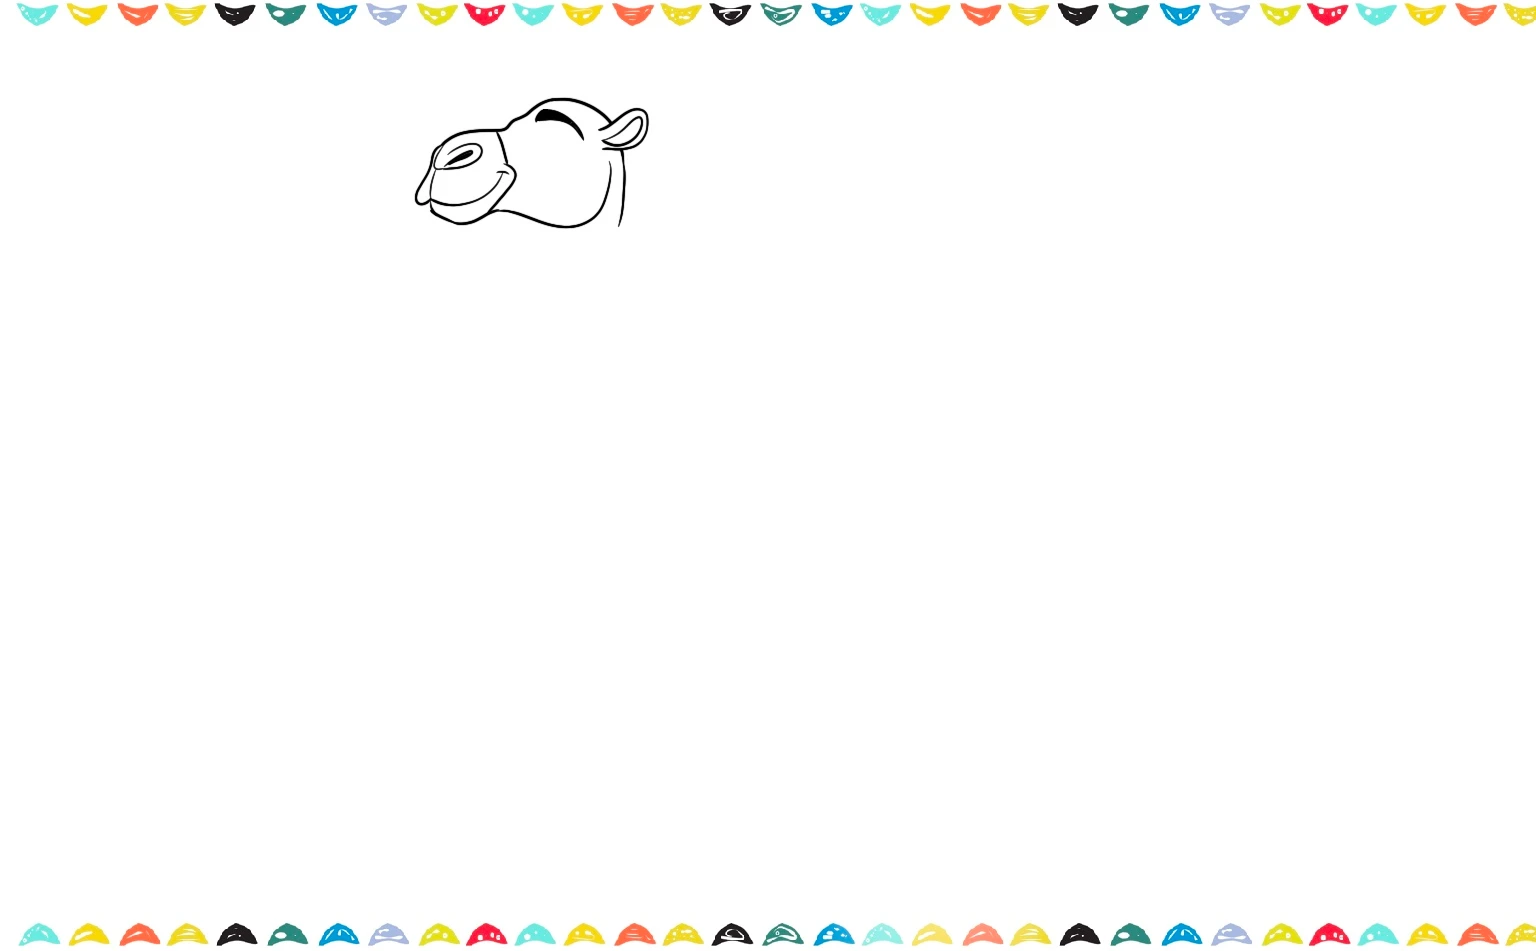
Ready for the most important part? It’s time to add a dash of personality to your drawing with a fun, new step! Let’s bring our camel to life by giving it a big, beautiful eye! Carefully add a tiny, magical white dot inside the eye, it’s like a secret sparkle that makes your camel look extra bright and happy!
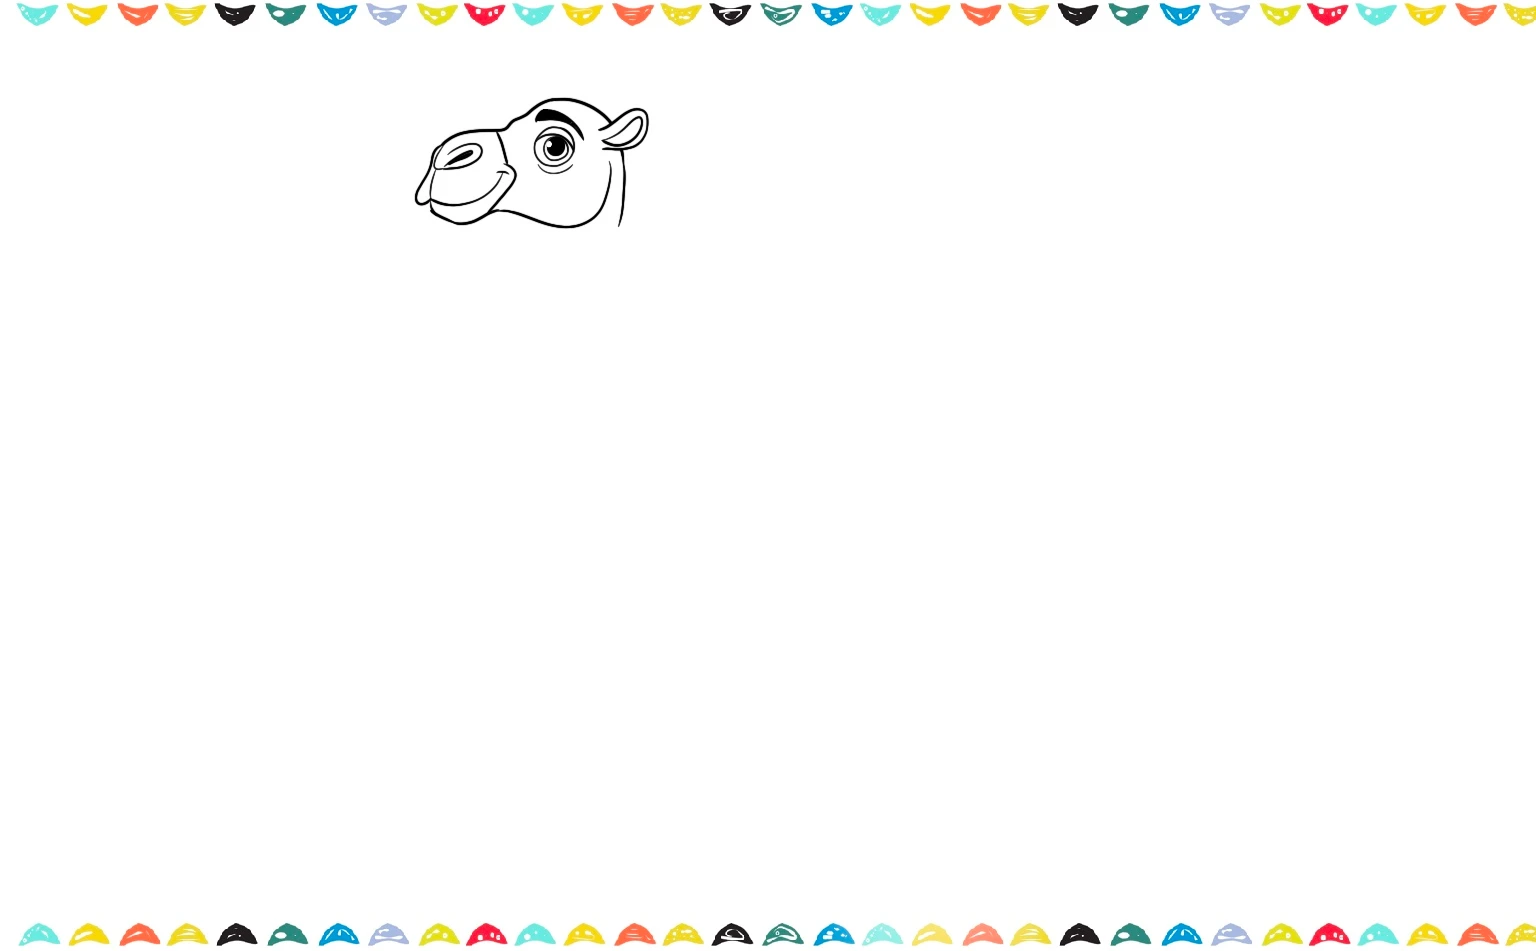
👉 This step is important for making your camel drawing easy and instantly recognizable. Let’s keep going with our awesome guide on how to draw a camel. Want to add a furry friend next to your camel sketch? Check out our guide on How to Draw a Realistic Cat, it’s simple and easy! 🐱
Step 2. Sketch the Neck and Body 🦜
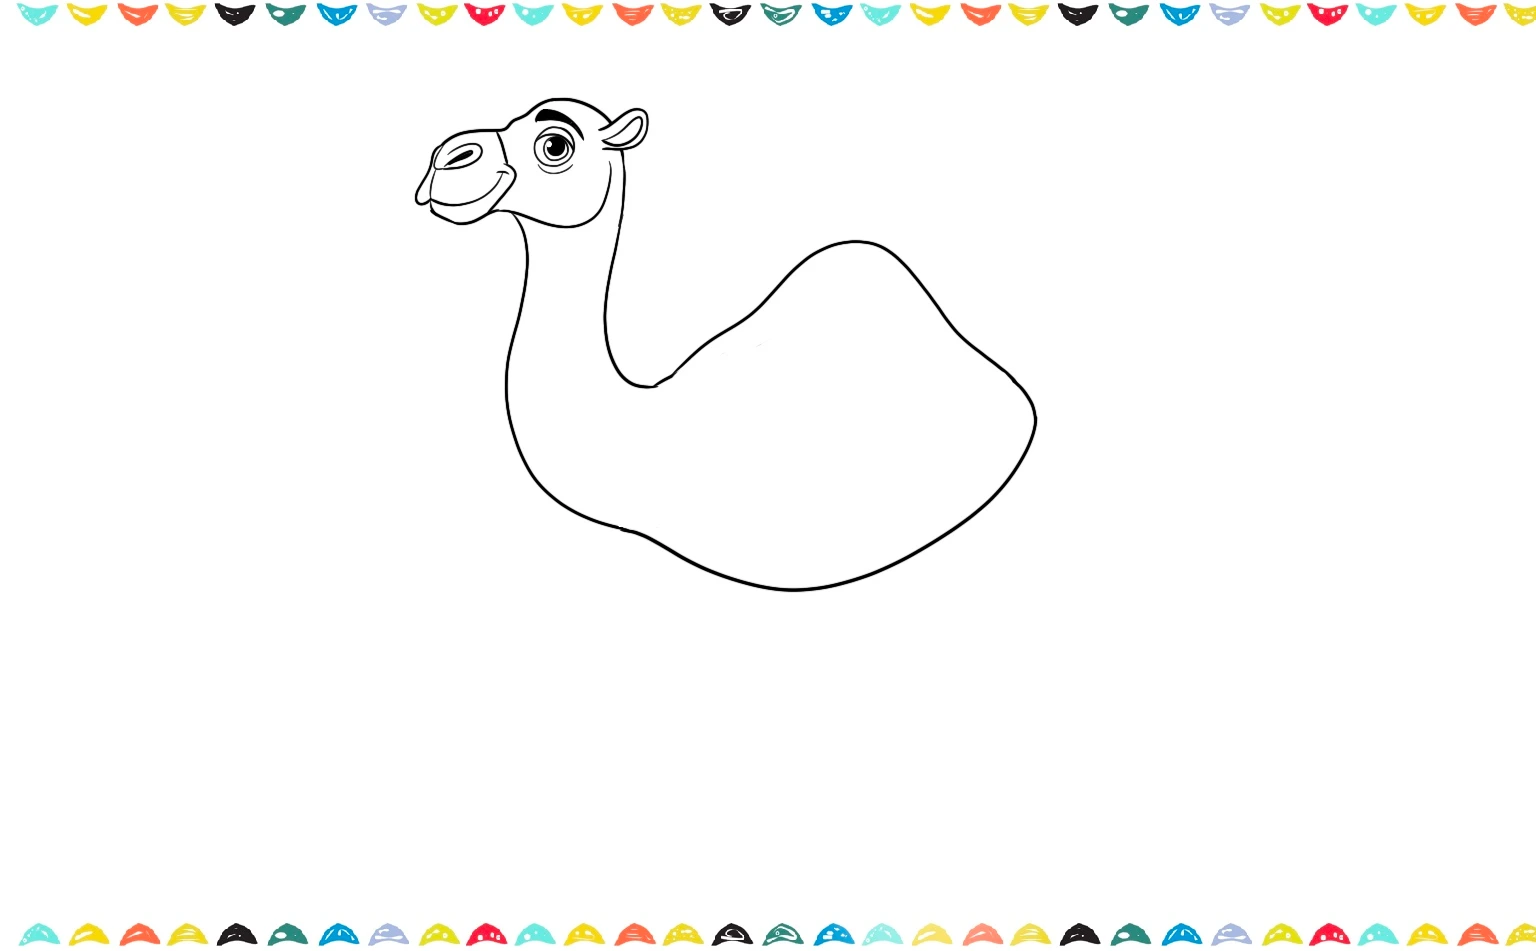
Now, let’s connect the head to the body with a super long, curved neck! Imagine a gentle, sloping slide going down from the camel’s head, that’s exactly the kind of line you want to draw.

Next, let’s give our camel a big, bouncy body! Draw a giant oval or a silly bean shape right in the middle. Remember to leave plenty of space underneath for its long legs!

Here’s the super special feature part of how to draw a camel, that makes a camel a camel: its fantastic hump! To do this, draw a big, beautiful, curved hill right on its back.
Step 3. Add the Hump
Now for the part that makes a camel so unique and cool their special hump! Imagine a big, smooth hill and gently draw a large, rounded shape right on top of your camel’s back. This awesome hump is what makes our camel look like the real deal!
After learning how to draw a camel, you might also love hopping over to our next article to learn how to draw a super silly cow!
Step 4. Draw the Legs and Tail 🧣
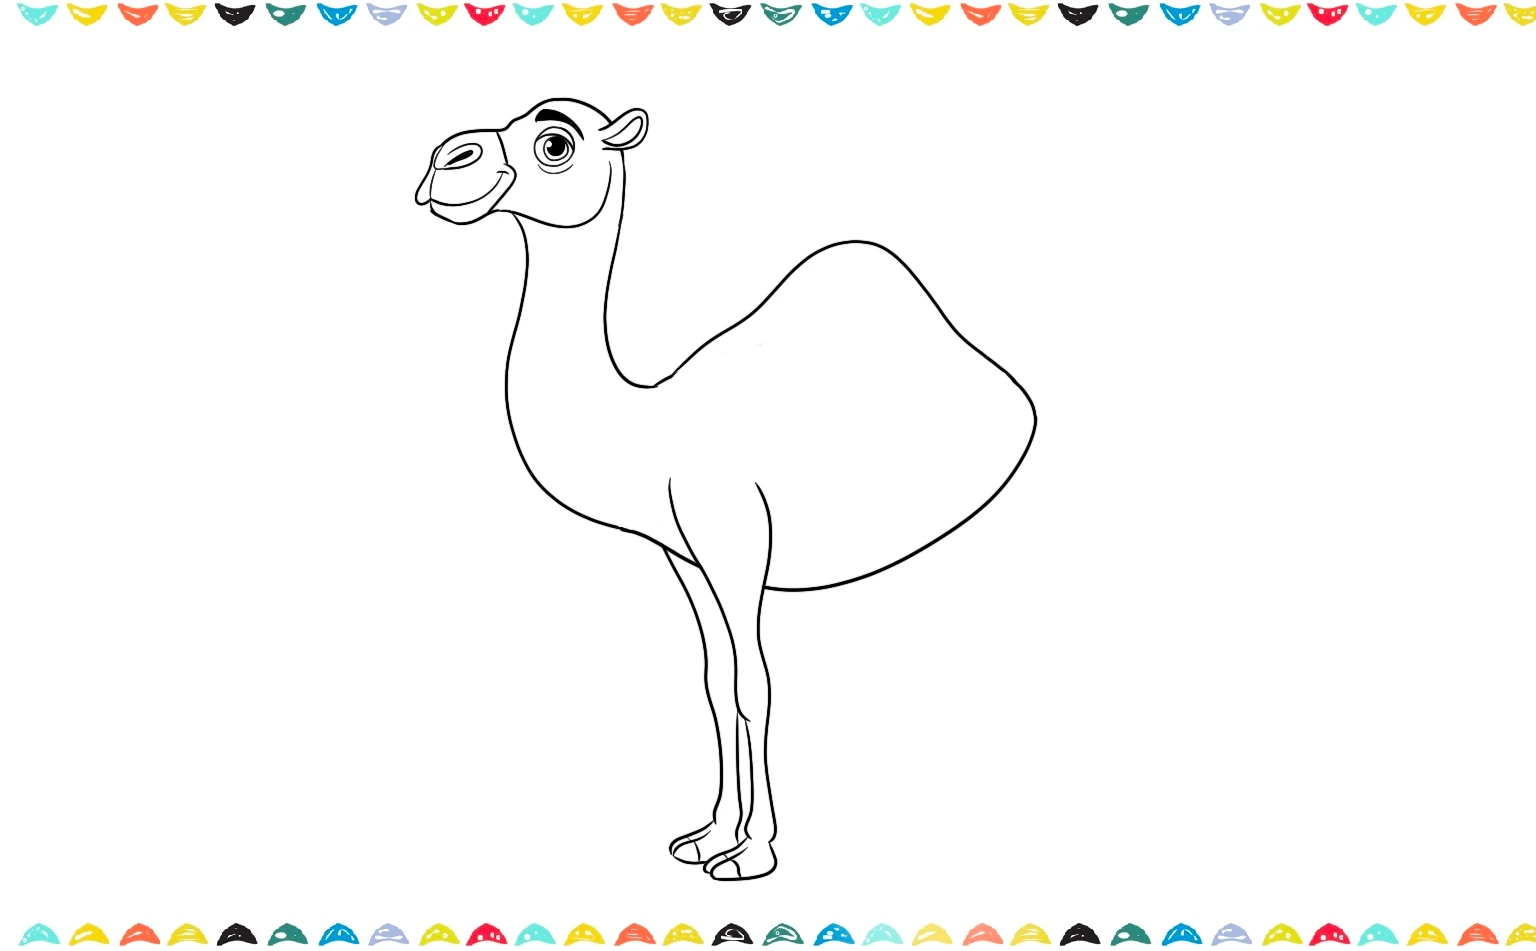
Time to give our camel some legs! They have very long and skinny legs, perfect for walking in the desert. We’ll draw two straight lines for the front legs, adding a little bump in the middle for a knee joint and finishing with a rounded foot at the bottom.
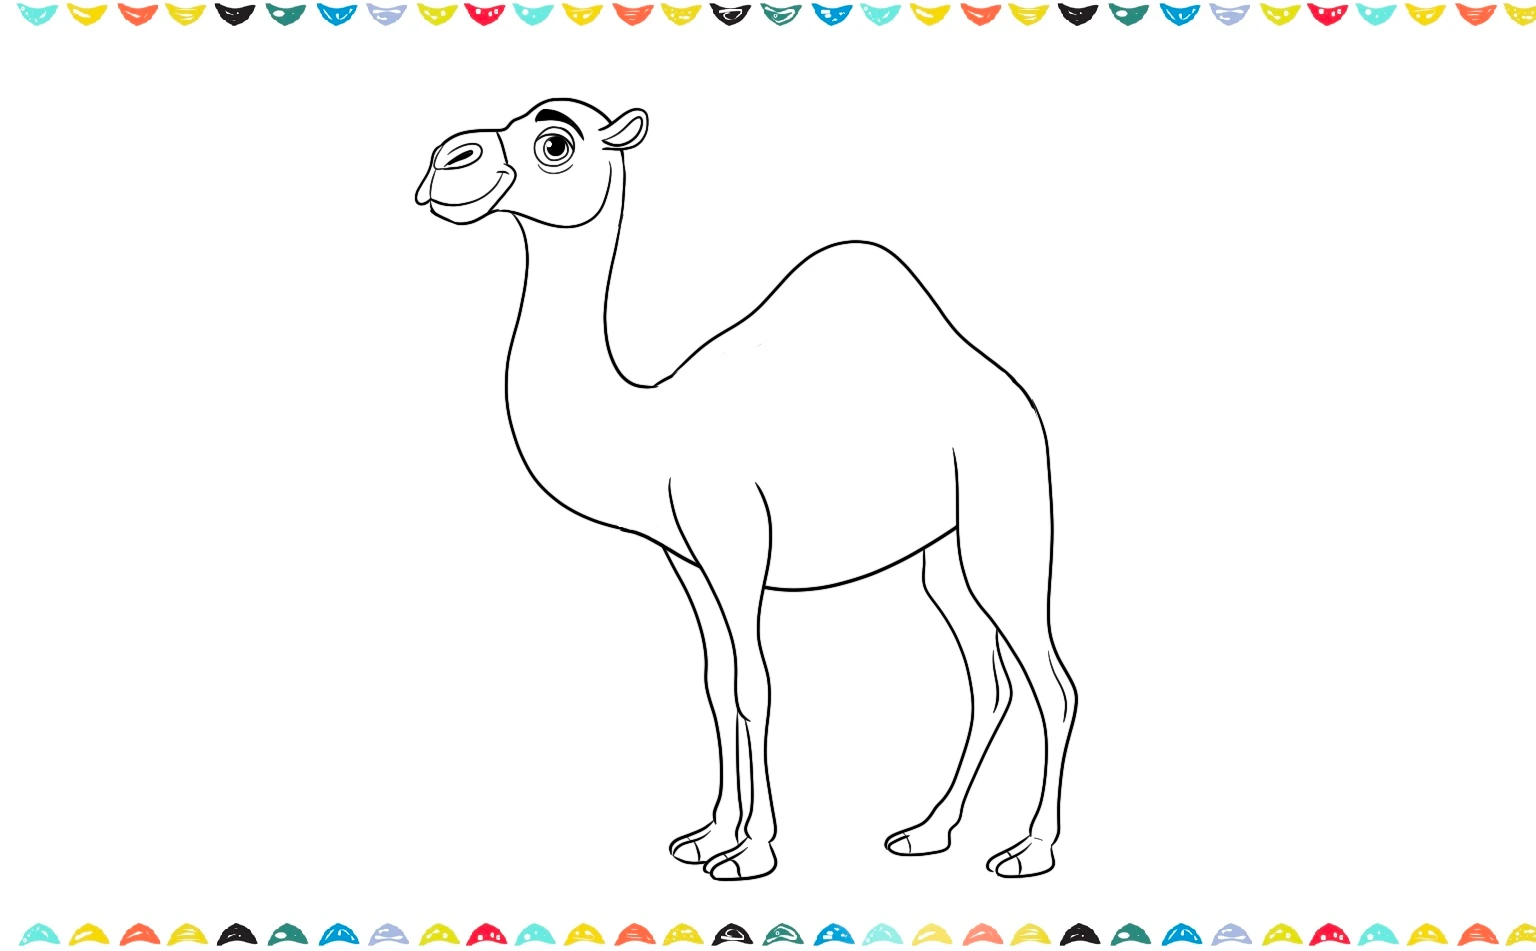
Let’s give our camel some strong back legs so it can stand tall and proud! Draw two long lines behind its body, making sure to add a couple of bends for its knees. Now your camel looks like it’s ready for an awesome desert adventure!
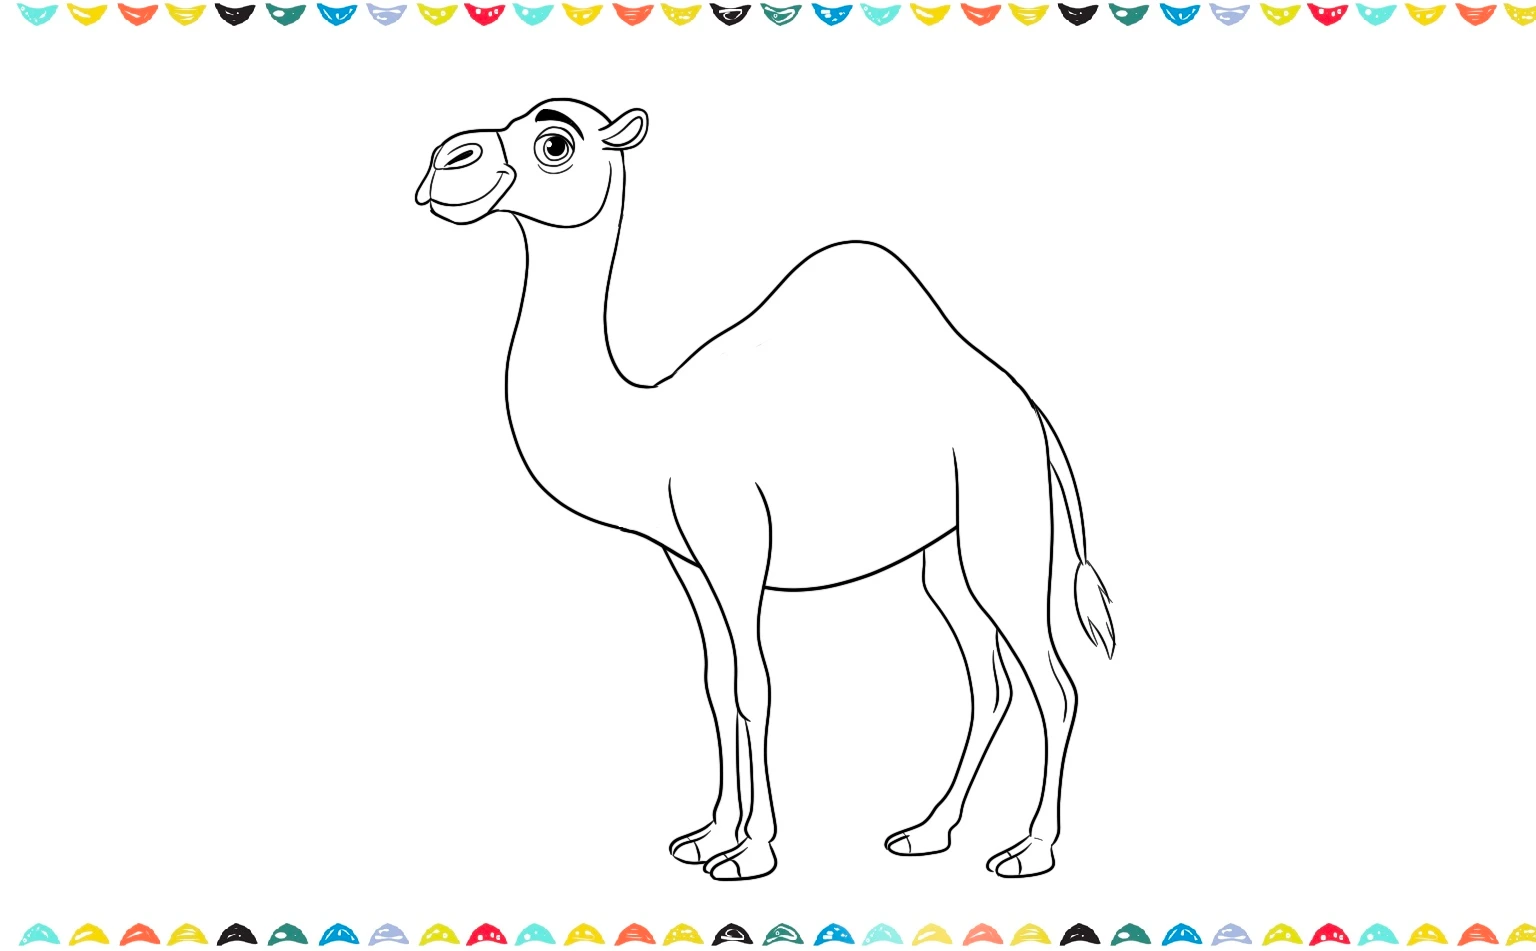
Now, for a fun, finishing touch! Let’s add a wiggly, wagging tail at the very back of your camel. Make it short and sweet, and be sure to give it a tiny, fluffy tuft of hair at the tip, just like a little paintbrush! This small detail will make your camel look extra real and extra awesome!
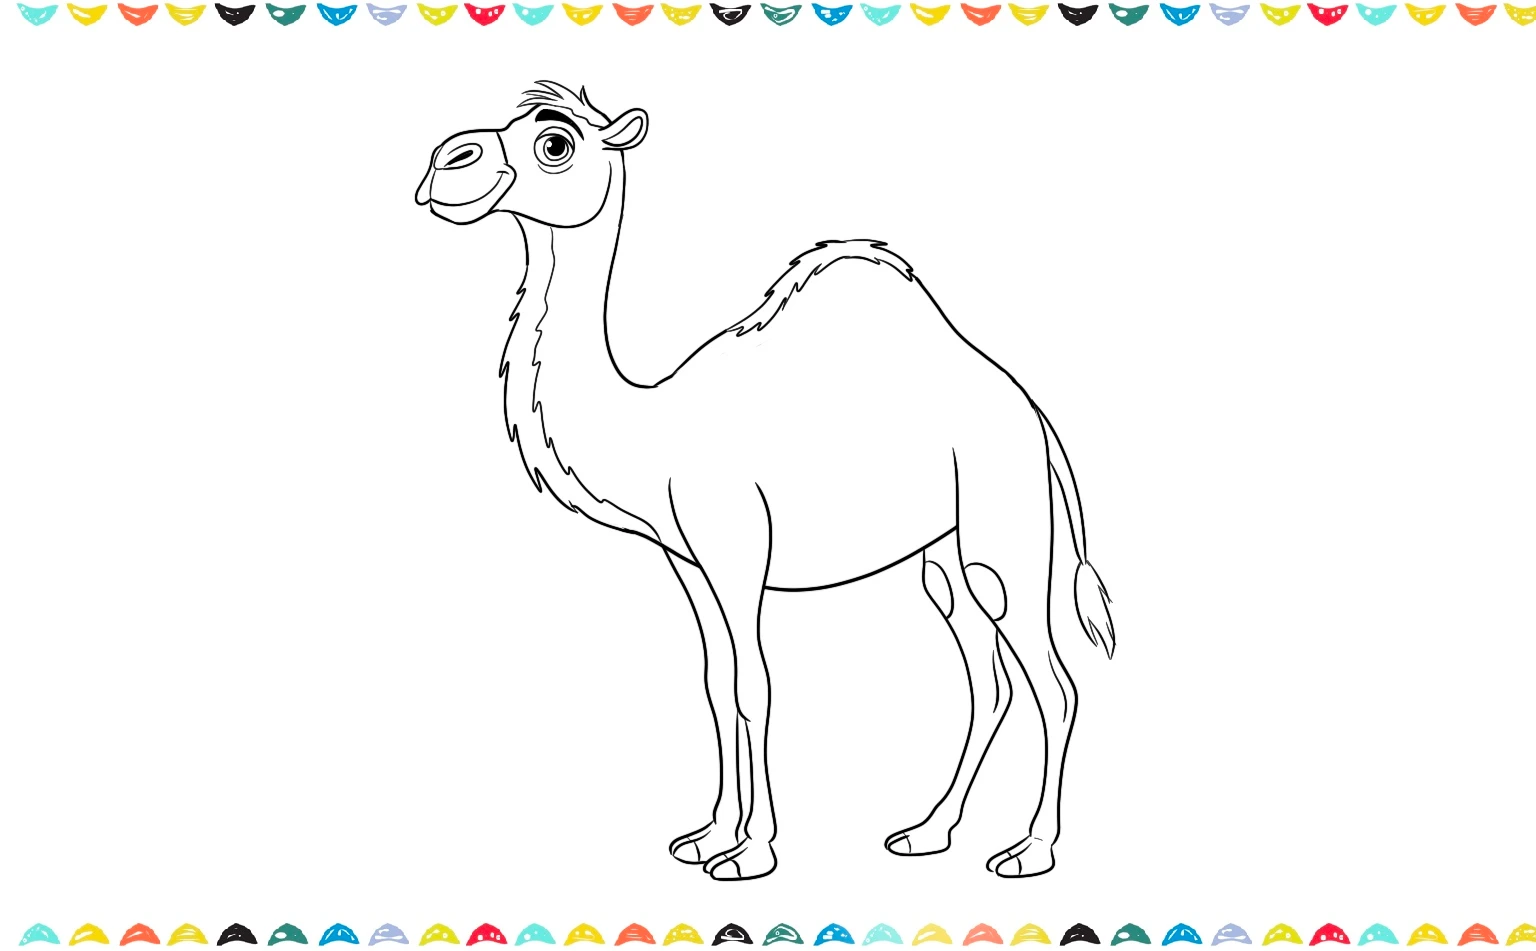
Let’s keep going on our how to draw a camel adventure! Now that our camel is so adorable, it’s time for the next big step. We’re going to sketch out fur details to make our little camel drawing complete.
Step 5. Add Details and Hair 💇♀️
Let’s give our camel a cool, fluffy haircut! Use zigzag or squiggly lines to draw a furry mane on the back of its neck, and add a little poof of hair right on top of its head. You can also add some fun fur tufts on the hump and at the tip of its tail to make it look extra cuddly!
Wow, you’ve just drawn a magnificent camel! Are you ready to add some more awesome desert friends to your picture? Learn how to draw a slithery snake that might be found in the desert.
Step 6. Outline and Color 🎨
Ready for the finishing touches? Now it’s time to make your camel pop! Carefully trace all of your pencil lines with a black pen or marker to make them bold and clear. Once you’re done, grab your crayons or markers and fill your camel in with some warm, sandy colors like light brown or tan. To make it a whole picture, you can even add a bright blue sky and some squiggly lines for the desert sand!

👉 Congratulations, now that you learned how to draw a camel. If you like drawing a camel you may also like our step by step tutorials about How to Draw a Giraffe or How to Draw a Lion.
Fun Facts About 🌟
Now that you know how to draw a camel, it’s time to celebrate with some amazing camel facts! Here are some awesome things to know while you’re working on your camel drawing:
- Camels store fat in their humps, not water! 🐪
- They can go days without drinking and survive in hot deserts. ☕
- Camels have long eyelashes and closing nostrils to keep sand out! 🌿
- They are called “ships of the desert” because of how they move smoothly across sand. 🚗
- There are two types of camels: one-hump (dromedary) and two-hump (Bactrian). 🧐
Learning how to draw a camel makes you appreciate how unique and cool they really are! Want to learn more about camels: Camel Facts.
Frequently Asked Questions – How to Draw a Camel ❓
Q1. How to draw a camel step by step for beginners?
A. Start with simple shapes: an oval for the body, a smaller oval for the chest, a curved cylinder for the neck, and a circle for the head. Add the hump, long legs, and tail; refine the outline, then ink and color. A side view is the easiest.
Q2. How do I draw a camel face (eyes, nose, mouth) correctly?
A. Place large almond eyes slightly above the muzzle line, add thick lids and a soft nose bridge, then sketch a wide, gentle muzzle with split upper lip. Keep features rounded for a friendly look.
Q3. Where should I place the camel’s hump(s)?
A. For a dromedary (one hump), center the hump over the back half of the main body oval. For a Bactrian (two humps), draw two rounded humps with a slight dip between them, spanning mid-back to rear.
Q4. How to draw a cartoon camel for kids?
A. Use big eyes, a smaller body, and oversized hump/ears. Simplify legs into smooth tubes and outline with bold lines; add a cute smile and minimal details.
Q5. What tools do I need for a simple camel drawing?
A. Just a pencil, eraser, and colors! Markers or crayons work great for turning it into a cute camel drawing.
Q6. How can I shade and color a realistic camel?
A. Layer sandy beiges, light browns, and warm grays; shade under the neck, belly, and hump, and where legs overlap. Add short, directional strokes around the neck and hump to suggest coarse fur.
Conclusion: You Did It, Artist! 🎨
Great job, now you know how to draw a camel from simple shapes to a polished, lifelike sketch! With an oval body, curved neck, clear hump placement (one for dromedary, two for Bactrian), and long tapered legs, you’ve learned the key proportions that make camels look right. Keep your pencil light while blocking in shapes, then refine, ink, and add warm sandy colors and gentle shading under the neck, belly, and hump for depth. If you ever forget a step, revisit the outline and build it up slowly, confident lines come from careful construction.
Quick Tips to Keep Improving
- Practice different poses: standing, walking, or kneeling beside a desert scene.
- Vary hump size and neck curves to explore both camel types.
- Add texture with short, directional strokes on the neck and hump.
- Try a cartoon version for kids big eyes, smooth lines, and a friendly smile.
You’ve mastered the basics of how to draw a camel, now challenge yourself with color blends, shadows, and fun accessories like a saddle or water jug. Ready for more animal drawings? Explore other step-by-step guides to keep your skills growing and your sketchbook full! See How to Draw a Monarch Butterfly, How to Draw a Palm Tree or How to Draw Earth in 4 Steps.
Looking for creative inspiration? Check out our Pinterest page for some magical ideas!
Keep drawing and having fun with it, just like playing your favorite game every day! The more you draw, the better you’ll get, and you might even discover new ways to draw that you never knew before. Check out our blog post about Drawing Ideas for Beginners – 100 Easy and Fun Things to Draw for more inspiration about drawing.
Share Your Drawing With Us! 💯🎁
We’d love to see your amazing artwork! When you finish your drawing, send us a picture of it. Whether it’s your first try or your masterpiece, we’re excited to cheer you on. Your creativity could even be featured on our site – so grab your crayons and show us what you’ve made! 🎉🖍️
Looking for more step-by-step drawing tutorials? Visit the A-Z Drawing Tutorials Index to browse all lessons, organized alphabetically.