Introduction
Learning how to draw Stitch step by step is the perfect way to bring everyone’s favorite mischievous blue alien to life on paper! 🌟 Stitch, from Disney’s Lilo & Stitch, is not only funny and adorable but also one of the most popular characters kids love to draw. At first glance, his big ears, wide smile, and playful stance might look tricky, but don’t worry, this fun and easy tutorial will guide you through each part of the process. With simple shapes, clear steps, and lots of encouragement, you’ll soon be sketching Stitch in his classic standing pose with confidence.
In this guide, we’ll start with the basic outline and body shape, then move on to Stitch’s expressive face, large ears, and little details that make him unique. Each step is broken down in a way that’s perfect for beginners and kids, so you won’t feel overwhelmed. Along the way, you’ll also find helpful tips to make your drawing more fun, like adding shading, color, or even funny accessories. By the end of this tutorial, you’ll have your very own Stitch drawing ready to show off to friends, family, or even add to your Disney fan art collection. 🎨💙

Hey there, amazing artist! It’s time to grab your pencils, crayons, or markers, because we’re about to go on a super fun drawing adventure. We’ll show you how to draw Stitch step by step, so you can bring this adorable and mischievous alien to life on your paper!
Table of Contents
Materials Needed 🎨
Before we start our step-by-step drawing, let’s make sure you have everything you need! You don’t need anything fancy, just a few basic tools to bring your drawing to life:
✅ Paper or Sketchbook – A blank page for your drawing. 📄
✅ Pencils (HB or 2B) – Light pencils help with outlining the drawing. ✏️
✅ Eraser – To fix mistakes while sketching. 🔄
✅ Black Marker or Fine Liner – For outlining and defining clearly. ✍️
✅ Colored Pencils – To color your drawing.
Now, let’s learn how to draw Stitch step by step, standing pose…
How to Draw Stitch Step by Step Standing 🖍️
Ready to draw our mischievous little friend? Follow these easy instructions to learn how to draw stitch step by step and create your very own Stitch drawing!

We’ll show you exactly how to make him stand on two feet, and you’ll have a blast bringing this super cute alien to life on your paper. Let’s get started with the fun!
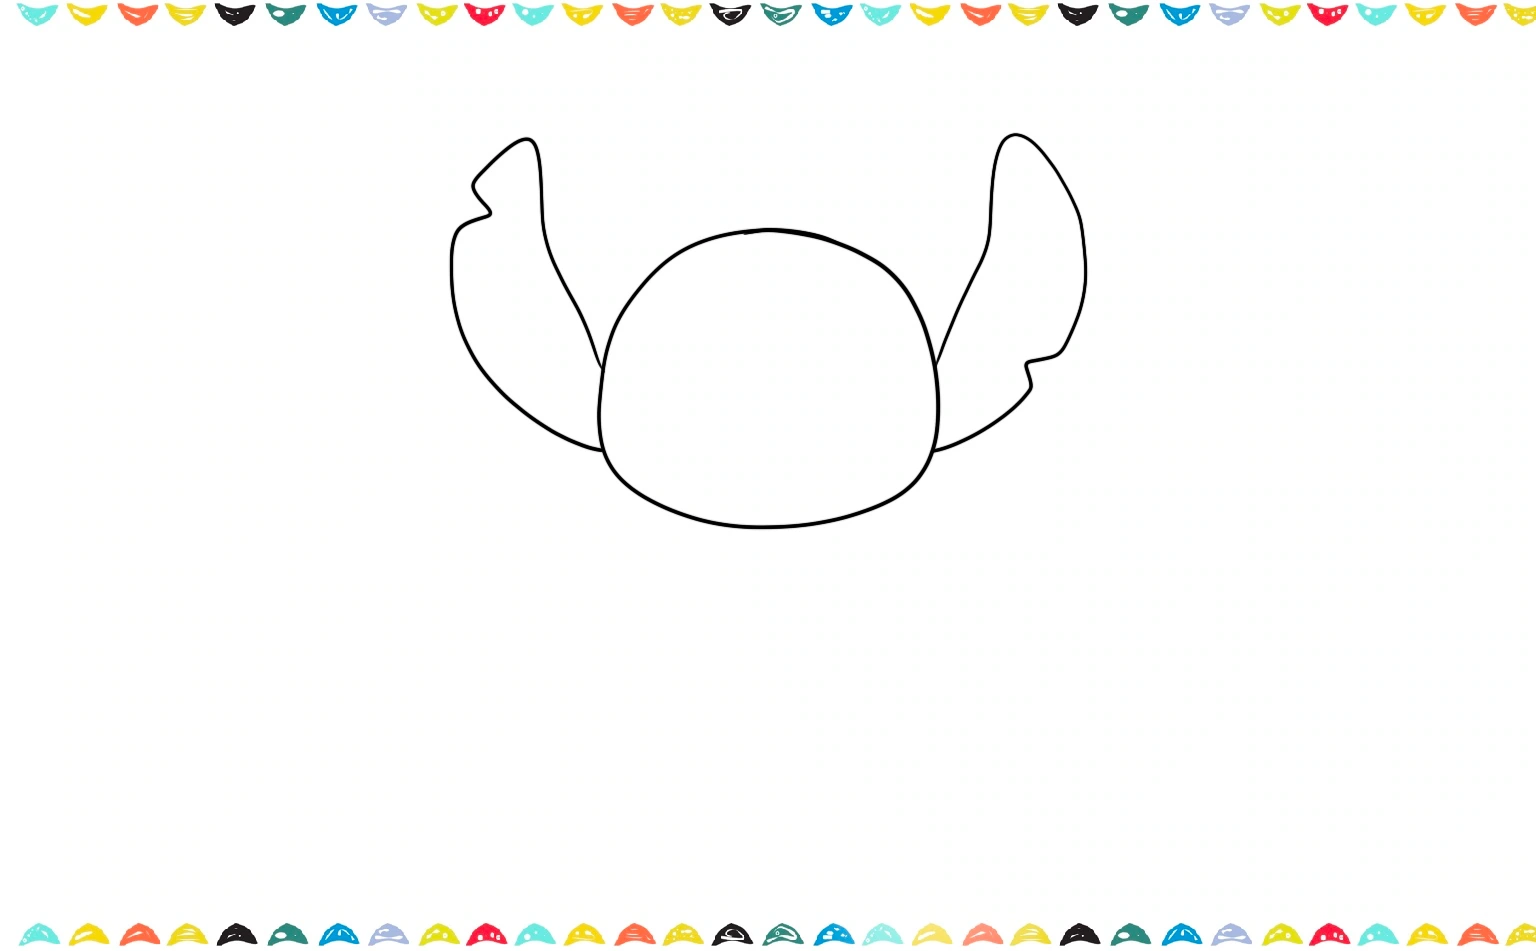
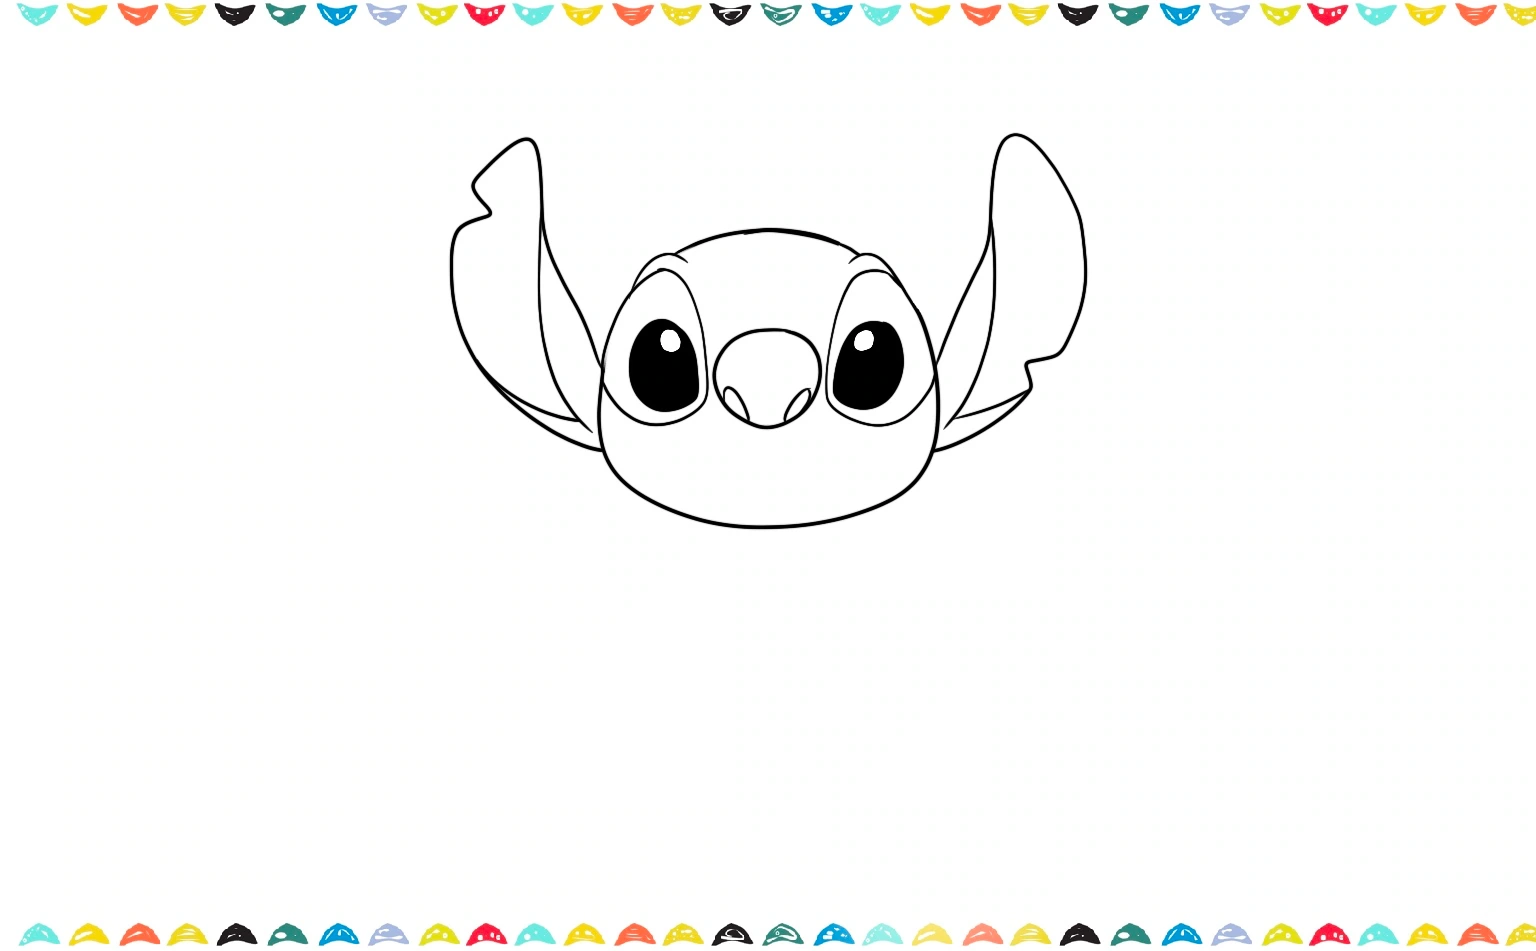
Step 1. Draw the Head Shape 🌀
Start by sketching a wide oval for Stitch’s head. His head is round at the top and a bit wider near the cheeks. Draw light curves for the sides and chin to give him that friendly look! This is the base of your Stitch sketch easy.
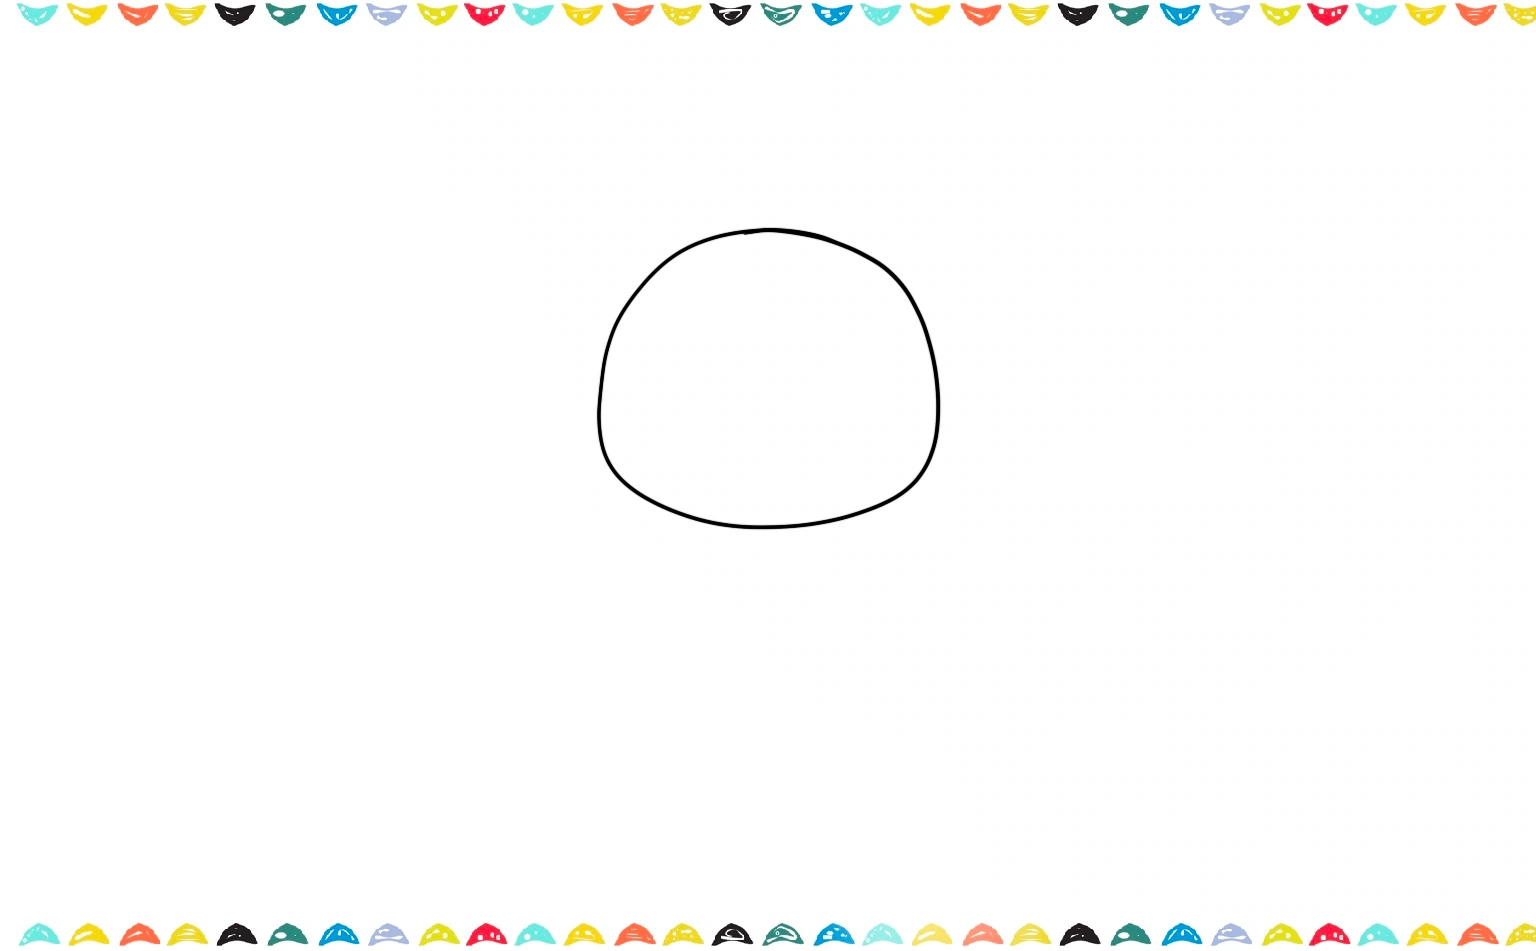
Drawing Tip: When you’re first learning how to draw Stitch step by step, grab your pencil and draw with a light touch. This way, if you make a little mistake, it’s super easy to erase and fix your shapes without leaving any messy marks behind.
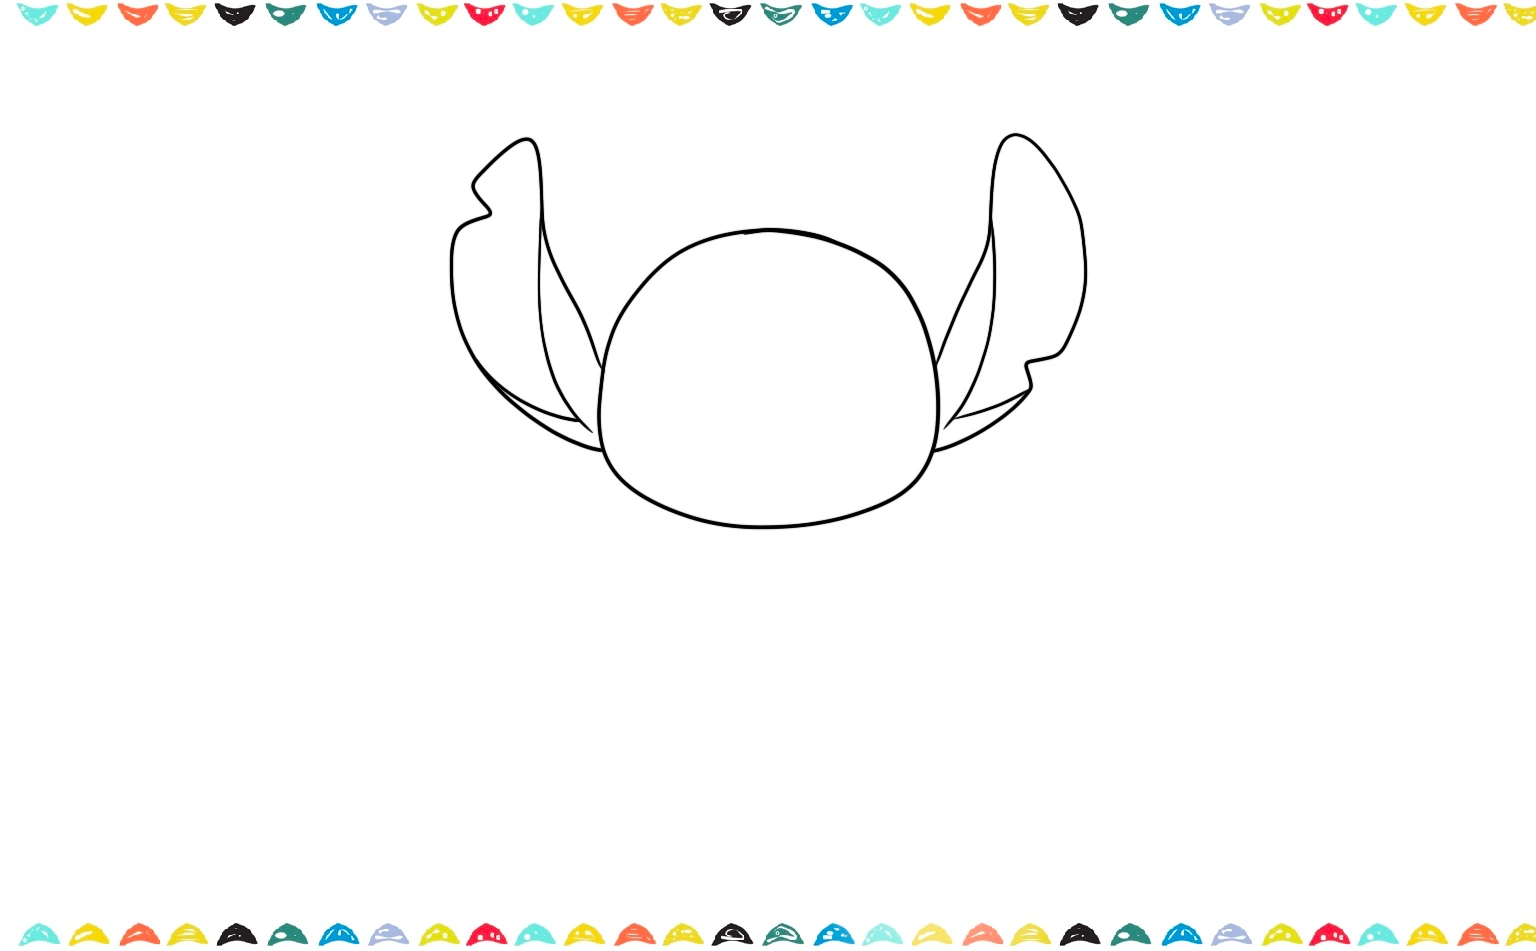
Step 2. Add His Giant Ears 👂
Draw two big, curved ears sticking out to the sides. One ear is flopped over (so make that one bent).
Inside the ears, draw a second shape to show the inner ear area. This is a fun part of easy stitch drawing, his ears are HUGE!
Want to add a cute friend next to your stitch drawing? Check out our guide on How to Draw Pikachu, it’s simple and friendly! 🐱 Let’s keep going with our awesome guide on how to draw stitch step by step.
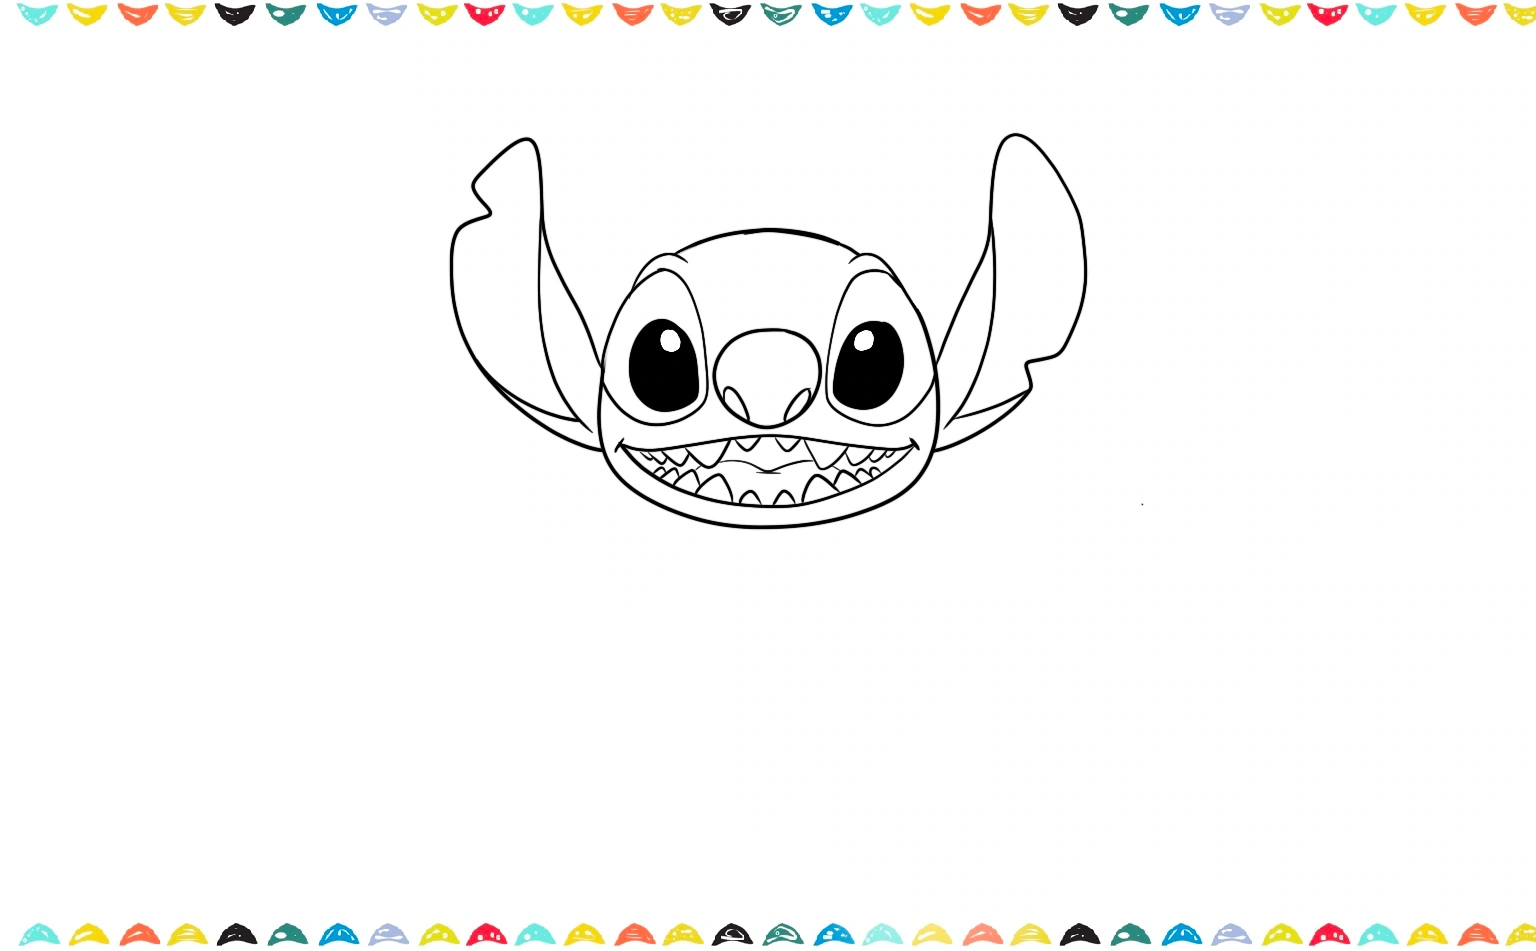
Step 3. Sketch the Face Features 😊
Let’s continue to learn how to draw stitch step by step. Draw a rounded triangle nose in the middle, don’t forget to add nostrils for a more realistic look to the Stitch drawing.
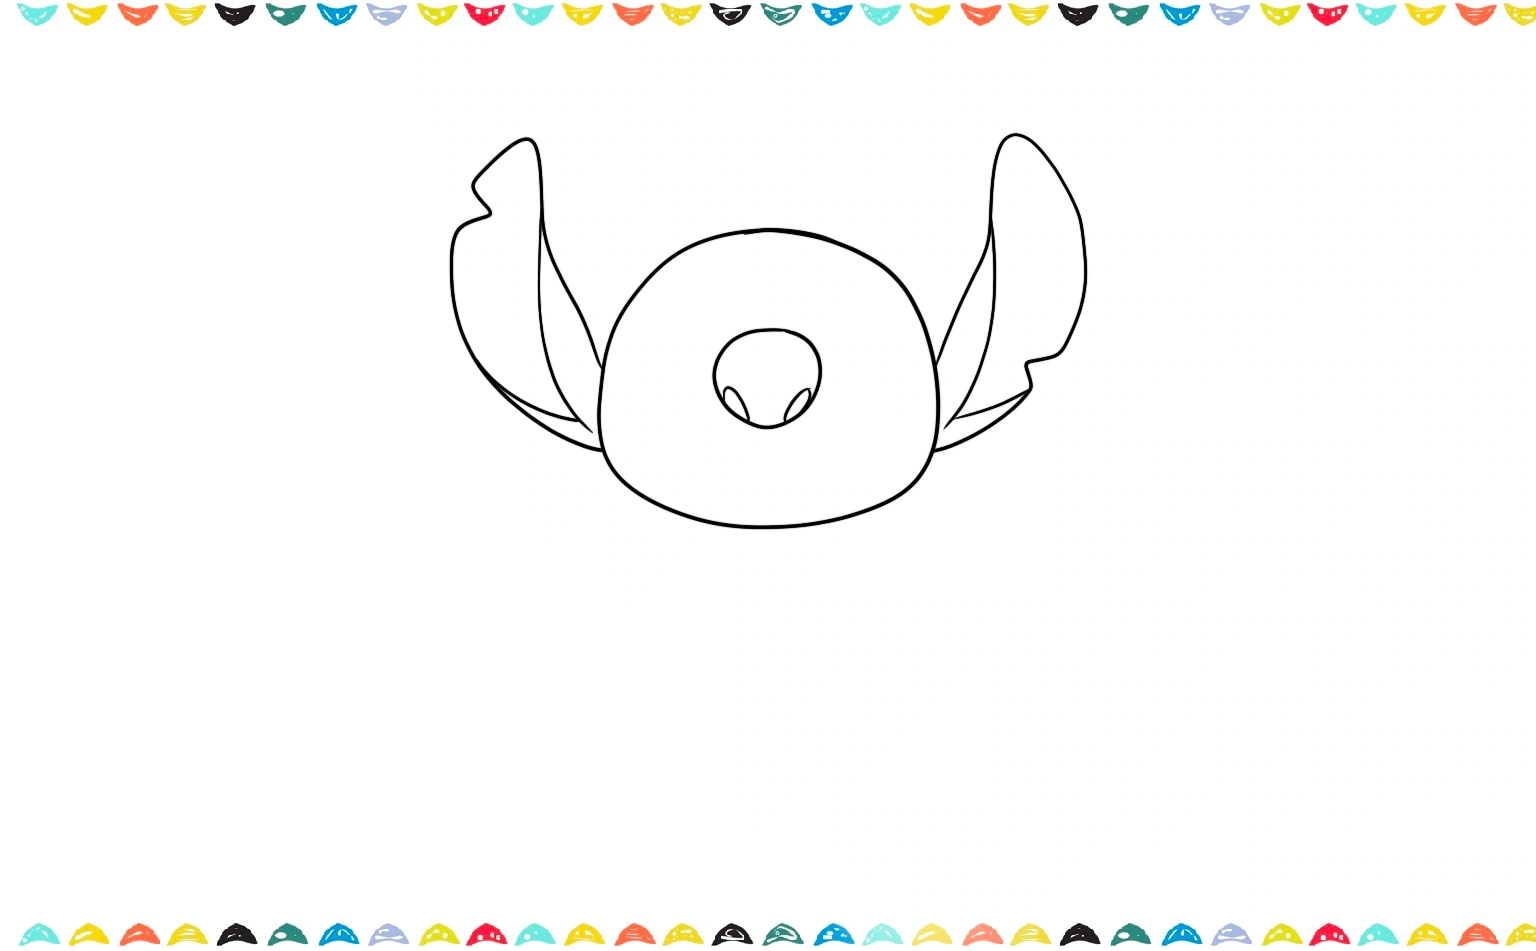
Now, draw Stitch’s big round eyes close to the center of the face. Add small eyebrows above.
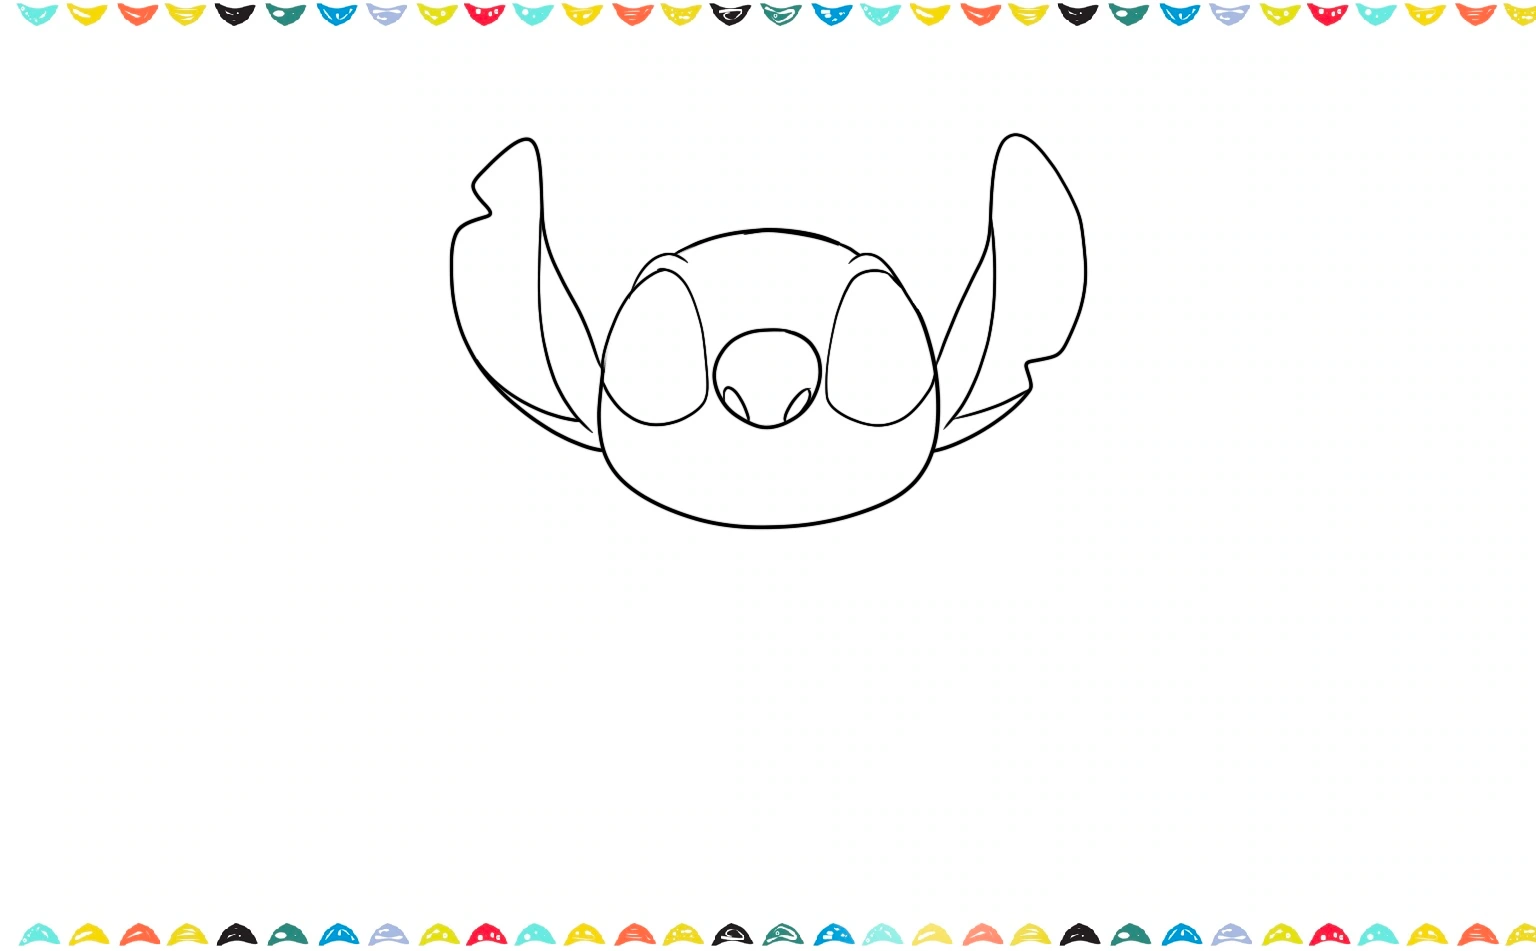
After learning how to draw stitch step by step, you might also enjoy drawing How to Draw Dragon Ball Z Goku. Now it’s time to add more detail to Stitch’s eyes. Add the pupils inside Stitch’s huge eyes. Don’t forget to add some sparkles inside each pupil.
Next comes his adorable smile, a wide, curved line with little sharp teeth peeking out! You can even add a small tongue. You’re doing great with this fun drawing!
Ready to make our drawing even more amazing? Let’s keep learning how to draw Stitch step by step by adding all the fun details to his round body, his little arms, and his chunky legs. These touches will make our Stitch drawing look so real.
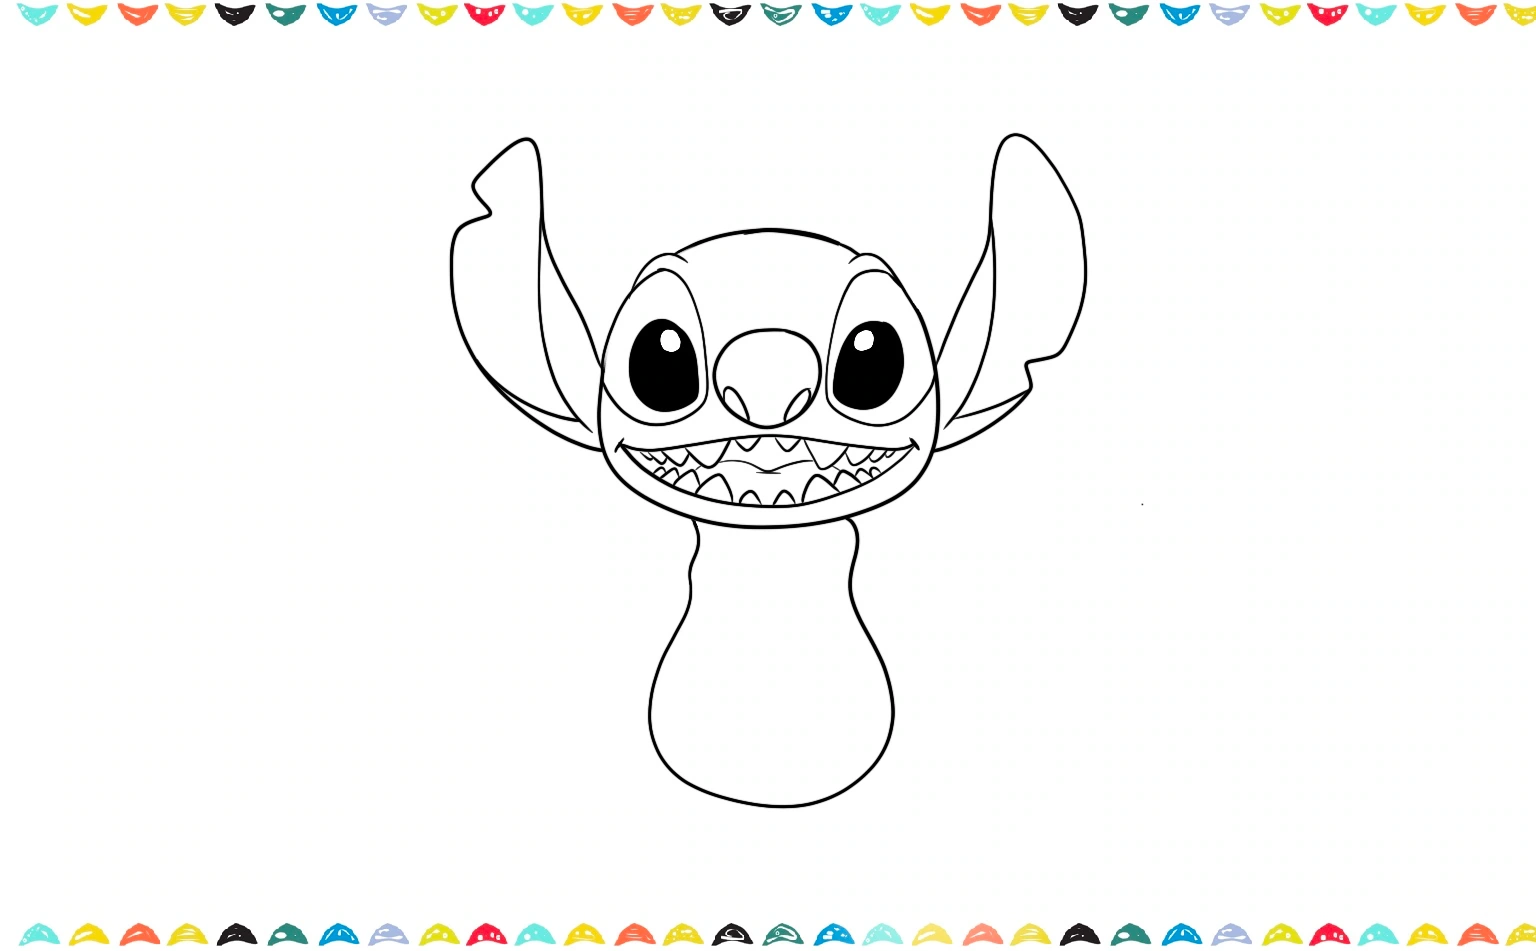
Step 4. Draw the Body and Belly 🧸
Time for the body! Draw a short, rounded body under the head. Start with the outline, and then add a smaller oval inside to show Stitch’s lighter belly area. This part is essential for creating a full-body Stitch standing drawing.
Now for the fun part! Let’s keep going on our adventure of how to draw Stitch step by step by sketching his silly arms and hands.
Step 5. Add Arms and Hands 🤲
Draw two arms coming down from his body. Make the arms short and curvy, ending in big hands with claw-like fingers. Each hand should have three visible fingers. Be playful, this part adds personality to your cartoon Stitch drawing!
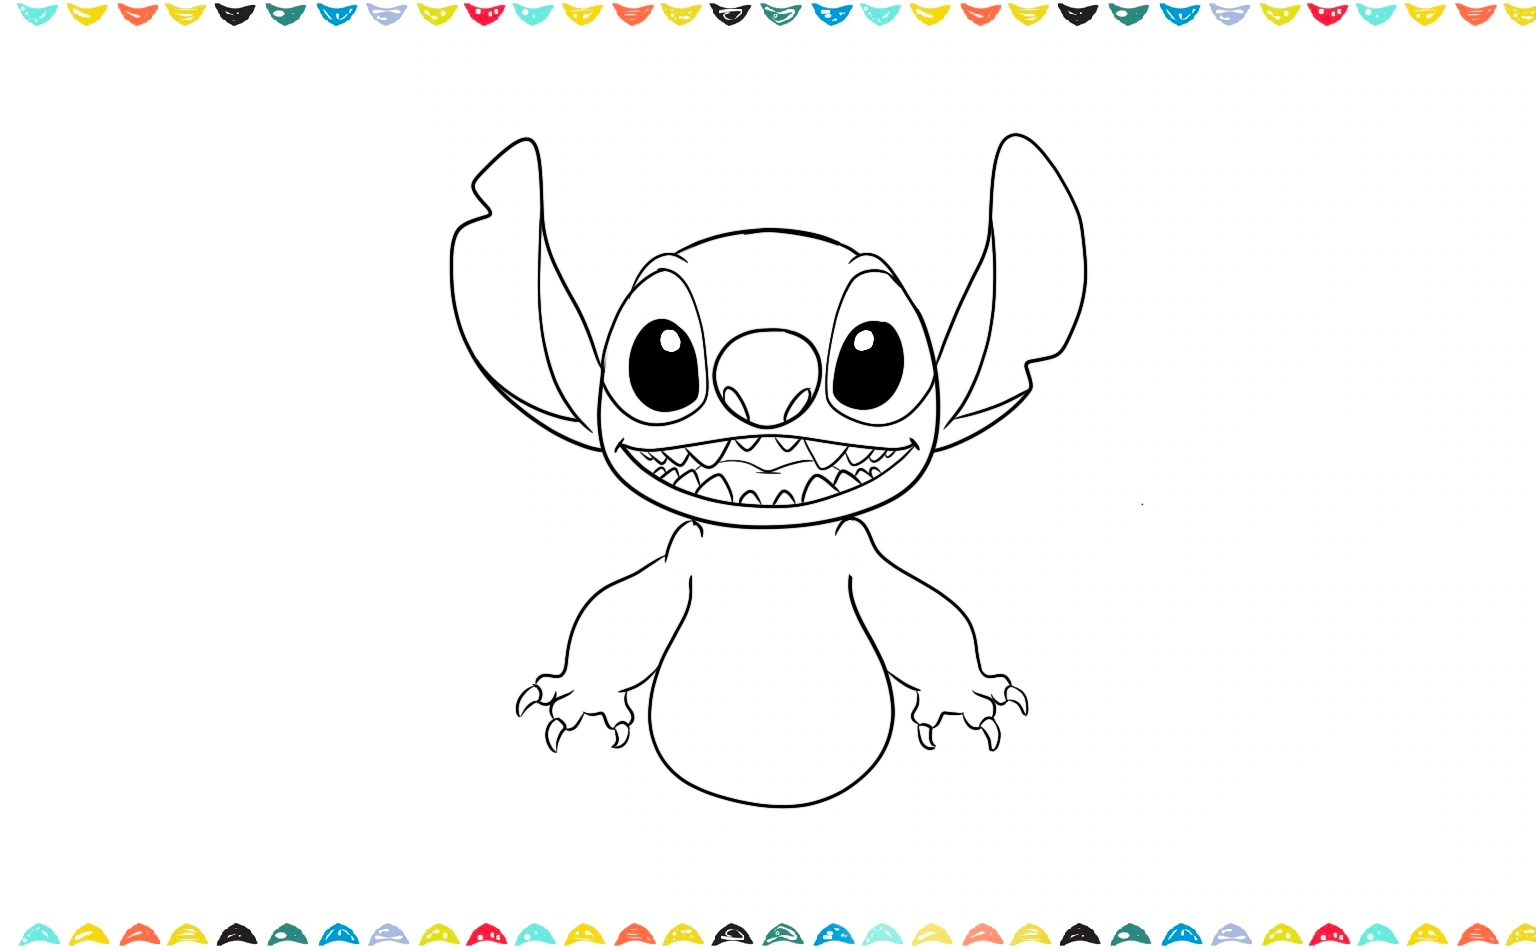
Step 6. Draw the Legs and Toes 🐾
Finish your drawing Stitch full body by adding short legs and big feet. Draw three stubby toes on each foot and add tiny claws. Stitch should look like he’s standing proudly and ready for adventure! Add final details like tummy lines and shading.
This is the magical moment that brings all your hard work together and makes your Stitch drawing look whole! It’s an important part of our quest to learn how to draw Stitch step by step.
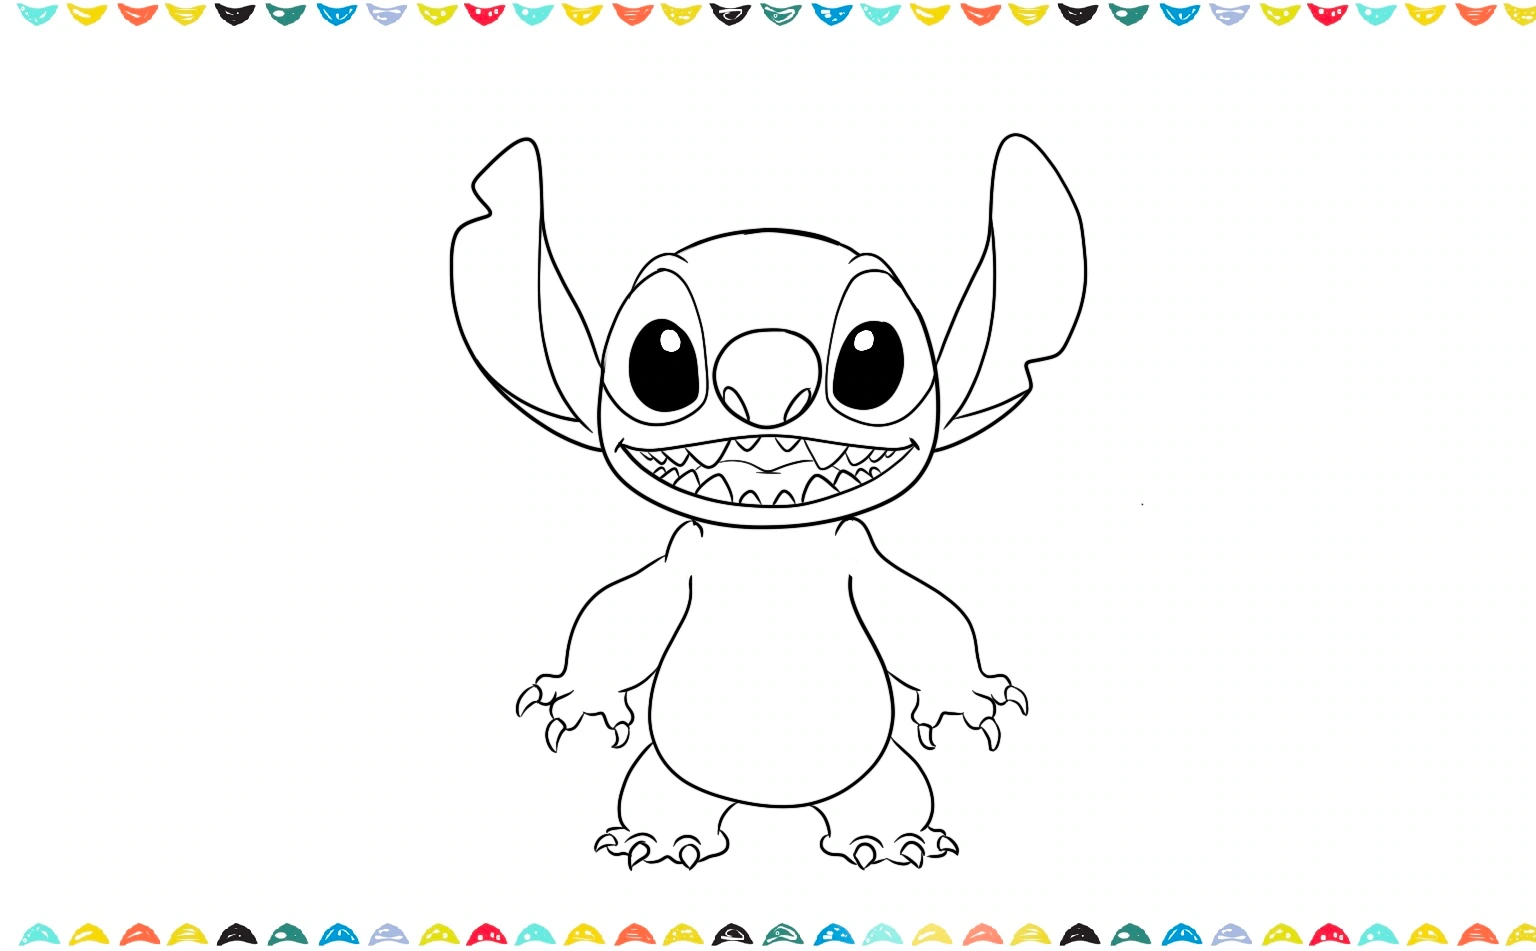
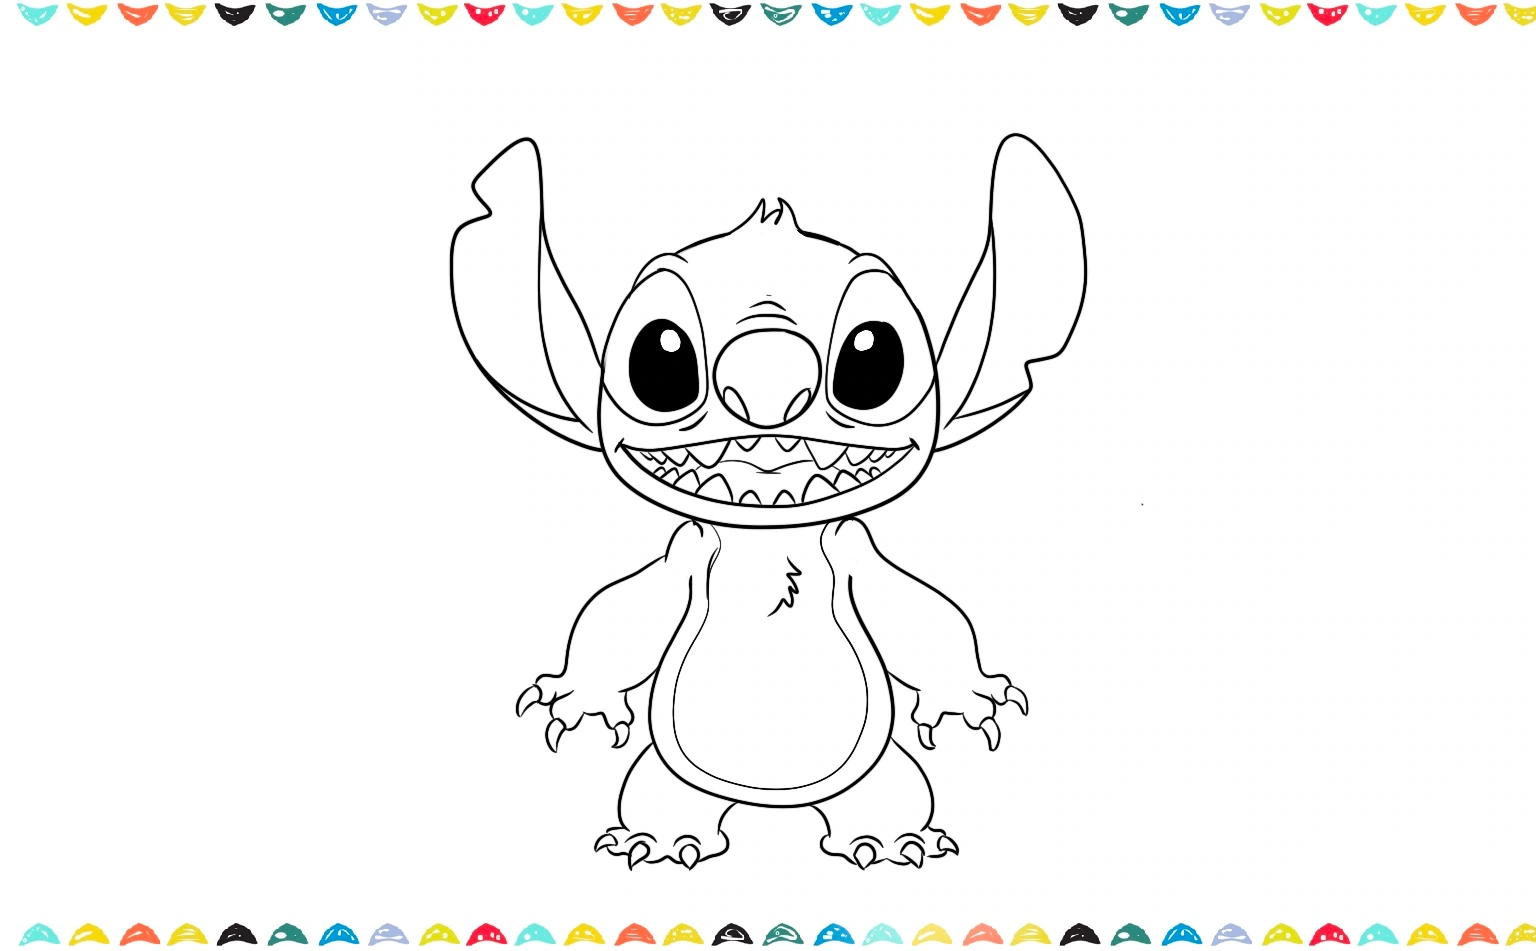
Step 7. Add the Belly and Chest Details 💙
Draw a long oval in the middle of the body for Stitch’s light blue belly. Then, add a few short curved lines under the chin to define his neck area. You can also sketch two small symmetrical fur spikes at the top of the chest. These small features give Stitch more character and match his original design.
Step 6. Outline and Color Your Drawing 🎨
Now it’s time to outline your entire sketch using a black pen or marker. Carefully trace all the lines, then erase any pencil marks. Color Stitch’s body with dark blue, his belly and chest with light blue, and the insides of his ears with purple-pink.
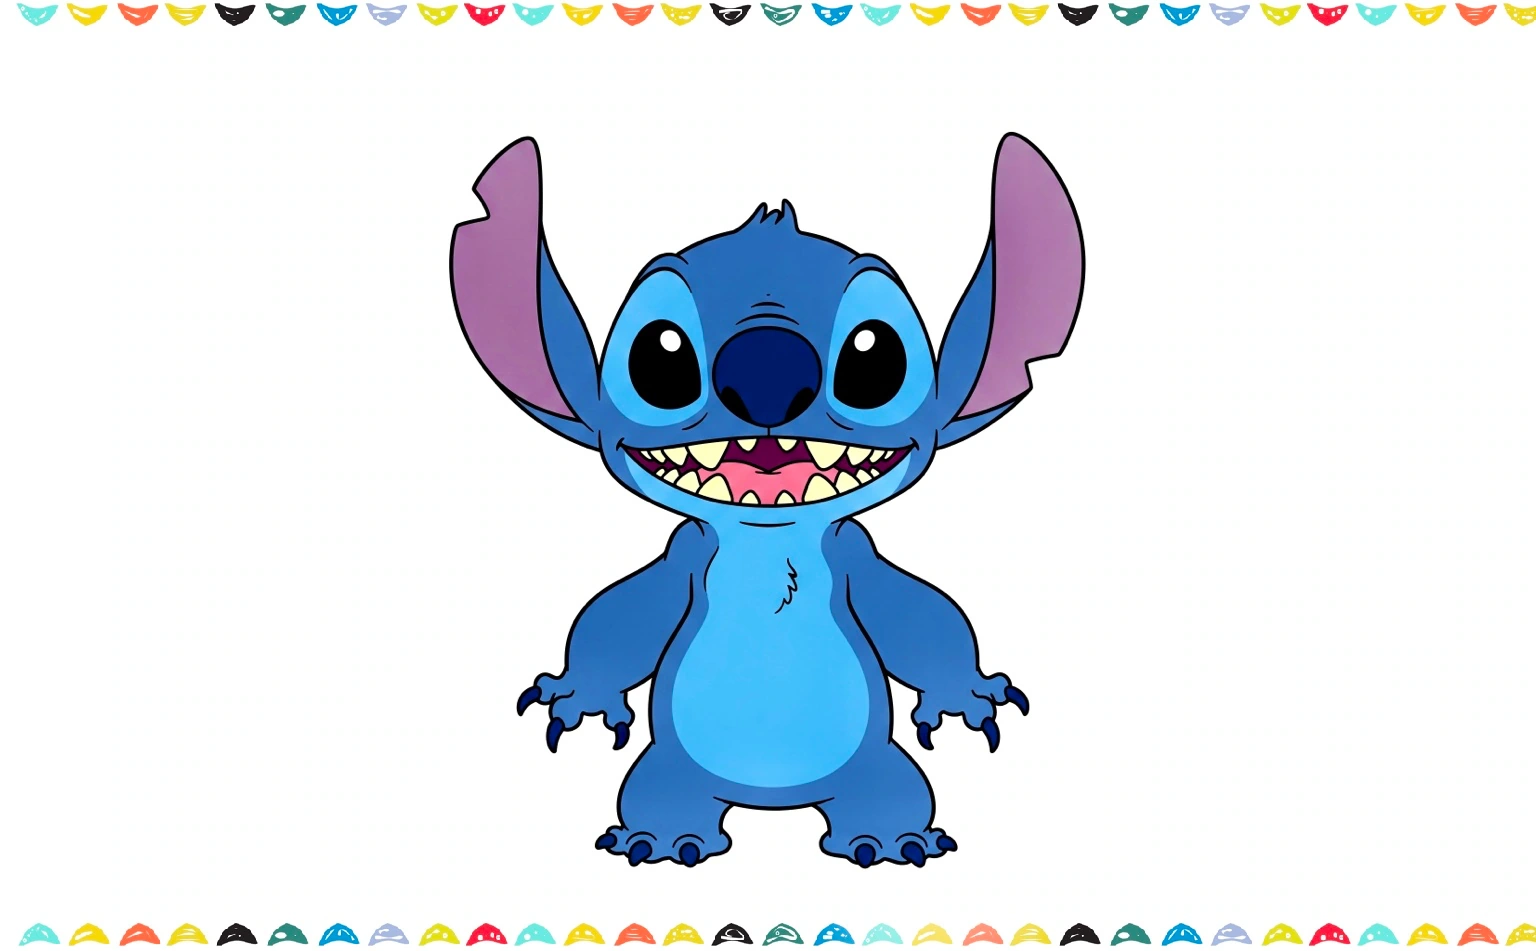
His eyes should be solid black with white highlights, and his claws should be a dark navy tone. That’s it, your Stitch drawing is complete!
Congratulations! You just learned how to draw Stitch step by step! 🎉 If you like this tutorial you may also like our step by step drawing tutorials about How to Draw Labubu or How to Draw Kuromi.
Explore More Lilo and Stitch Characters Drawings!
You finished learning how to draw Stitch step by step and are you ready to draw more of your favorite characters from the Lilo and Stitch universe?
Whether you’re a fan of the mischievous Stitch, Angel, and Lilo our tutorials will guide you through every step. Click on the links below to discover how you can bring these beloved characters to life on your own! Our step-by-step drawing guides are perfect for fans of all ages and skill levels, ensuring a fun and rewarding art experience.

Learn how to draw Stitch step-by-step easily! 🌺✨ Fun, simple tutorial for kids to create their own adorable Stitch drawings.

Discover how to draw Angel from Lilo and Stitch step by step! 🌸 Fun, simple drawing guide perfect for kids to create adorable Angel

Want to learn how to draw Lilo? This step-by-step guide is perfect for kids and beginners! Draw, color, and smile with your favorite Hawaiian girl!
Fun Facts About Stitch 🌟
Before you finish learning how to draw Stitch step by step, here are some fun facts that make this little blue alien even more exciting to sketch:
- Experiment 626: Stitch’s real name is Experiment 626, created by Dr. Jumba to be mischievous and strong. That’s why he looks so unique compared to other Disney characters.
- Loves Music: Stitch is a huge fan of Elvis Presley’s songs. In the movie, he even learns to play the guitar, which makes him extra fun to draw in different poses. 🎸
- Family First: One of Stitch’s most famous quotes is “Ohana means family.” This sweet reminder makes him one of Disney’s most loved and meaningful characters.
- Big Ears & Wide Smile: His giant ears and cheeky grin are the two features that make him so fun for kids to draw. You’ll notice both stand out while practicing how to draw Stitch step by step.
- Disney Favorite: Even though Stitch first appeared in 2002, he quickly became one of Disney’s most popular characters worldwide, with toys, shows, and even theme park attractions.
These fun facts not only make Stitch more lovable but also give you extra inspiration while sketching his standing pose. Want to learn more about Stitch, click for All About Stitch.
Free Printable Worksheet for Stitch Drawing

Make learning to draw even more fun with our free printable worksheet! This 5-page worksheet is the perfect companion to the tutorial above and includes everything need to practice:
- 🎨 Step-by-step drawing instructions to follow easily
- 📦 A blank drawing box to try it by yourself
- 🧩 A grid drawing exercise for better proportion and accuracy
- 🖍️ A coloring page to finish with creative flair!
It’s a great tool for home practice, classroom activities, or just a fun art break. Click below to download, print, and start drawing!
FAQ – How to Draw Stitch Step by Step ❓
Q1: How to draw Stitch step by step for beginners?
A: Start by drawing the head, ears, and face. Then add his body, arms, and legs in simple shapes. Use this easy drawing tutorial for clear instructions!
Q2: What materials do I need to draw Stitch?
A: You only need a pencil, an eraser, and some paper to get started. If you want to bring your Stitch drawing to life, you can also add markers, colored pencils, or crayons for bright blue shades.
Q3: Can I draw Stitch in other poses besides standing?
A: Yes! Once you finish this how to draw Stitch step by step guide, you can try sketching Stitch sitting, surfing, or even playing the guitar. Practicing different poses helps improve your drawing skills.
Q4: How do I sketch Stitch’s face?
A: Start with his large eyes and nose. Then draw the wide mouth with little sharp teeth. Use curves to make him look friendly!
Q5: How can kids make their Stitch drawing look unique?
A: Kids can add fun accessories like sunglasses, a Hawaiian shirt, or even Stitch holding a flower. Personal touches make your drawing creative and extra special.
Q6: Where can I find more tutorials like this one?
A: Check out our other anime and cartoon drawing tutorials in the menu. You’ll find more step-by-step lessons that are just as fun and beginner-friendly! 🎨✨
Conclusion: You Did It, Artist! 🎨
Awesome job, artist! 🖼️ You’ve just learned how to draw Stitch step by step in his fun, standing pose. From his giant ears to his stubby toes, your Stitch drawing is full of life and cuteness. 🥰 Whether this is your first drawing or part of your growing sketchbook, you should feel proud of your easy drawing tutorial success!
Drawing characters like Stitch helps you practice shapes, expressions, and proportions, all while having fun. Don’t forget to try other step-by-step drawing guides like animals, cupcakes, or other Disney characters.
👉 Wasn’t that so much fun? Now that you know how to draw Stitch step by step, why stop there? Your art adventure is just beginning! You can explore more of our awesome drawing tutorials such as How to Draw a Minion or How to Draw a Dragon – The Ultimate Step-by-Step Guide to create a whole collection of your favorite characters. Imagine putting them all together in one amazing scene.
Looking for creative inspiration? Check out our Pinterest page for some magical ideas!
Keep drawing and having fun with it, just like playing your favorite game every day! The more you draw, the better you’ll get, and you might even discover new ways to draw that you never knew before. Check out our blog post about Drawing Ideas for Beginners – 100 Easy and Fun Things to Draw for more inspiration about drawing.
Share Your Drawing With Us! 💯🎁
We’d love to see your amazing artwork! When you finish your drawing, send us a picture of it. Whether it’s your first try or your masterpiece, we’re excited to cheer you on. Your creativity could even be featured on our site – so grab your crayons and show us what you’ve made! 🎉🖍️
Looking for more step-by-step drawing tutorials? Visit the A-Z Drawing Tutorials Index to browse all lessons, organized alphabetically.