Introduction
How to draw a polar bear is a fun and educational art project for kids, beginners, and anyone who loves Arctic animals! 🐻❄ With its fluffy white fur, small round ears, and powerful build, the polar bear is one of the most fascinating creatures to draw. In this easy step-by-step polar bear drawing tutorial, you’ll learn how to create a cute or realistic polar bear using simple shapes and clear instructions. Whether you’re working on a school art project, an animal-themed craft, or just want to practice your drawing skills, this guide will make the process simple and enjoyable.
We’ll begin how to draw a polar bear project by sketching the basic body outline, then add the head, ears, legs, and facial features. You’ll also get tips on drawing fur texture, shading for depth, and coloring your polar bear so it looks fluffy and full of life. While polar bears are usually white, you can have fun experimenting with light blues, greys, or even pastel shades for a creative twist.
Grab your pencils and let’s start drawing one of the most majestic animals of the Arctic! ✏️❄️
Table of Contents
🎨 Materials Needed
Before we start our step-by-step drawing, let’s make sure you have everything you need! You don’t need anything fancy, just a few basic tools to bring your drawing to life:
✅ Paper or Sketchbook – A blank page for your drawing. 📄
✅ Pencils (HB or 2B) – Light pencils help with outlining the drawing. ✏️
✅ Eraser – To fix mistakes while sketching. 🔄
✅ Black Marker or Fine Liner – For outlining and defining clearly. ✍️
✅ Colored Pencils – To color your drawing.
Now, let’s learn how to draw a polar bear step by step…
How to Draw a Polar Bear in Two Options
We’ve got TWO different options for you today! Take a look at both and pick your favorite. Just follow our simple steps, and you’ll learn how to draw a polar bear step by step.
Would you rather to draw first cute polar bear or polar bear on iceberg.

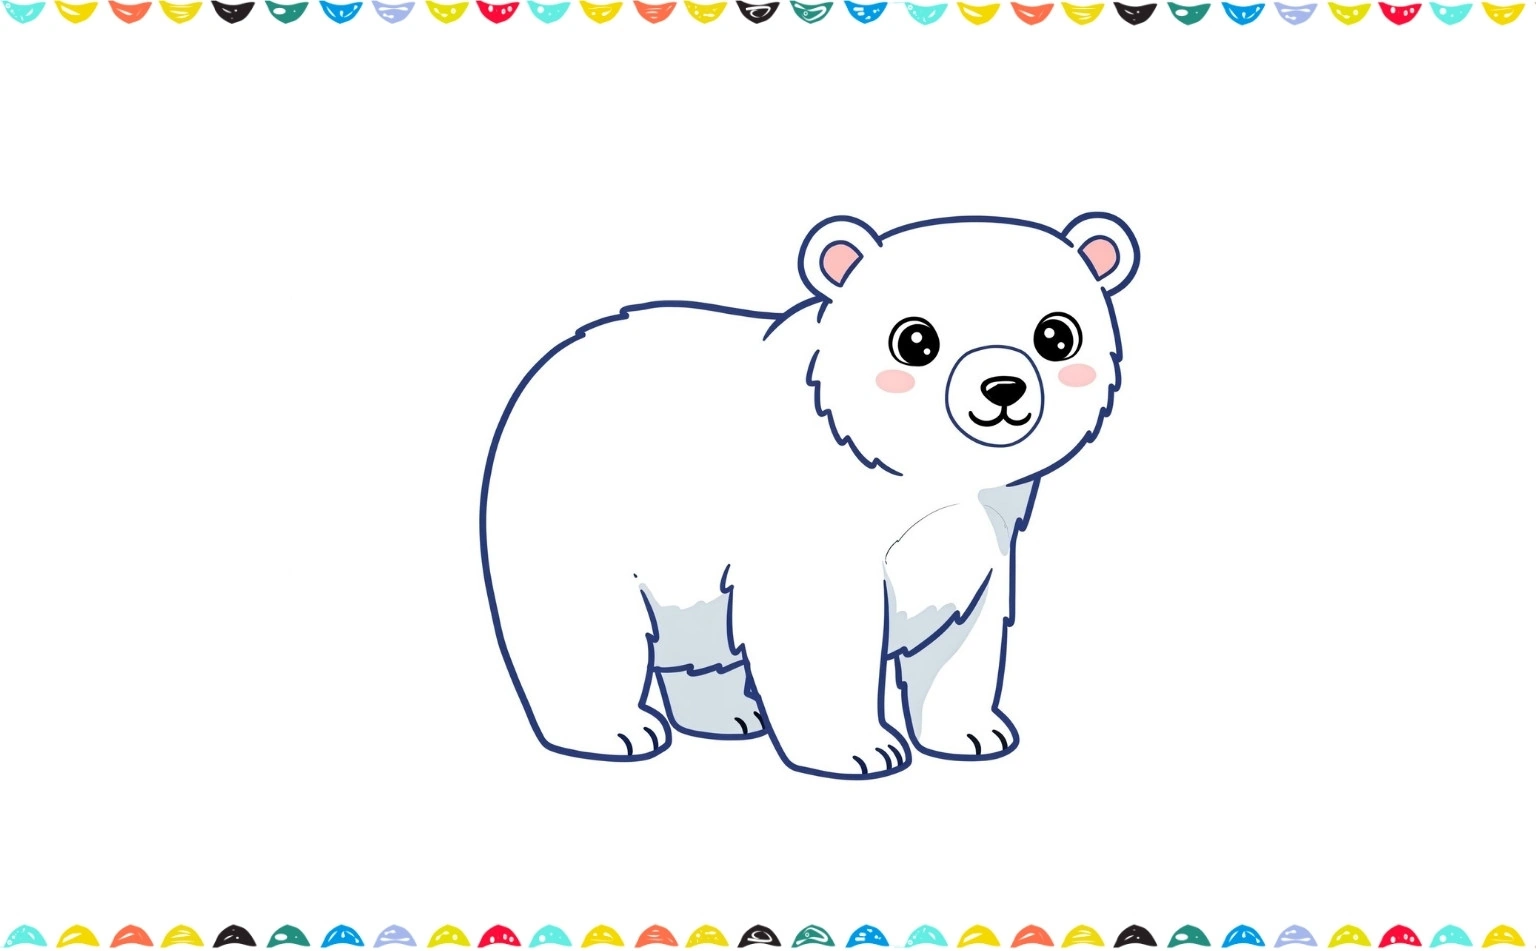
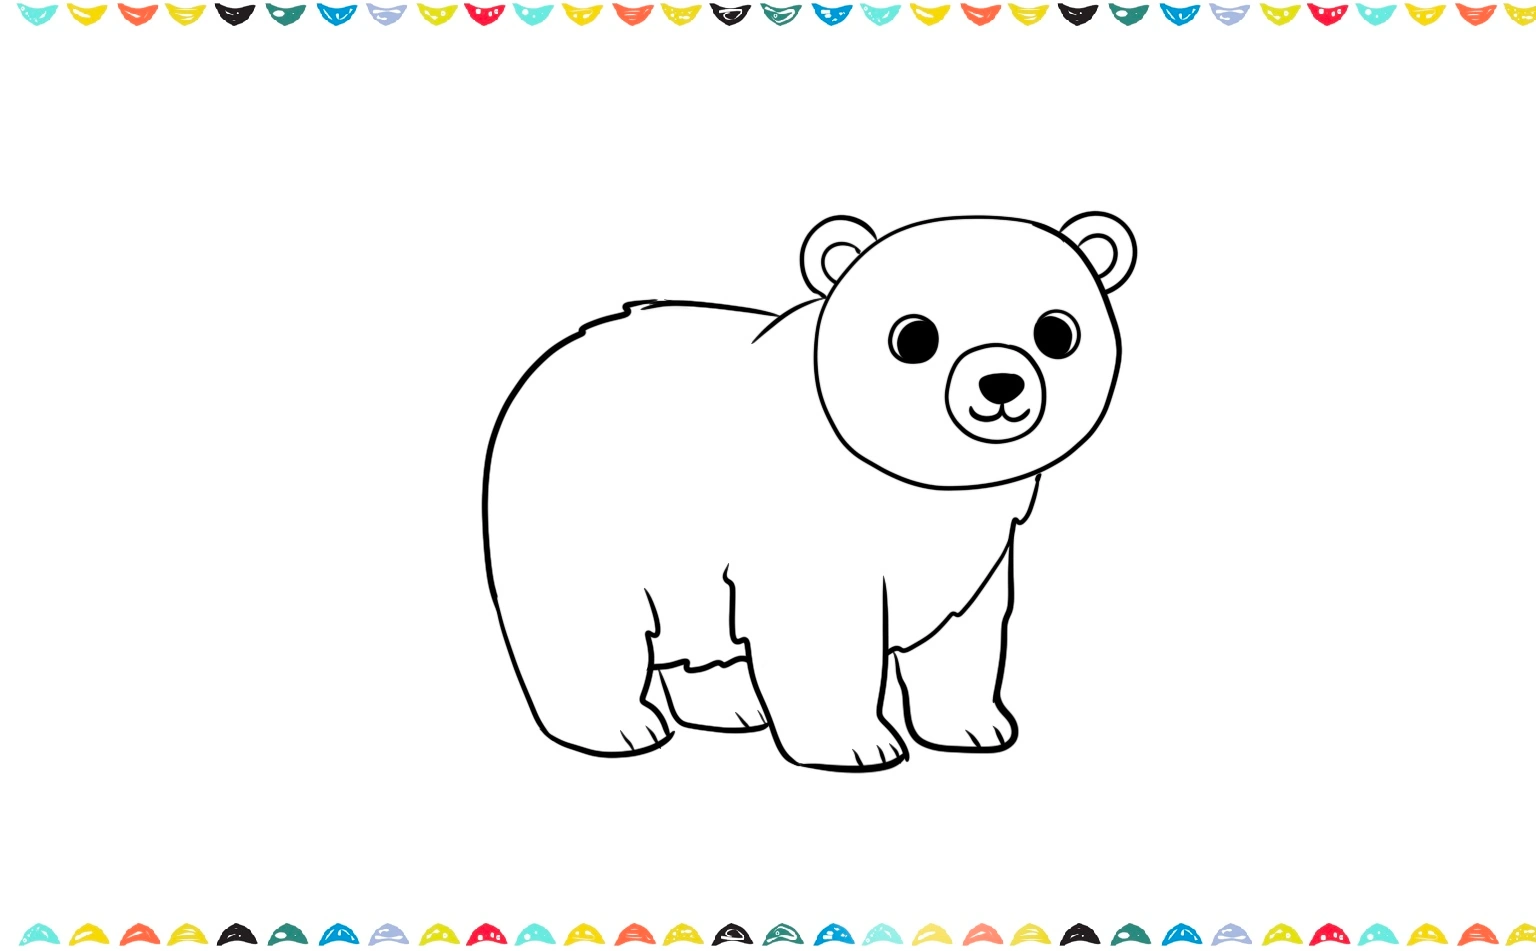
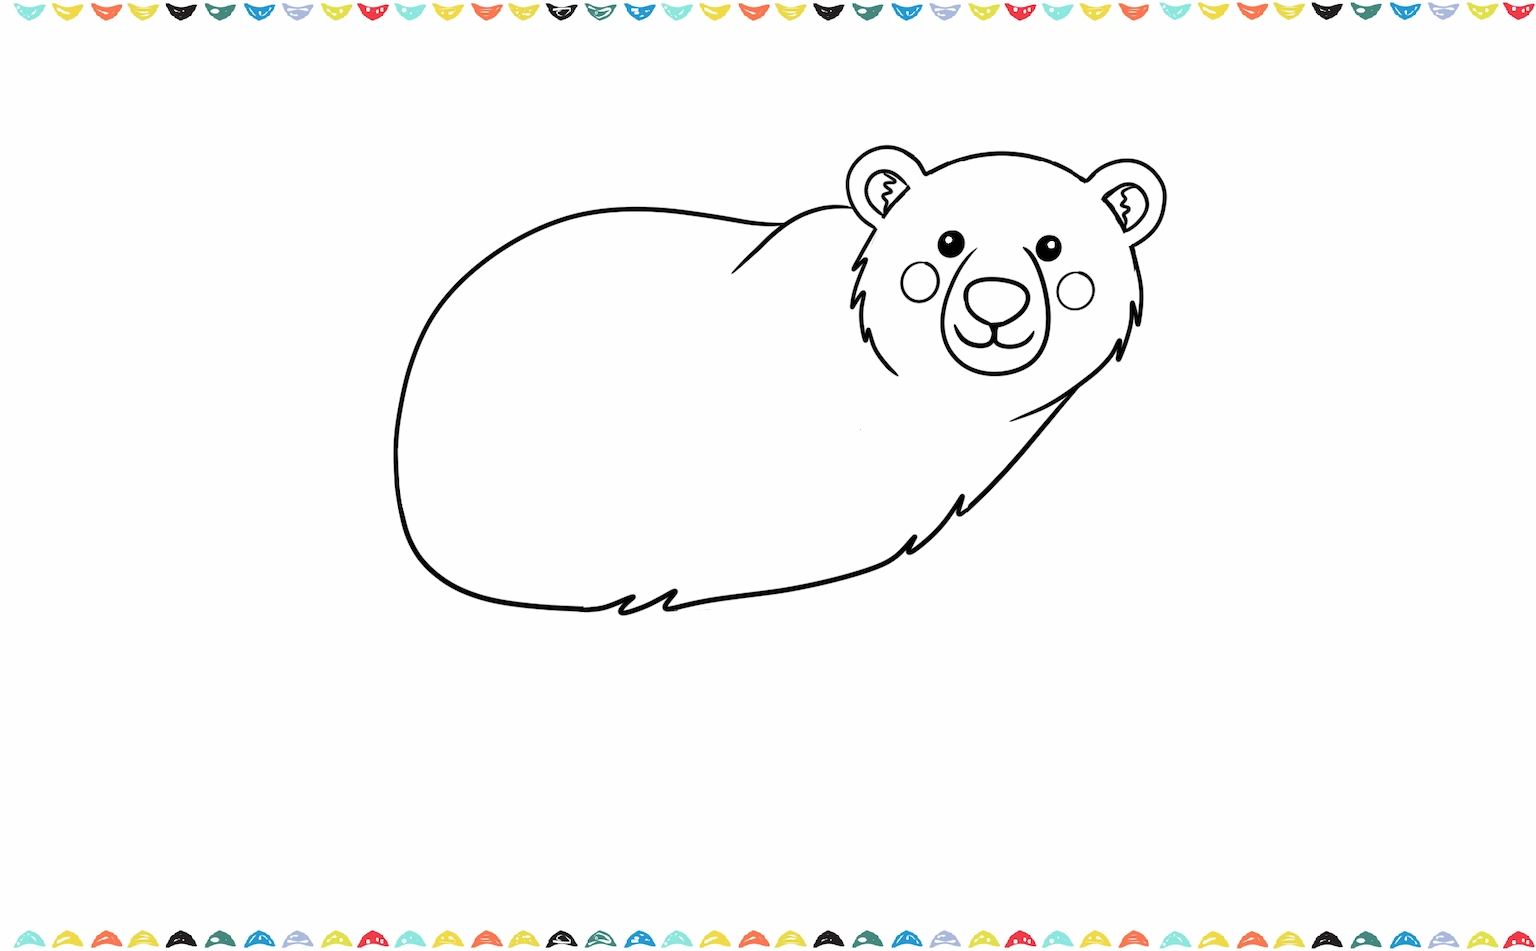
How to Draw a Polar Bear
Polar bears live in the icy Arctic and are known for their thick white fur and strong swimming skills. Learning how to draw a polar bear is a great way for kids to practice drawing big shapes and soft features.
Ready to go on a snowy adventure? Let’s grab our pencils and start our guide on how to draw a polar bear! We’ll have a blast bringing this big, fluffy, white animal to life on our paper, one step at a time.
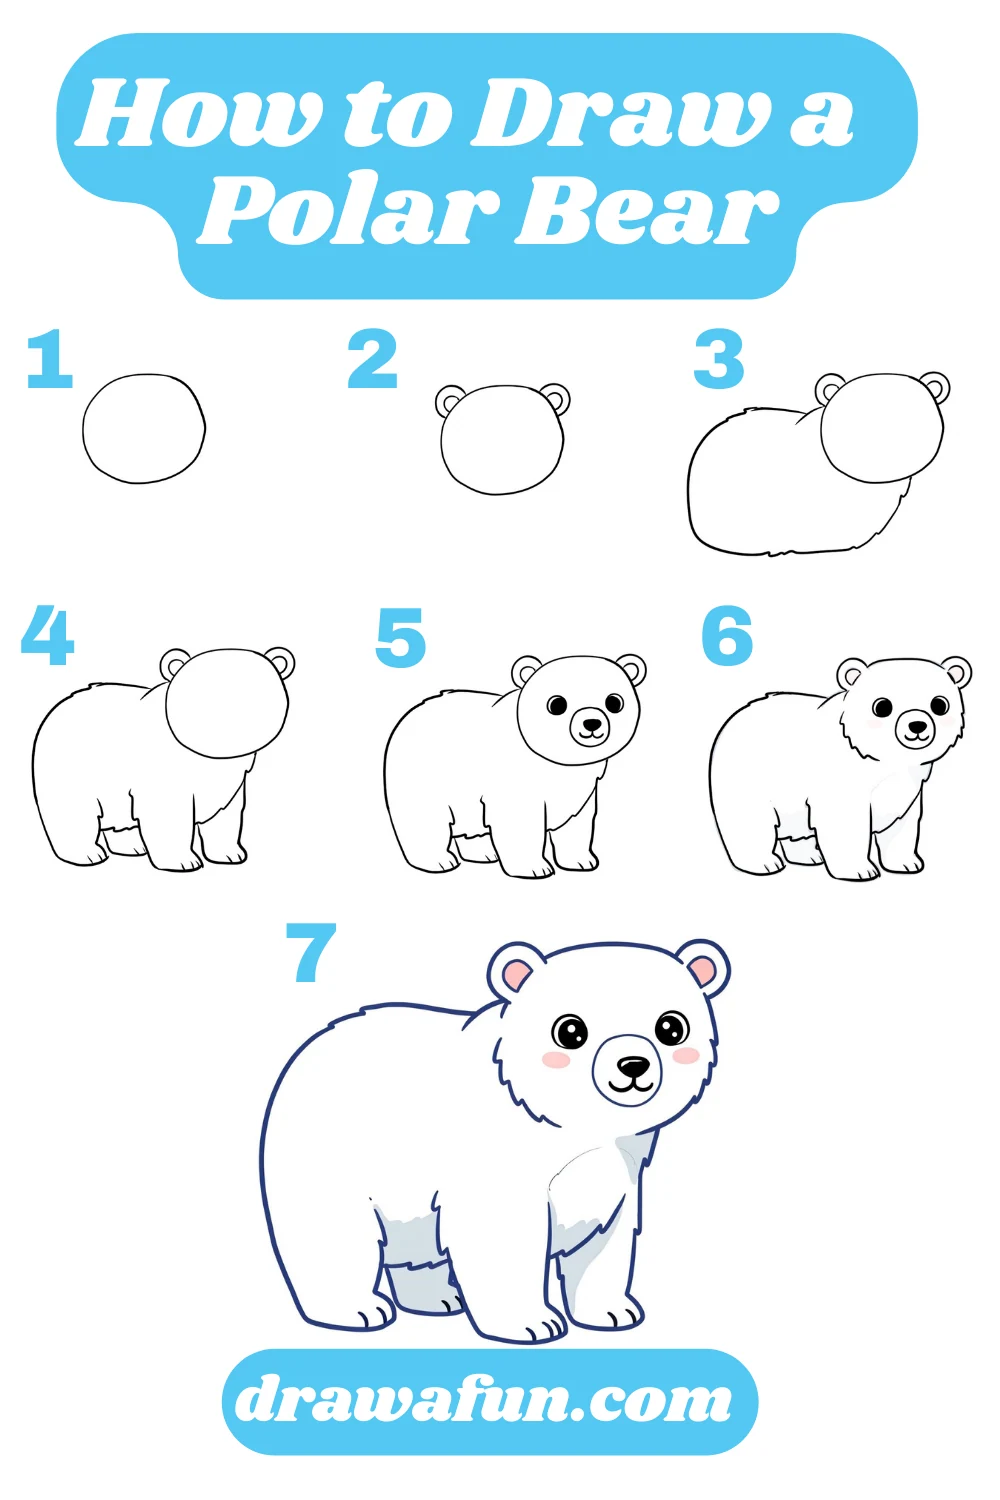
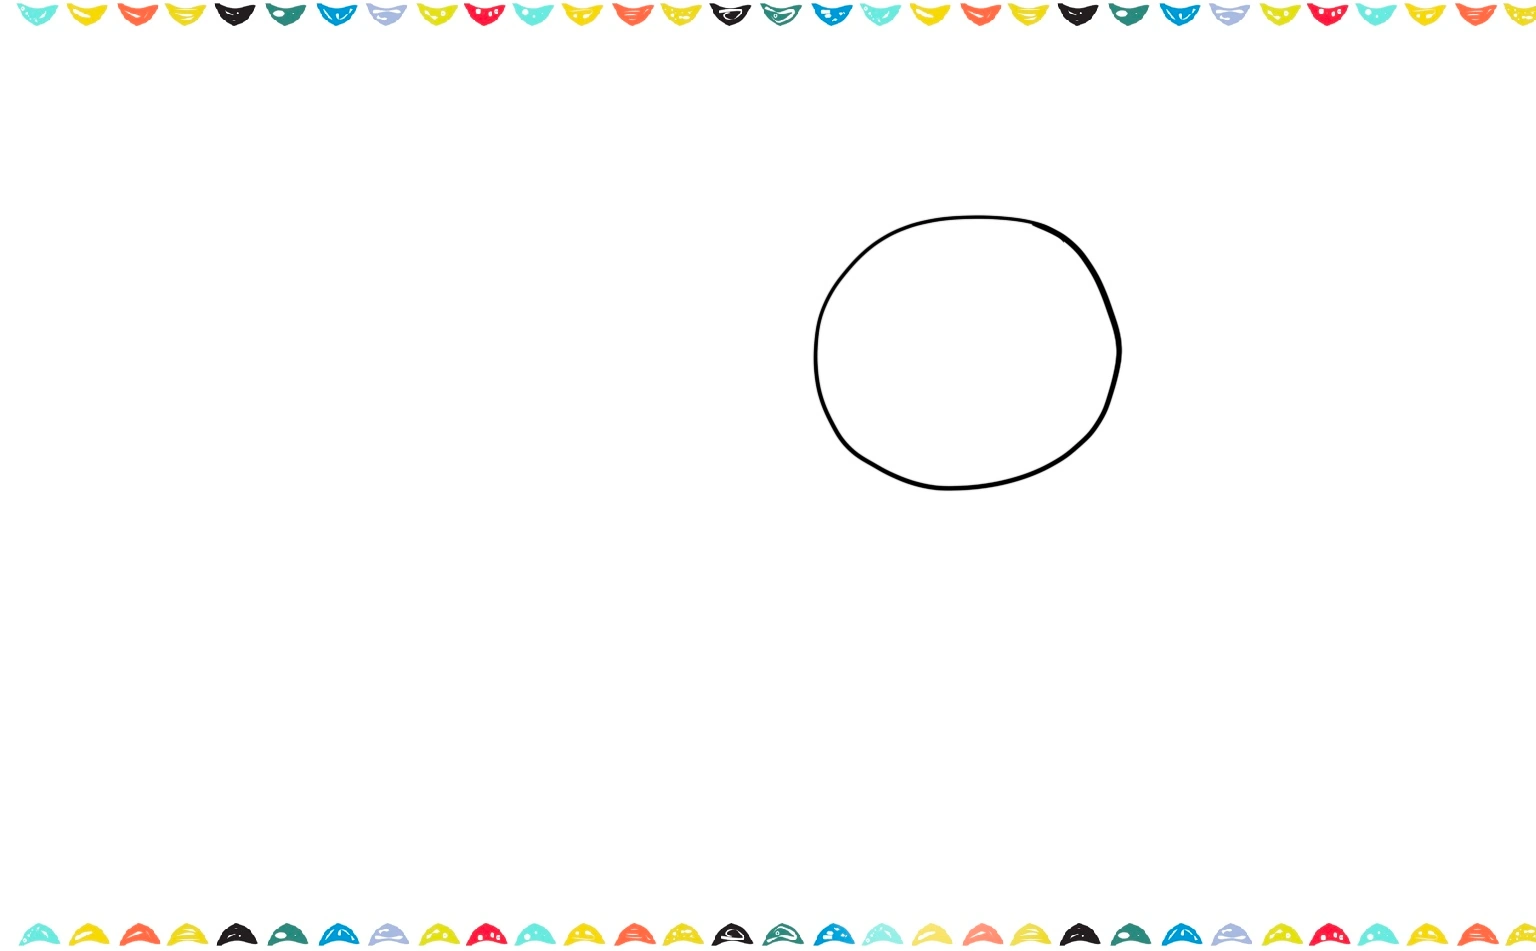
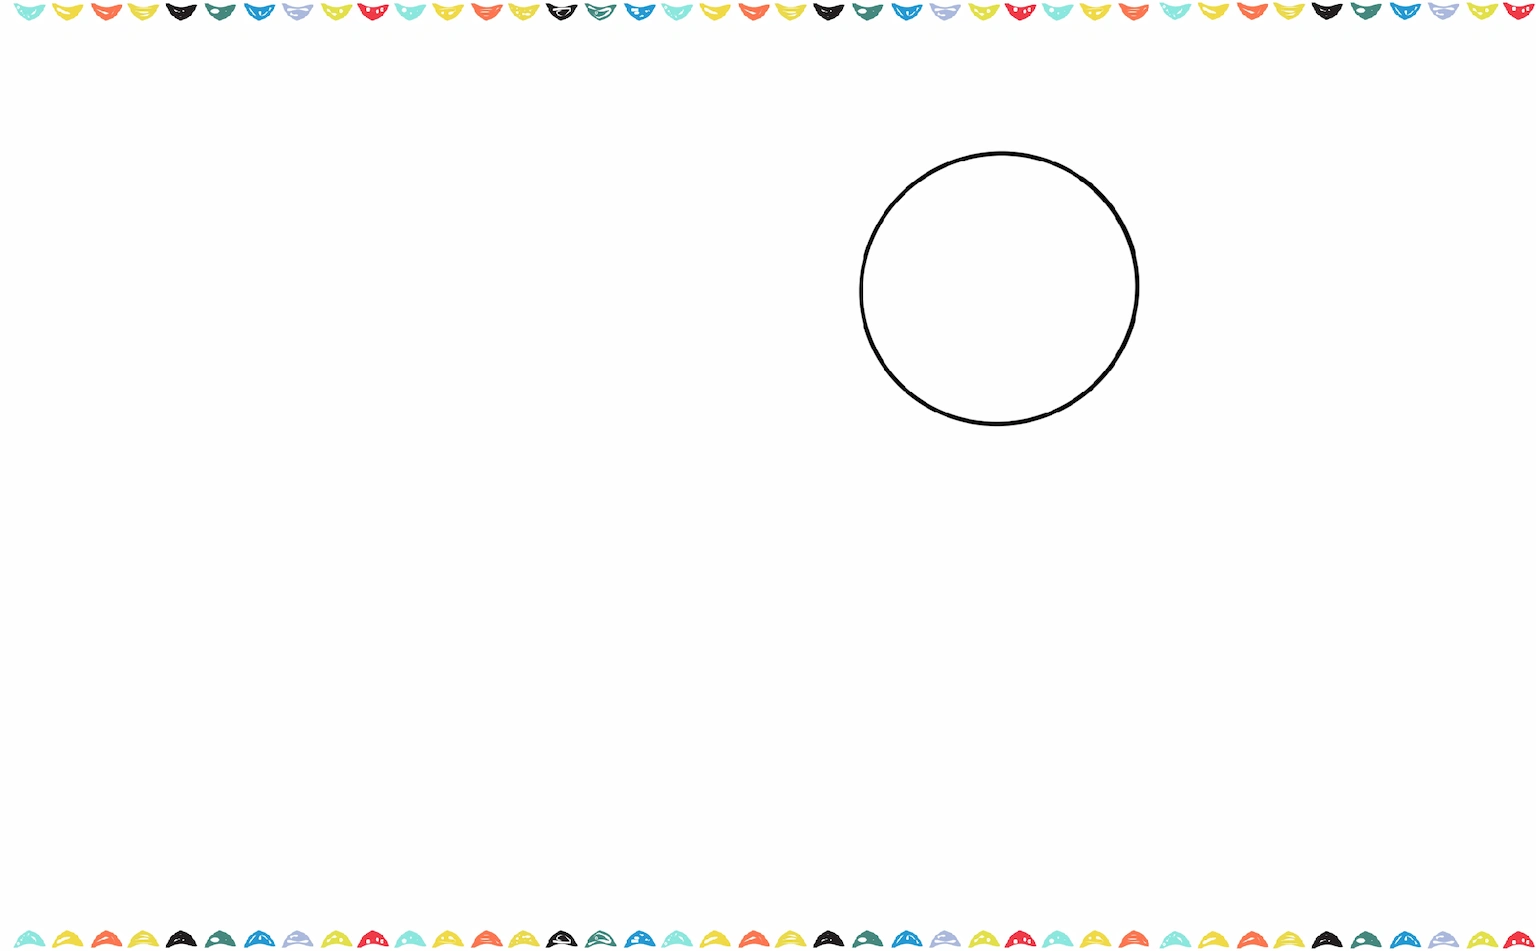
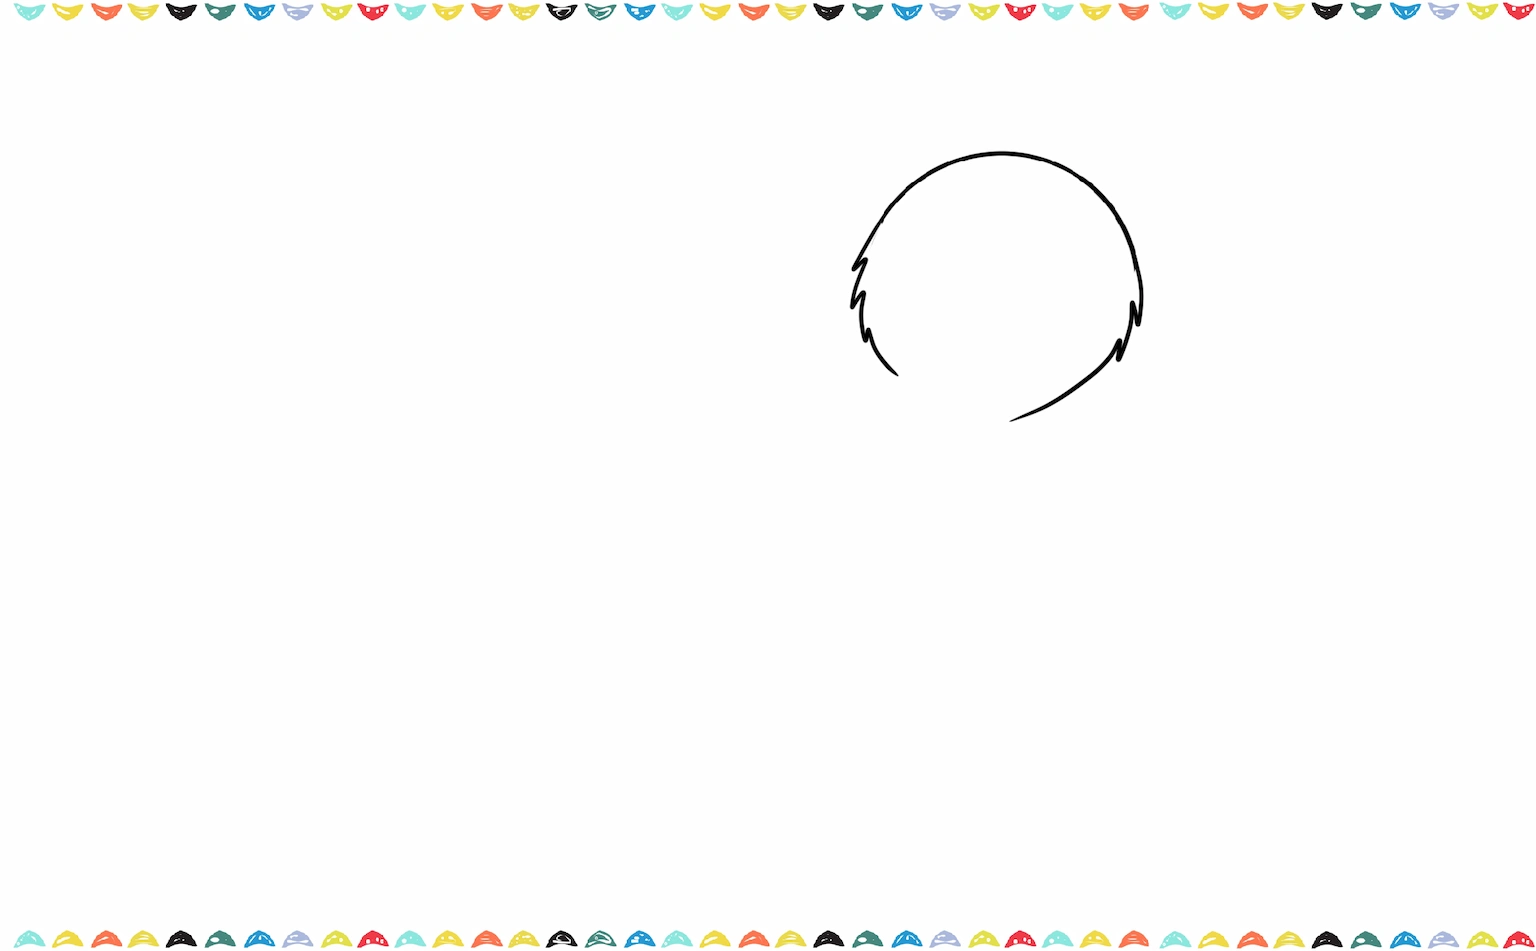
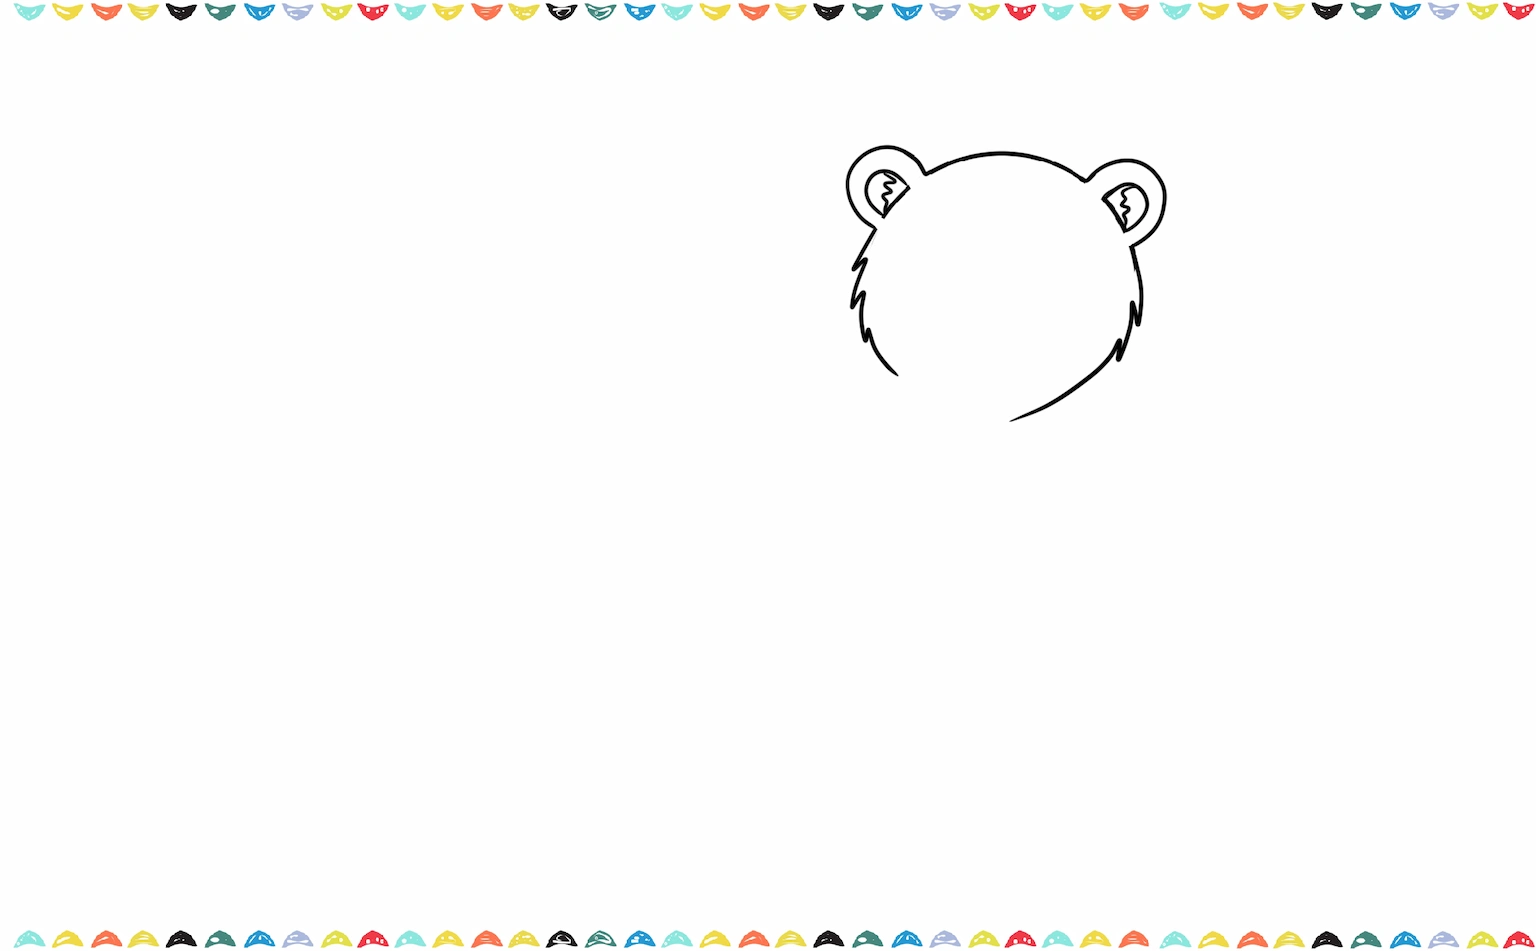
Step 1: Draw the Head of Polar Bear
1️⃣ Ready to get started on how to draw a polar bear? For our very first step, let’s draw a medium-sized oval at the top of your paper. This simple shape will be the big, strong head for our fluffy new friend!
2️⃣ To make your polar bear even cuter, let’s add two small circles on top of its head. Those will be its little ears!
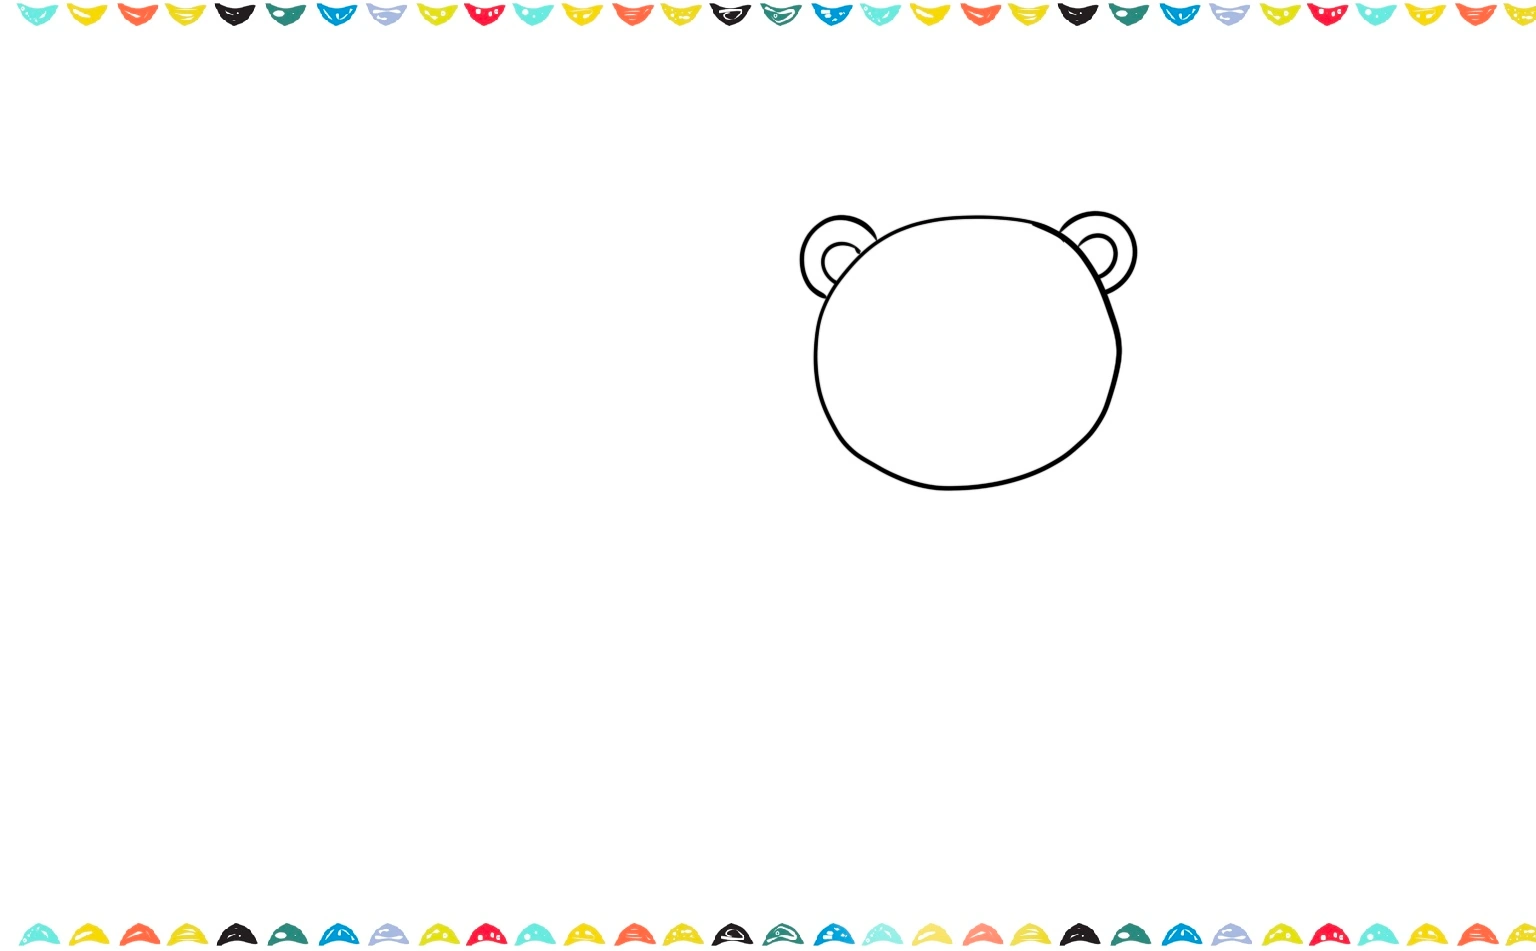
3️⃣ Now that we have the ears, let’s make our polar bear even fluffier! Inside each ear, draw smaller curved shapes. These little curves will look like soft fluff and make our polar bear look cozy and warm.
4️⃣ Ready for the next step? Let’s keep learning how to draw a polar bear by sketching a body and other details
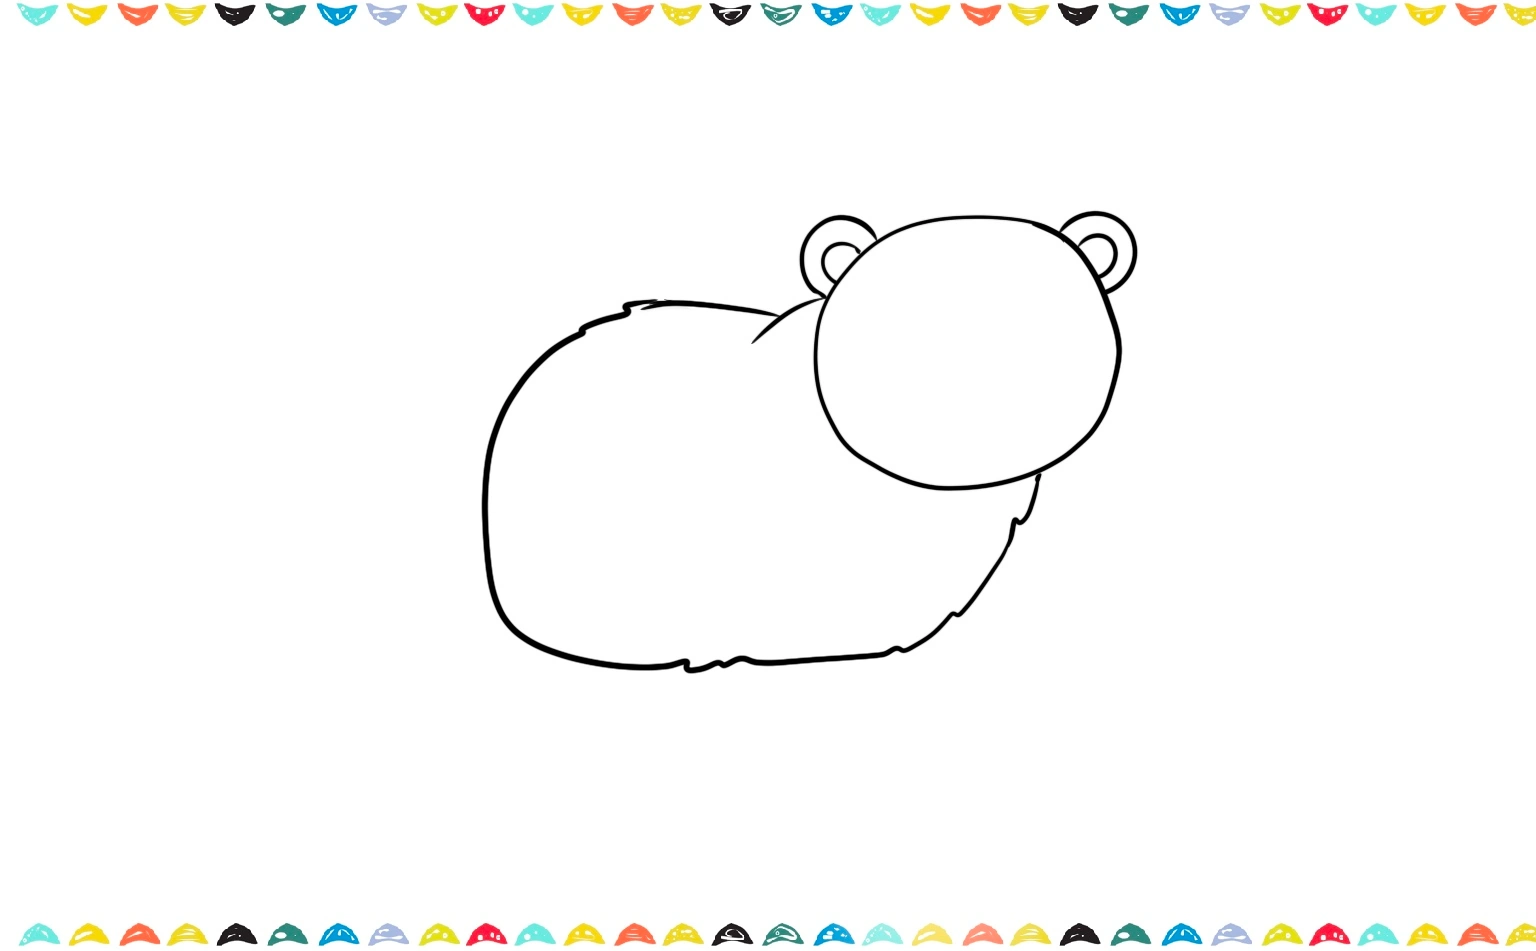
Step 2: Sketch the Body
1️⃣ Time to give our polar bear a big, round body! Right below the head we just drew, let’s make a large oval or a big, soft rectangle. This will be the main part of our polar bear’s body, ready for all that fluffy fur.
2️⃣ To draw your polar bear’s neck, connect its head and body with two short, curvy lines. This will make your polar bear drawing look strong and ready for the cold!
3️⃣ We’re doing such a great job! Let’s keep learning how to draw a polar bear by giving him strong legs and big, fluffy paws. This will help our polar bear stand up tall and look ready to play in the snow!
After learning how to draw a polar bear, you might also enjoy drawing other animals in our fun posts on How to Draw a Giraffe or How to Draw a Cow.
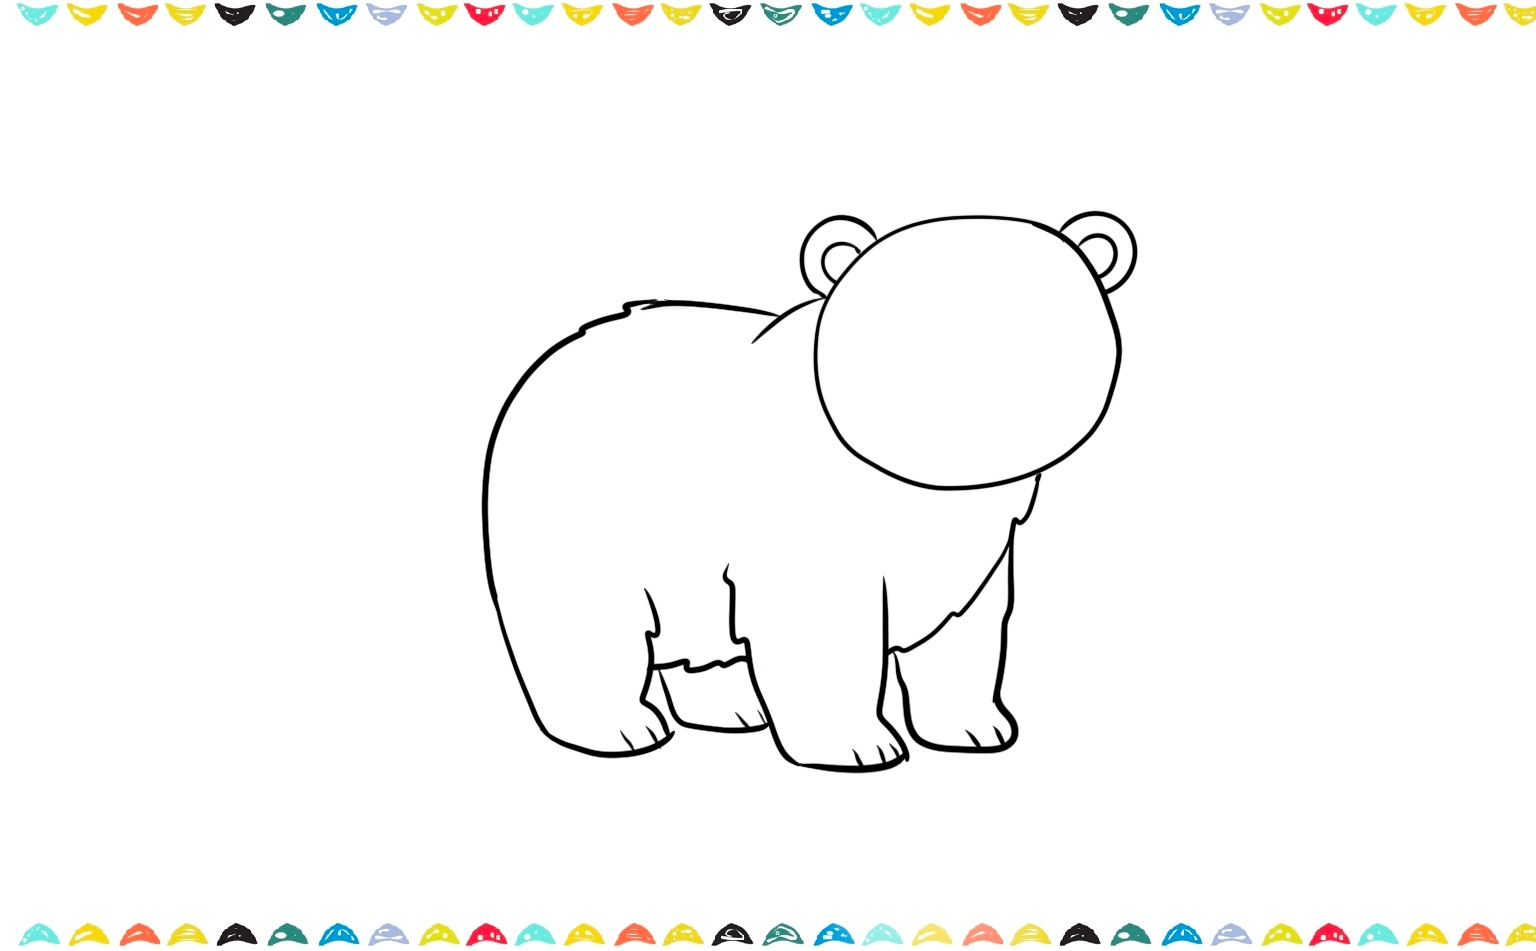
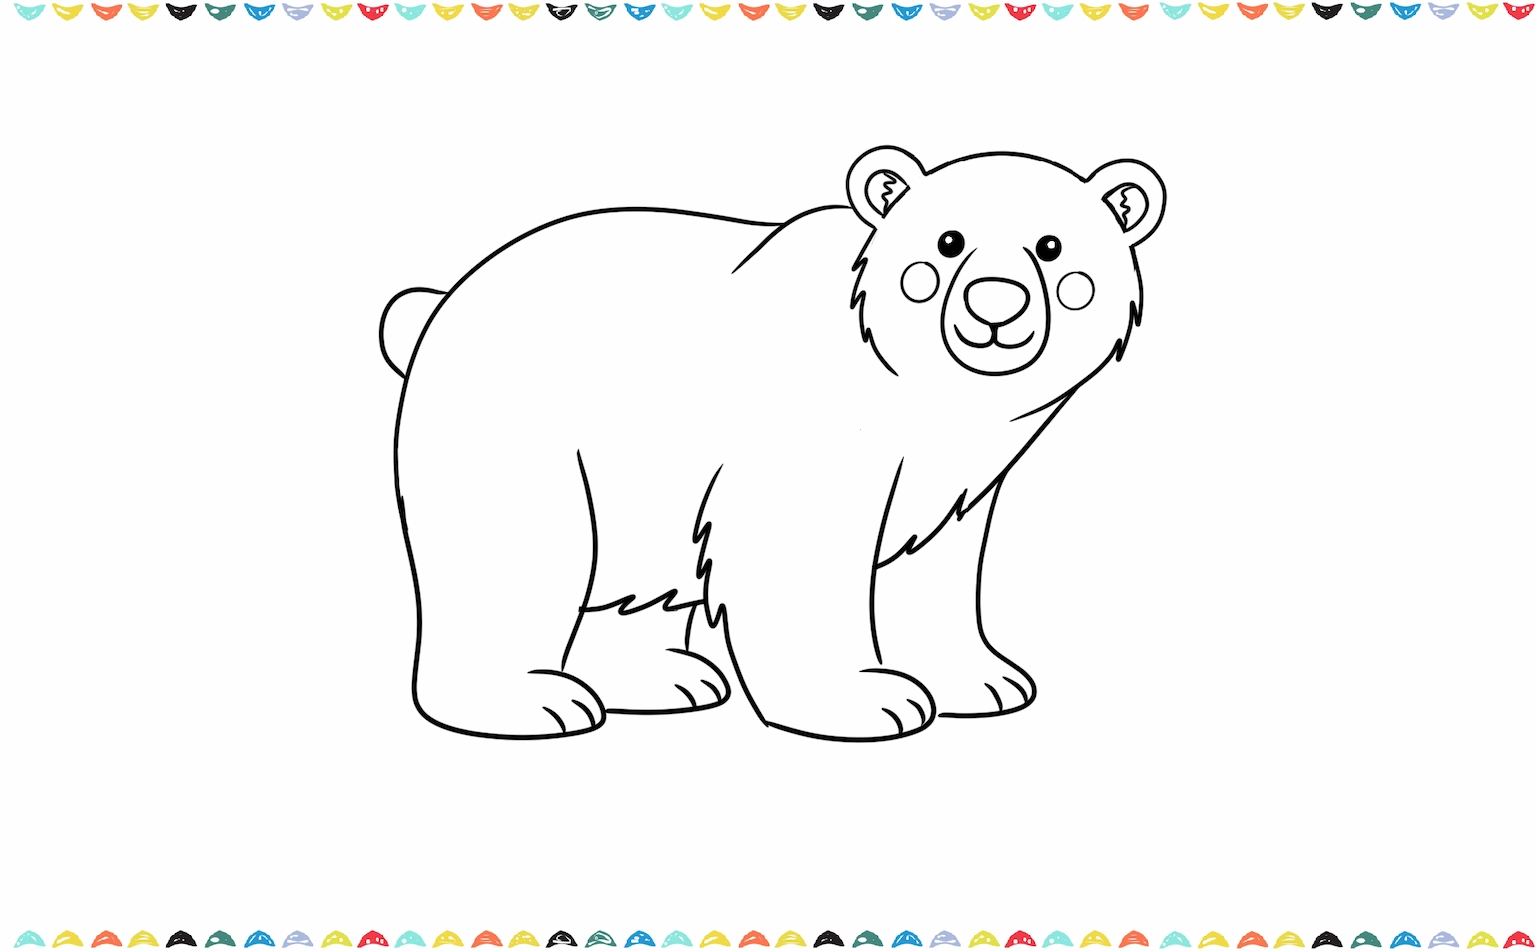
Step 3: Add the Legs and Paws
1️⃣ Now for the legs! Draw four long, curvy U shapes for your polar bear’s legs. Next, at the bottom of each leg, add a small oval or rounded shape for its cute paws. To make your polar bear drawing look extra realistic, you can add some tiny lines on the paws for claws, just like a real bear!
2️⃣ Ready to make your polar bear drawing look extra real and friendly? Let’s keep learning how to draw a polar bear, and we’ll add all the little details to its face! We’ll give it big, shiny eyes and a happy smile to bring it to life!
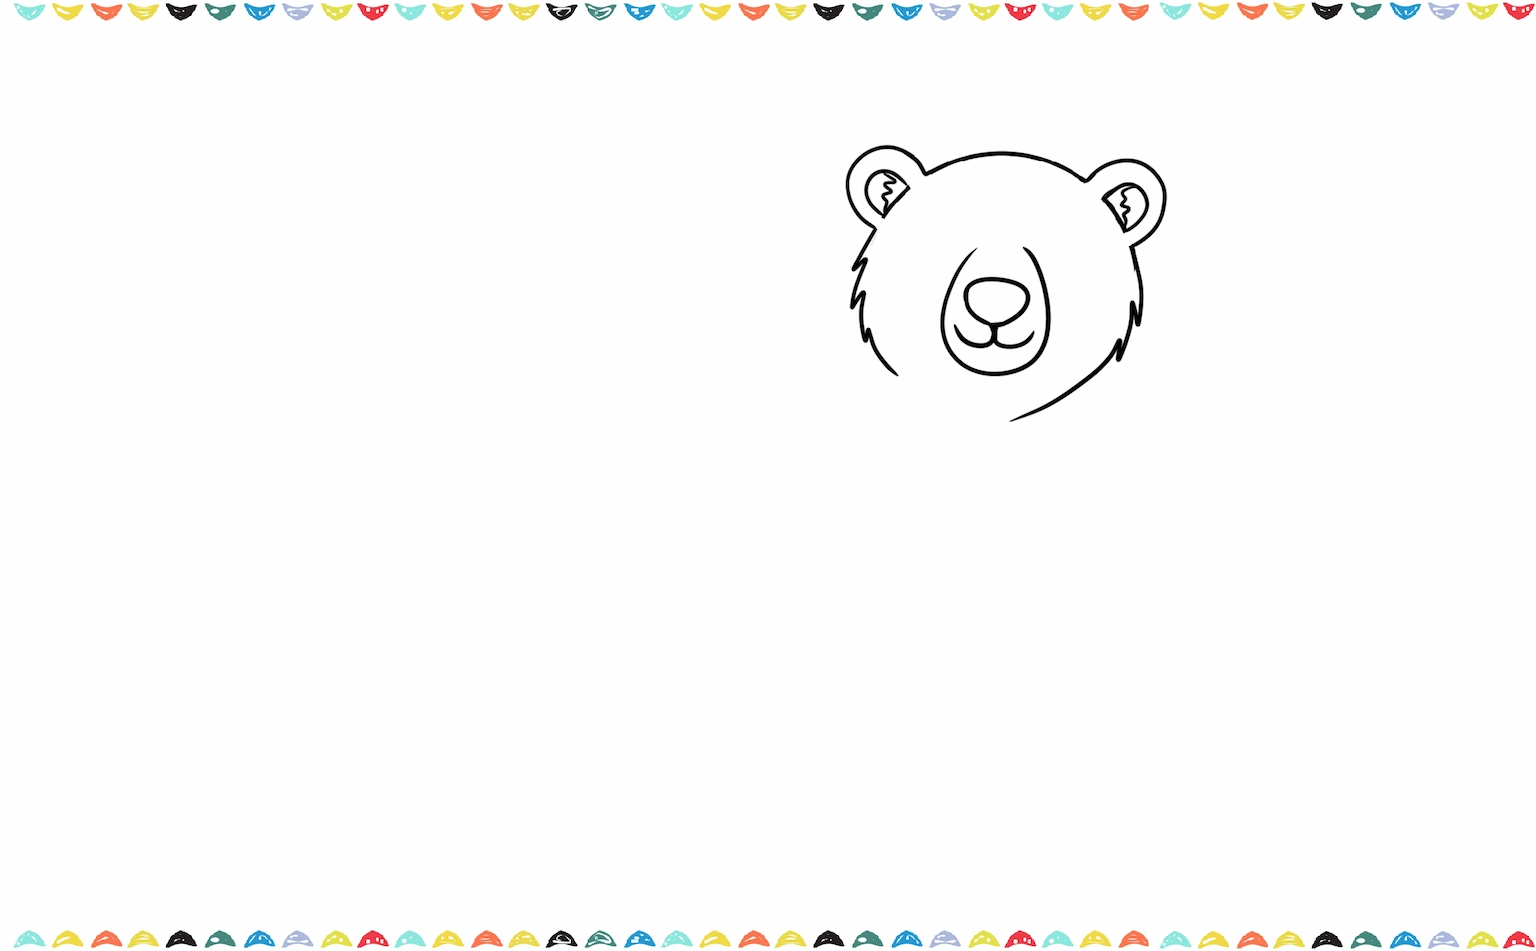
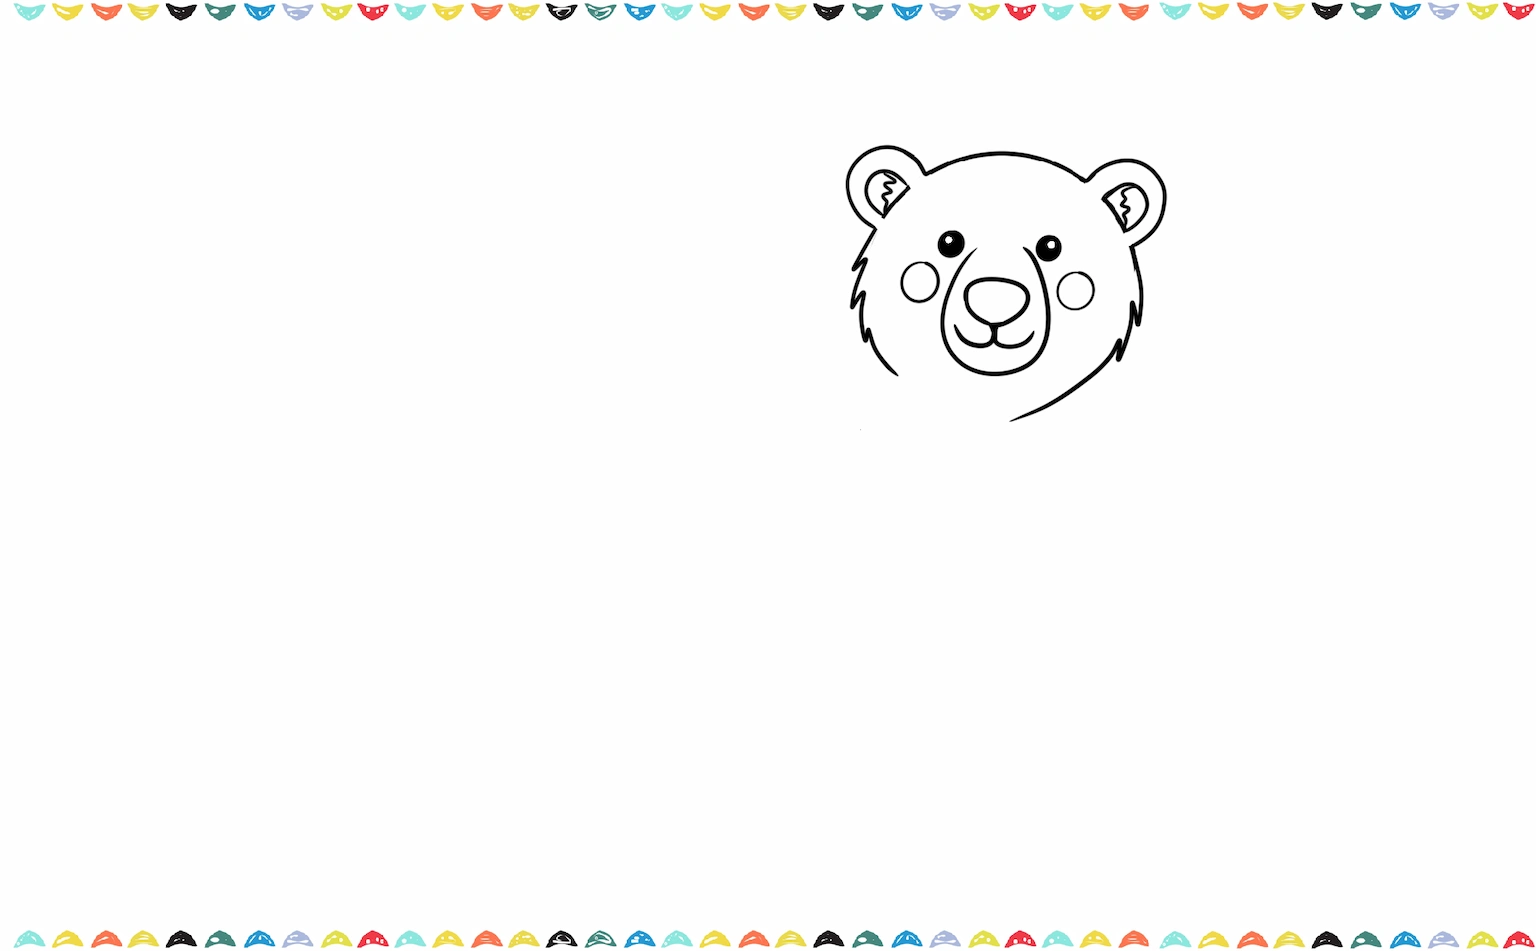
Step 4: Draw the Face and Ears
1️⃣ Now for the fun part: giving your polar bear a face! Look inside the head you just drew. First, let’s add two little dots for the eyes. Let’s add a new oval right below the eyes. This special oval is going to become the polar bear’s muzzle, which is the part where its nose and mouth go. This is how we give our big, fluffy bear a super friendly and happy face!
2️⃣ Then, right below the eyes, draw a small, rounded triangle for its cute button nose and sketch a cute mouth below the nose. These simple shapes will make your how to draw a polar bear project come to life!
3️⃣ Ready for the next step in our guide on how to draw a polar bear? It’s time to make your polar bear look extra warm and fluffy! Let’s add lots of small, quick lines all over its head and body. This fun step adds fur detail to your polar bear drawing, making it look super cozy and realistic.
4️⃣ As you work on the facial details, you’ll see that learning how to draw a polar bear is a creative and rewarding journey.
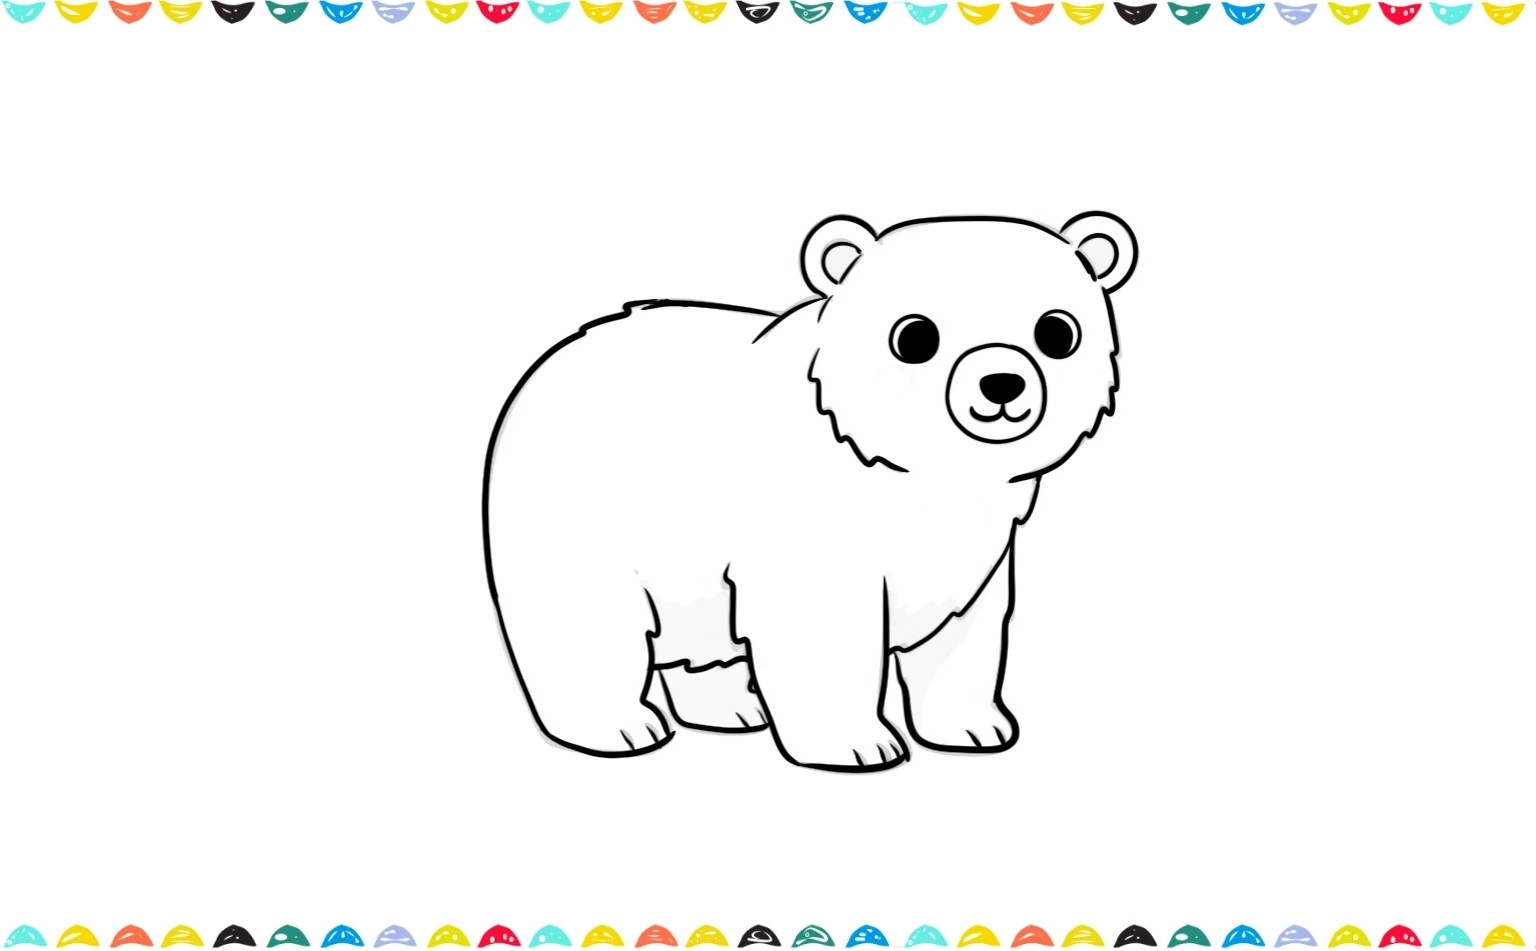
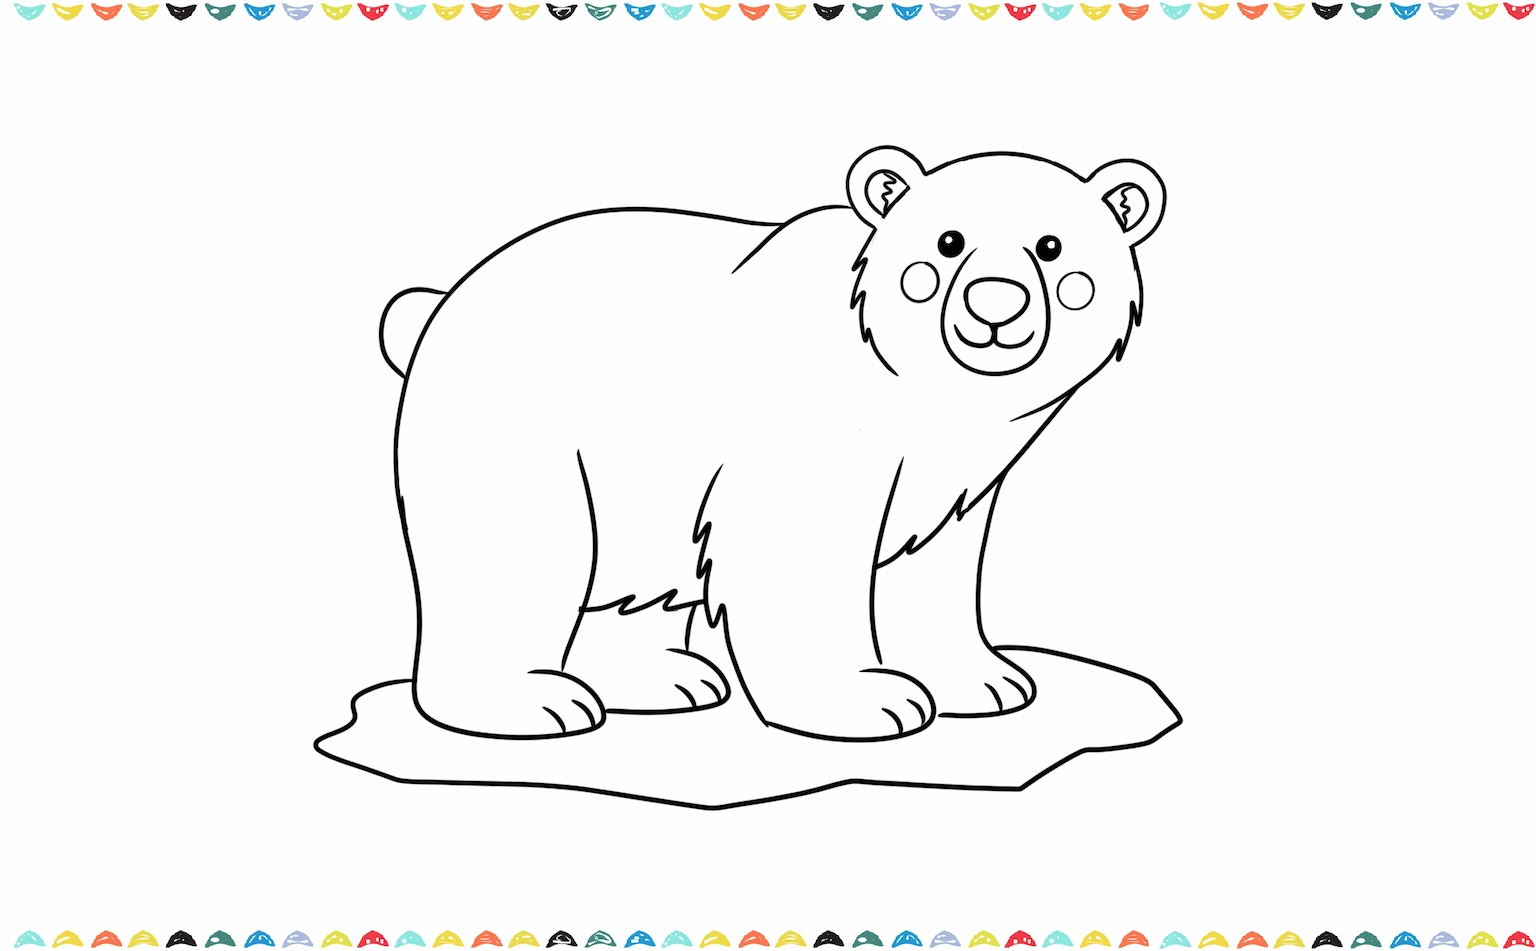
Step 5: Final Touches and Coloring
1️⃣ You’ve done a great job with your pencil sketch! Now, to make your polar bear really stand out on the page, let’s grab a black marker and carefully trace over all of your lines. This will give your drawing a super clean, finished look, ready for coloring!
2️⃣ Now for the fun part that makes your polar bear look like it’s living in the snow! Grab a gray or light blue crayon and lightly shade the body. This special trick will give your polar bear drawing a cool, snowy coat and make it look fluffy and real.
3️⃣ You’re almost finished! Let’s add some finishing touches like fluffy snowflakes falling all around, or maybe even a snowy ground and some icy mountains in the background. It will make your polar bear look like it’s right at home in the chilly Arctic!
🎉 You did it! You’ve learned how to draw a polar bear step by step! If you enjoyed drawing a polar bear, check out our other tutorials How to Draw a Bat or How to Draw a Horse Step-by-Step.
How to Draw a Polar Bear On Iceberg
Polar bears have big, fluffy white fur to keep them warm and strong paws that help them swim like champions. This guide on how to draw a polar bearon iceberg is a super fun way to practice drawing big, beautiful shapes and soft, fuzzy features that will make your artwork look amazing!
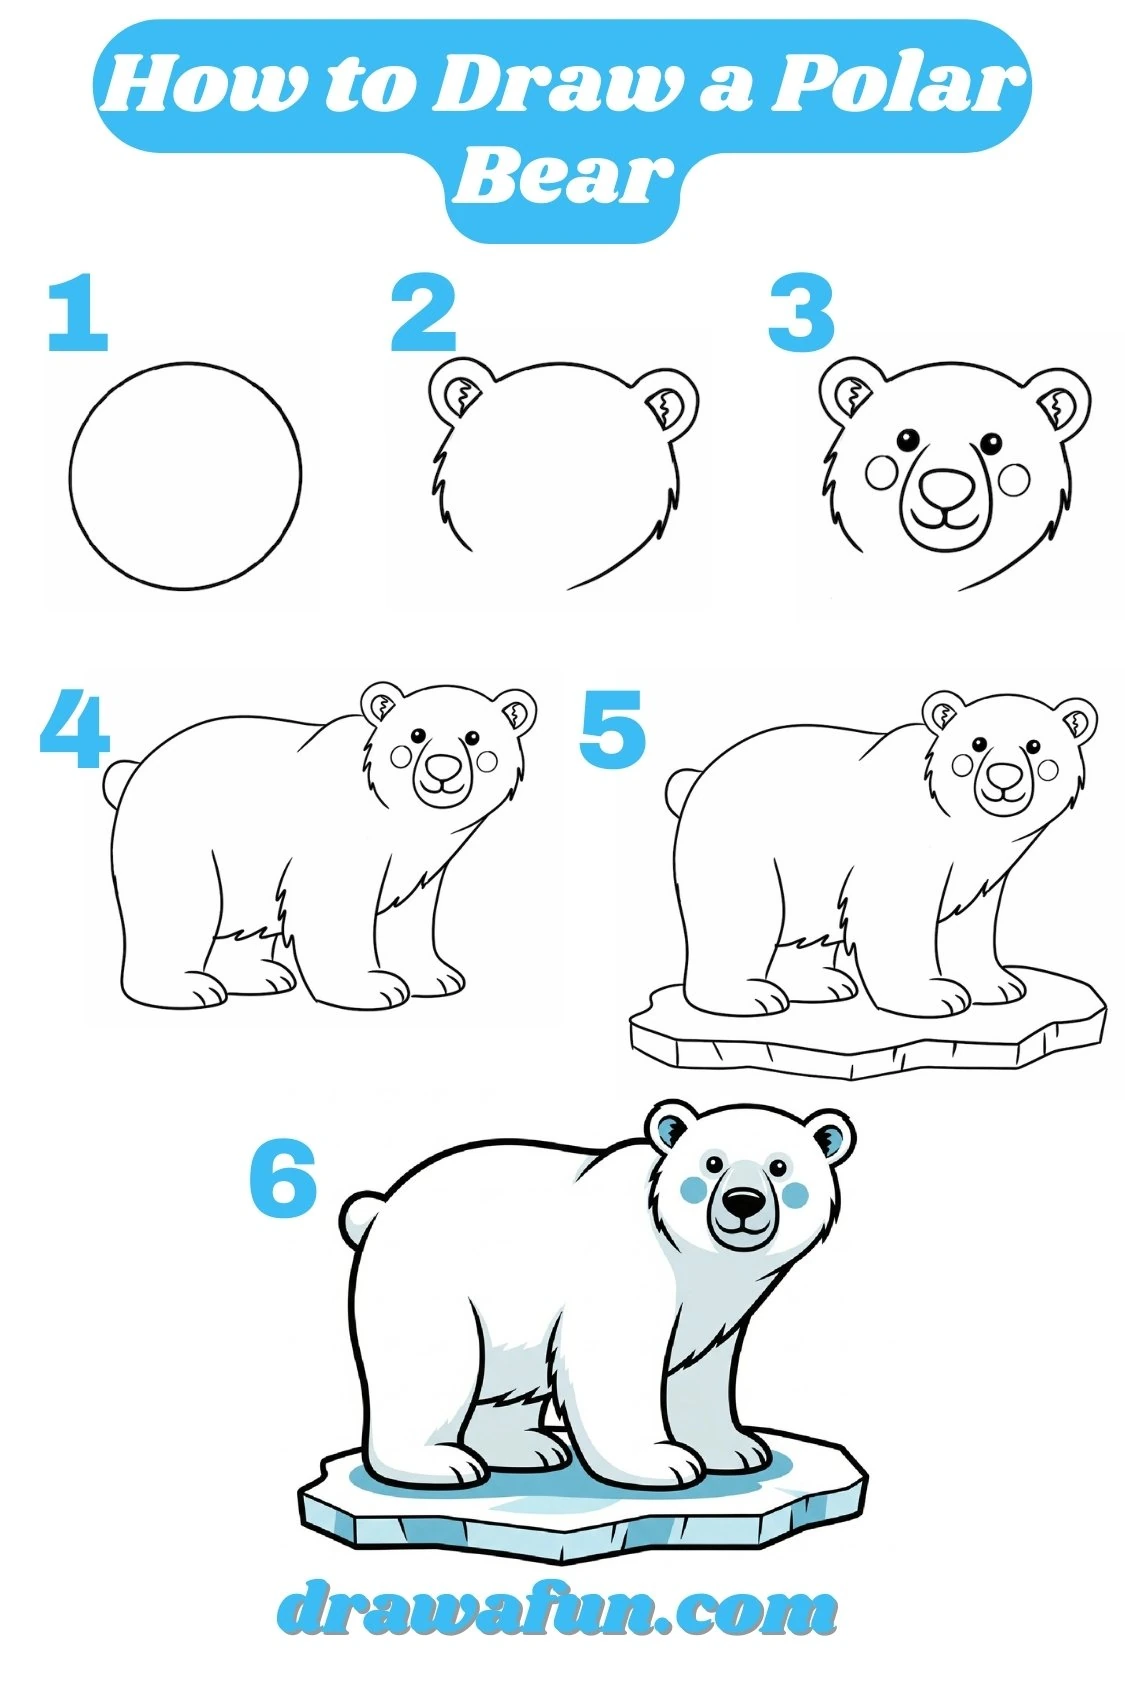
Step 1 – Build a light oval for the head
Sketch a smooth oval leaning slightly forward. Polar bears have strong heads, but in our cartoon polar bear drawing we keep it rounded and friendly.
Ready to make your polar bear look super soft and fuzzy? We’re going to put our straight lines away, because they make things look stiff and flat. For this special part of our how to draw a polar bear guide, you’ll use a secret trick: try using short, little zigzag and dashed lines all around your bear’s body. These special lines will help you create the look of warm, fluffy fur!
Now let’s give our polar bear some ears! Draw two little, round circles right on top of its head, a little bit apart from each other. Give each ear a smaller curved shape inside for depth. Those are its fluffy ears, ready to listen for sounds in the snowy landscape.
Step 2 – Draw the nose and mouth 🐽
Let’s add a sweet face! Start by drawing a small oval for polar bear’s snout. Then, we can put a cute, bean-shaped nose right in the middle. Finally, add a gentle little curve for the mouth. Just like that, your polar bear drawing looks so kind and happy!
Step 3 – Add eyes and cheek circles
Place two shiny eyes and color them in, leaving tiny white highlights. Add two soft circles on the cheeks. This tiny touch is great when you want a polar bear easy to draw style that still feels special. 😊
Step 4 – Draw the neck and big body
From the head’s lower edges, curve lines down to create the neck. Under the head, draw a large horizontal oval for the barrel-shaped body. It should be longer than the head and slightly lower in the front than the back, like the bear is stepping forward.
Add a few zig-zag lines for tufts of fur. Remember, in how to draw a polar bear, fur is drawn with small zig-zags, not spiky triangles. Keep it soft.
Step 5 – Sketch legs with soft rectangles 🐾
First, draw two rounded rectangles under its body for the front legs. Then, sketch two more curvy, rounded shapes for the back legs. Now your polar bear is ready to play in the snow!
Add three gentle bumps at the bottom for toes. Kids who ask how to draw a polar bear often worry about paws – think of them as warm slippers.
Step 6 – Draw the ice floe base 🧊
Time to give our polar bear a place to stand! Draw a a slightly wiggly, many-sided shape under its paws to make the floating ice floating in the water. This will be the big, floating piece of ice!
Now, let’s make the ice look super cool and cracked! Draw a few short line segments inside the ice shape to show little cracks. Using broken lines makes your how to draw a polar bear drawing look fun and playful.
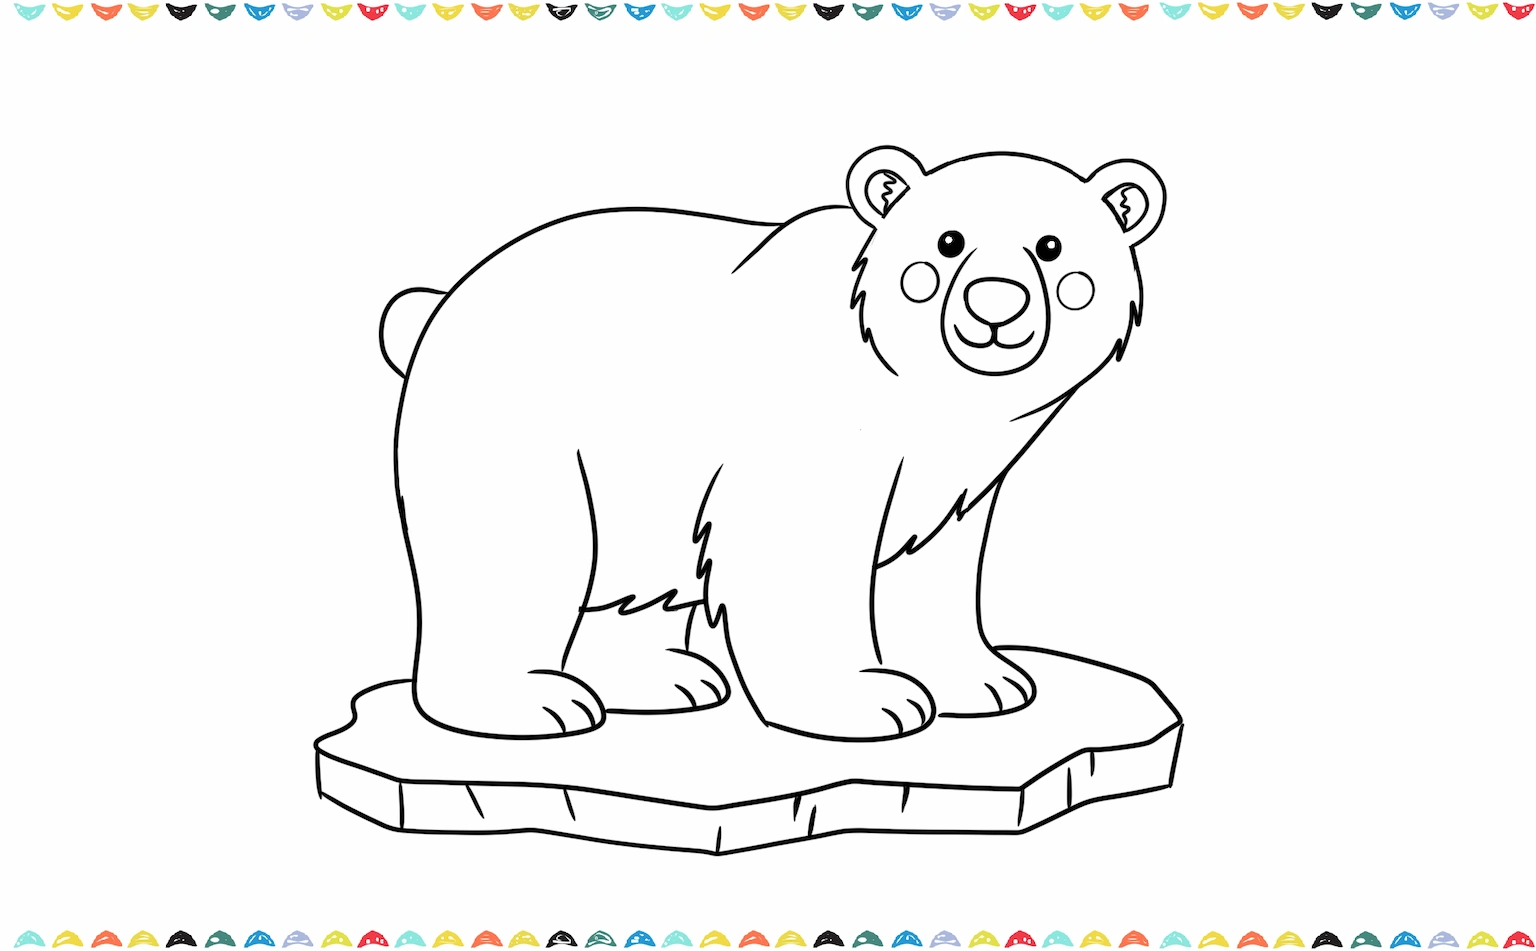
Step 7 – Color the polar bear drawing
To color our polar bear drawing stick to white, gray, and light blue with black outlines. If you like bright illustrations, you can add gentle pink inside the ears. This still looks like a simple drawing of polar bear but feels extra cozy.
Color a soft blue oval shadow where each paw meets the ice. This “cast shadow” makes your bear look grounded. Add a faint blue edge around the ice floe. Now you can really see how to draw a polar bear in an Arctic home.
You did it! You’ve learned how to draw a polar bear step by step! Isn’t that amazing? Now that you’re a pro at drawing this fluffy arctic friend, you can check out our other fun drawing tutorials like How to Draw a Crab or How to Draw a Shark.
Explore All Kinds of Bear Drawings! 🐻
You finished learning how to draw a polar bear and are you ready to draw more bears. From fluffy cartoon bears to real-life arctic creatures, there’s a bear for every artist to draw! In this section, you’ll find step-by-step tutorials to learn how to draw different types of bears, perfect for kids and beginners. Whether you want to sketch a gentle panda, a sleepy koala, a cuddly teddy bear, or a majestic bear, each guide is easy, fun, and full of personality. Choose your favorite bear below and start drawing today! 🎨🐾

How to draw a bear step by step for kids and beginners. Use simple shapes, add a friendly face and paws, then outline, shade and color your cute bear.

Learn how to draw a sweet teddy bear in a few simple steps! A perfect tutorial for kids and beginners. ❤️
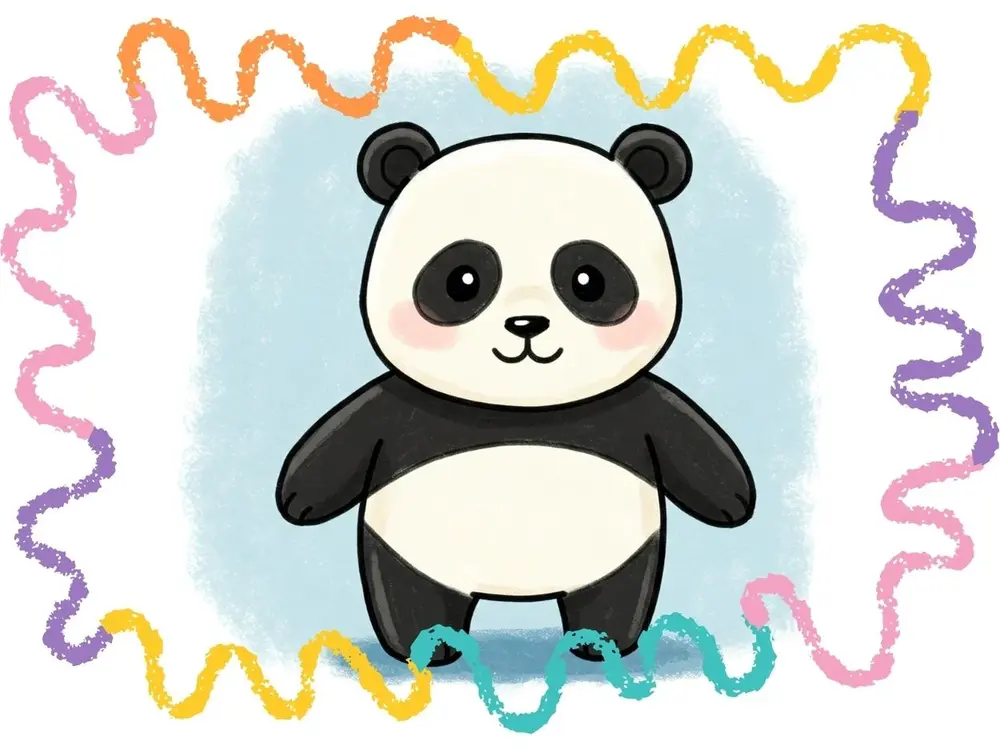
Follow this cute panda drawing tutorial for kids! A fun and simple step-by-step guide to sketch an adorable panda.
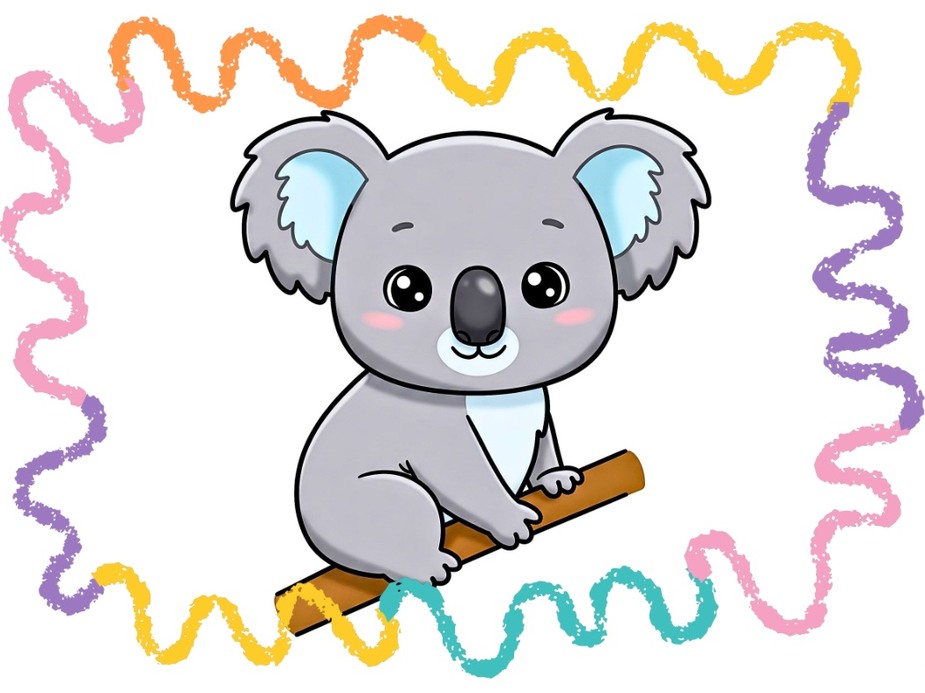
Draw a cuddly koala bear with this easy tutorial for kids. Step-by-step and perfect for little artists!
Fun Facts About Polar Bears 🌟
Now that you know how to draw a polar bear, let’s explore some fun facts about polar bears!
- World’s Largest Land Carnivore: Adult male polar bears, called boars, can weigh up to 700 kg (1,540 lbs) and stand over 3 meters tall on their hind legs!
- Transparent Fur, Black Skin: Their fur looks white, but each hair is actually transparent and hollow, helping to trap heat. Underneath, their skin is black to absorb the sun’s warmth.
- Incredible Swimmers: Polar bears are powerful swimmers, using their front paws like paddles. They can swim for hours at a time and have been recorded traveling over 100 km without stopping. 🏊♂️
- Keen Sense of Smell: They can smell a seal nearly a kilometer away, even under thick ice and snow!
- Surprisingly Fast: On land, a polar bear can run as fast as 40 km/h (25 mph) in short bursts, though they prefer conserving energy.
- Conservation Status: Polar bears are listed as vulnerable due to climate change and melting sea ice, making them a key species for Arctic conservation efforts.
This step-by-step guide is the perfect way to learn how to draw a polar bear, whether you’re a beginner or an experienced artist. Are you interested in learning more about polar bears? Click here to see 10 Facts About Polar Bears!
Frequently Asked Questions ❓
Q1. How do you draw a polar bear step by step for beginners?
A. Start with an oval for the body, a smaller circle for the head, then add the legs, ears, and facial details. Finish with fur texture and light shading.
Q2. How to draw a polar bear standing up?
A. Sure! Try drawing your polar bear standing on two legs or waving a paw for a fun twist.
Q3. What colors should I use for my polar bear drawing?
A. Use white with light blue or grey shading to add depth. You can also add pink to the ears and nose for extra charm.
Q4. Is this polar bear drawing tutorial suitable for kids?
A. Yes! This easy polar bear drawing guide is designed for kids and beginners, with clear, step-by-step instructions.
Q5. What makes drawing a polar bear fun?
A. Polar bears have fluffy white fur, round ears, and a strong body, making them perfect for a cute animal drawing tutorial.
Conclusion: You Did It, Artist! 🎨
Now you know exactly how to draw a polar bear! Keep practicing and try drawing polar bears in different poses, standing, sitting, or even sliding on ice! Once you’ve finished the coloring, you’ll have a fantastic final piece, proving that learning how to draw a polar is a fun and rewarding process.
Keep practicing to learn how to draw a polar bear and try different poses, and remember, you can draw anything with a little imagination and a few simple steps!
👉 If you loved this lesson, don’t stop here! Explore more of our tutorials like How to Draw a Penguin, How to Draw a Hippo or How to Draw an Octopus to complete your sea animals art collection. You can even combine them all into one big drawing idea for an awesome scene!
👉 If you adore magical characters and want another super-fun challenge, why not try drawing How to Draw SpongeBob, How to Draw Dragon Ball Z Goku or How to Draw Sonic next? You can Anime – Cartoon Drawings to find our easy step-by-step guides and keep your creativity blooming!
Looking for creative inspiration? Check out our Pinterest page for some magical ideas!
Keep drawing and having fun with it, just like playing your favorite game every day! The more you draw, the better you’ll get, and you might even discover new ways to draw that you never knew before. Check out our blog post about Drawing Ideas for Beginners – 100 Easy and Fun Things to Draw for more inspiration about drawing.
Share Your Drawing With Us! 💯🎁
We’d love to see your amazing artwork! When you finish your drawing, send us a picture of it. Whether it’s your first try or your masterpiece, we’re excited to cheer you on. Your creativity could even be featured on our site – so grab your crayons and show us what you’ve made! 🎉🖍️
Looking for more step-by-step drawing tutorials? Visit the A-Z Drawing Tutorials Index to browse all lessons, organized alphabetically.