Introduction
Ready to learn how to draw basketball like a pro? 🎨 Whether you’re a beginner or a young artist, this step-by-step guide will show you how to draw a basketball with perfect lines and texture. But that’s not all! We’ll also teach you how to draw a basketball hoop, so you can complete the full scene and make your drawing come alive. With easy-to-follow instructions and fun tips, you’ll be sketching a realistic basketball and hoop in no time.

Grab your pencils and let’s bounce into this exciting basketball drawing tutorial! 🏀✏️
🎨 Materials Needed
Before we start our step-by-step drawing, let’s make sure you have everything you need! You don’t need anything fancy, just a few basic tools to bring your drawing to life:
✅ Paper or Sketchbook – A blank page for your drawing. 📄
✅ Pencils (HB or 2B) – Light pencils help with outlining the drawing. ✏️
✅ Eraser – To fix mistakes while sketching. 🔄
✅ Black Marker or Fine Liner – For outlining and defining clearly. ✍️
✅ Colored Pencils – To color your drawing.
Now, let’s learn how to draw a basketball step by step…
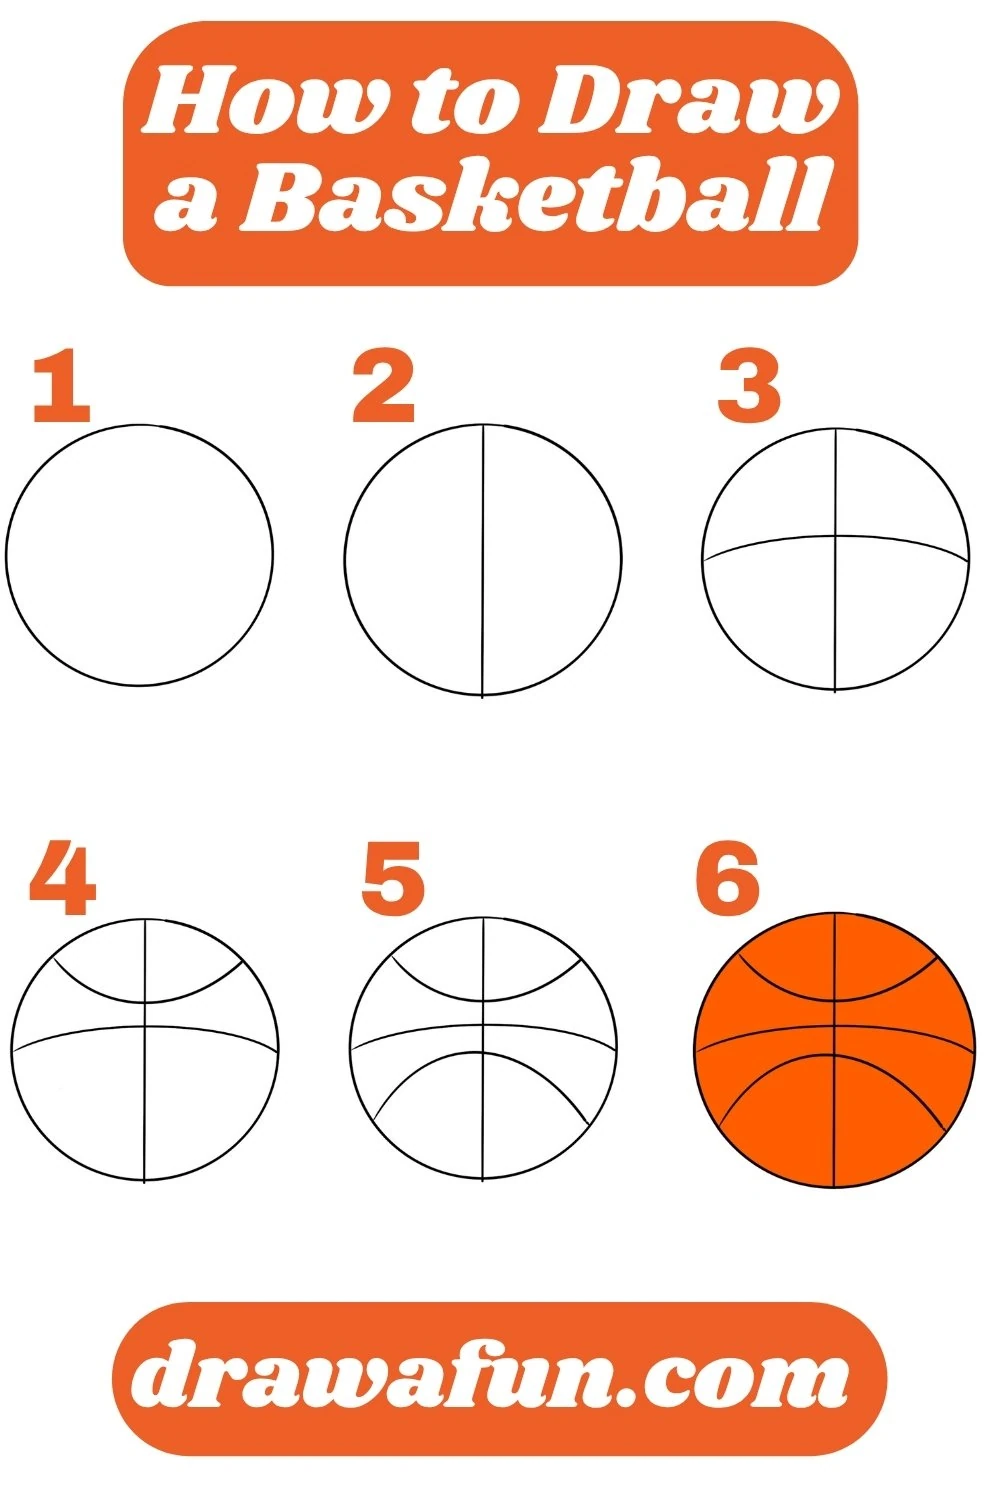
How to Draw a Basketball Step by Step
Basketballs are round, bold, and super fun to draw! Once you learn the lines and curves, you’ll be able to create awesome basketball drawings and even try sketching a hoop or court later on.
Let’s learn how to draw a basketball ball together!
Step 1: Draw a Perfect Circle
1️⃣ Use a round object like a lid or a compass to draw a perfect circle in the center of your paper.
2️⃣ This will be the shape of your basketball.
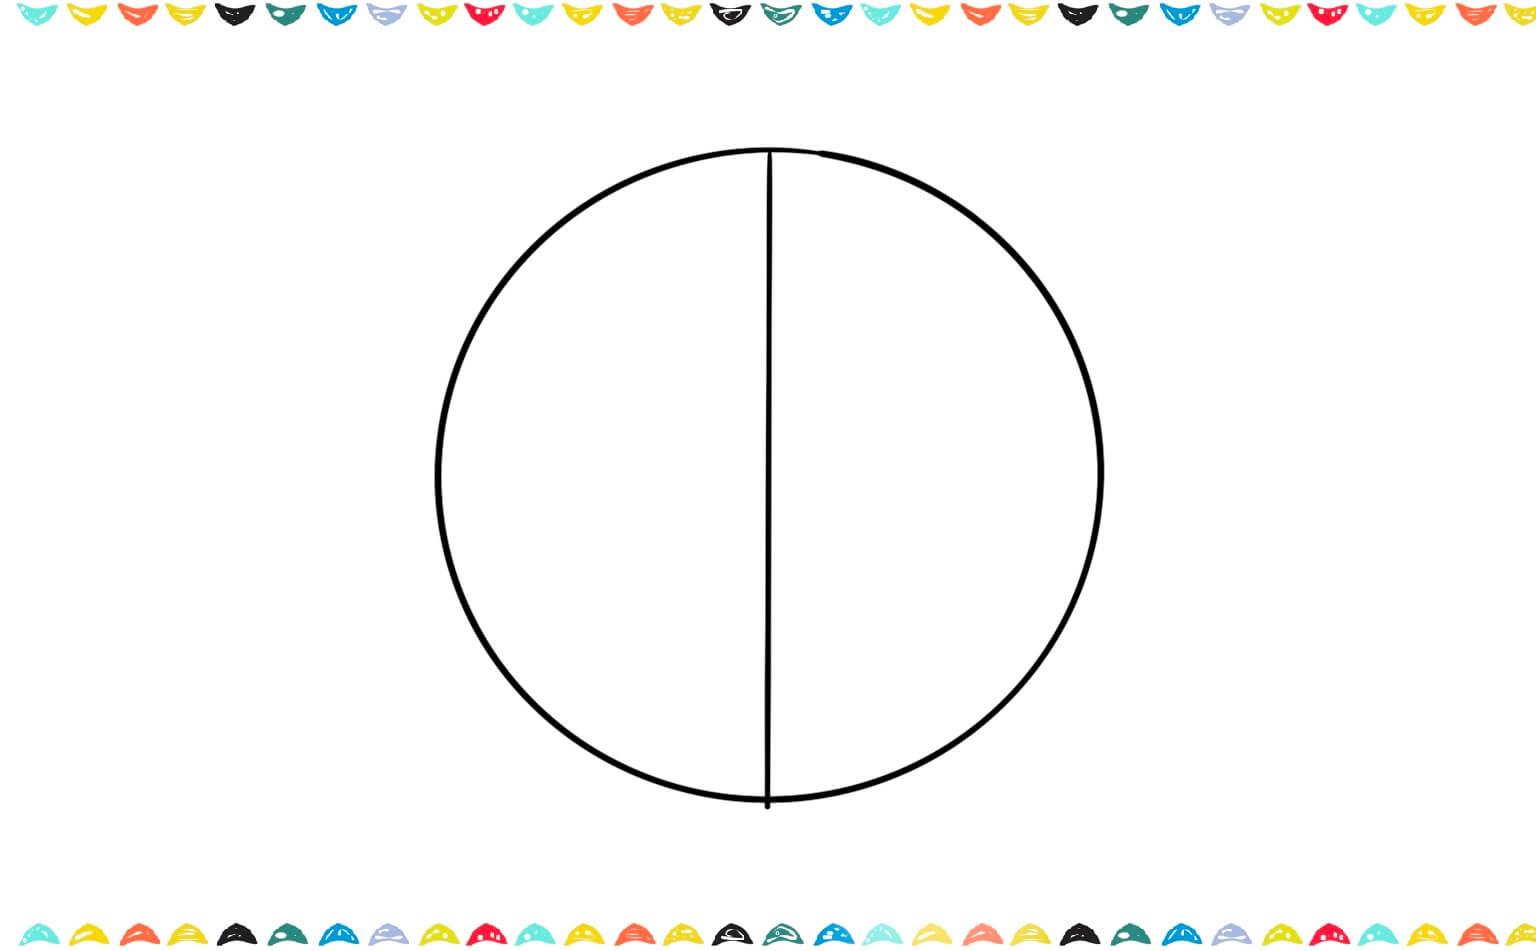
Step 2: Add the Vertical Curve
1️⃣ Inside the circle, draw a curved vertical line from top to bottom.
2️⃣ This line bends slightly outward to match the ball’s shape.
Step 3: Add the Horizontal Curve
1️⃣ Now, draw a curved horizontal line across the center of the ball.
2️⃣ Make sure it crosses the vertical line in the middle – it should look like a cross made of curves!

This easy basketball sketch tutorial helps kids and beginners understand how to shade and shape the ball correctly. Let’s continue…
Step 4: Draw Two Arched Lines
1️⃣ Add one curved line starting from the top-left and curving to the top-right

2️⃣ Then draw another arched line from the bottom-left to the bottom-right.
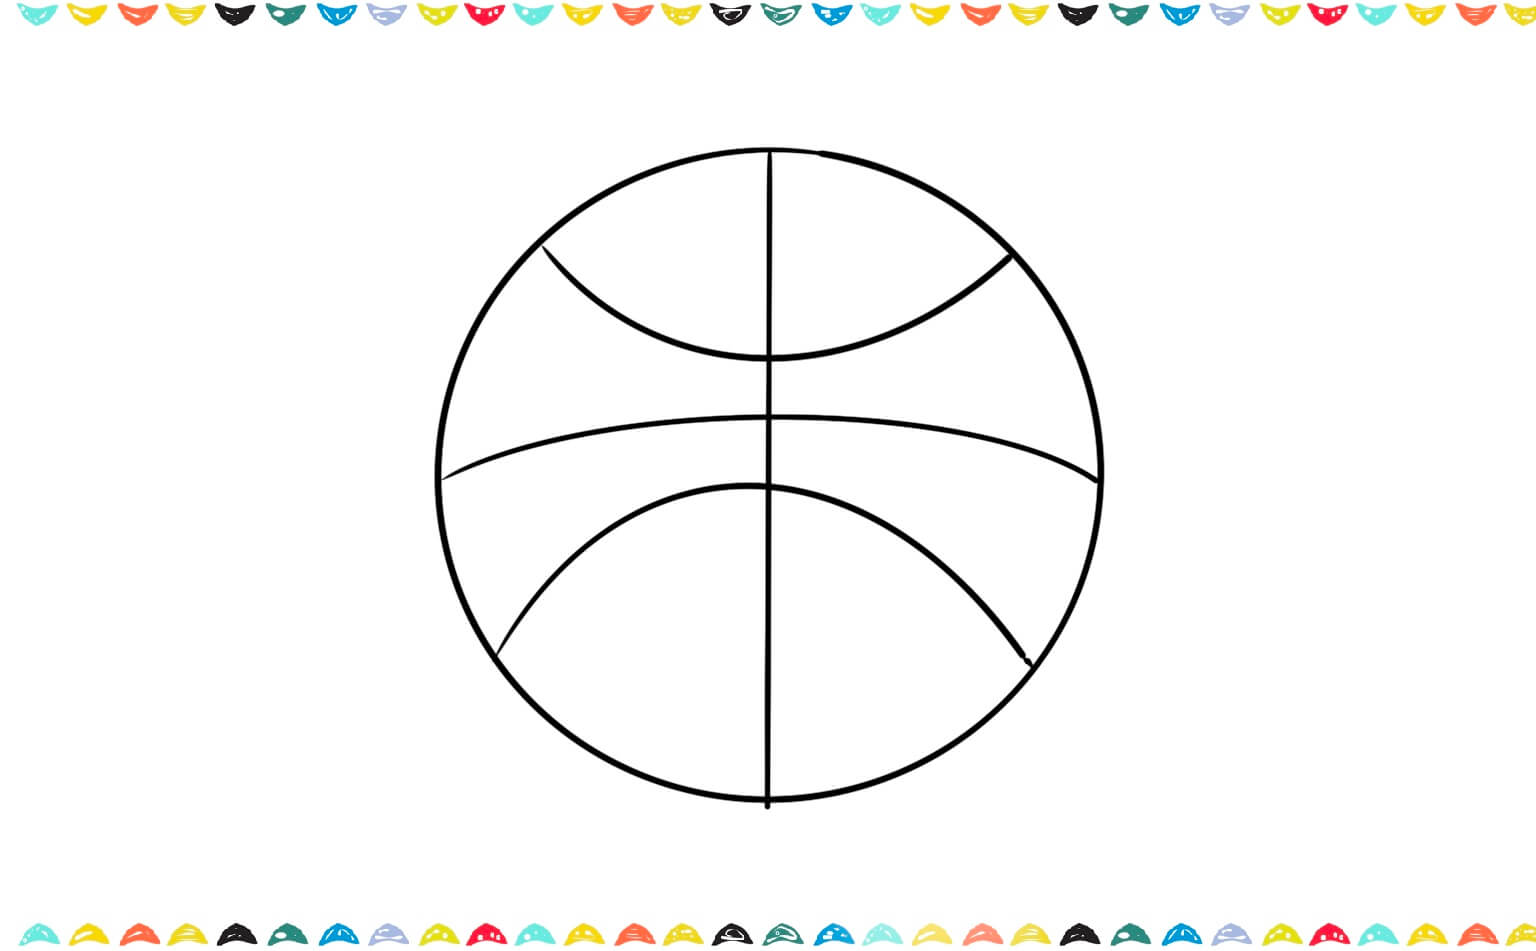
3️⃣ These lines complete the classic basketball pattern!
Step 5: Outline and Color
1️⃣ Trace your lines with a black marker to make them bold.
2️⃣ Drawing a realistic basketball requires paying attention to the curved lines and classic orange texture. Color the ball orange and the lines black to finish your basketball drawing!

Congratulations! You just learned how to draw a basketball ball step by step! 🎉 If you like this tutorial you may also like our easy drawing tutorials about How to Draw a Soccer Ball or How to Draw a Cupcake.
🏀 How to Draw a Basketball Hoop Step-by-Step
Learn to draw the basketball net and backboard to complete your full basketball court scene. It’s time to draw a basketball hoop! Follow these easy steps to create your own hoop, just like the one in the picture. You can color it later to bring your drawing to life!
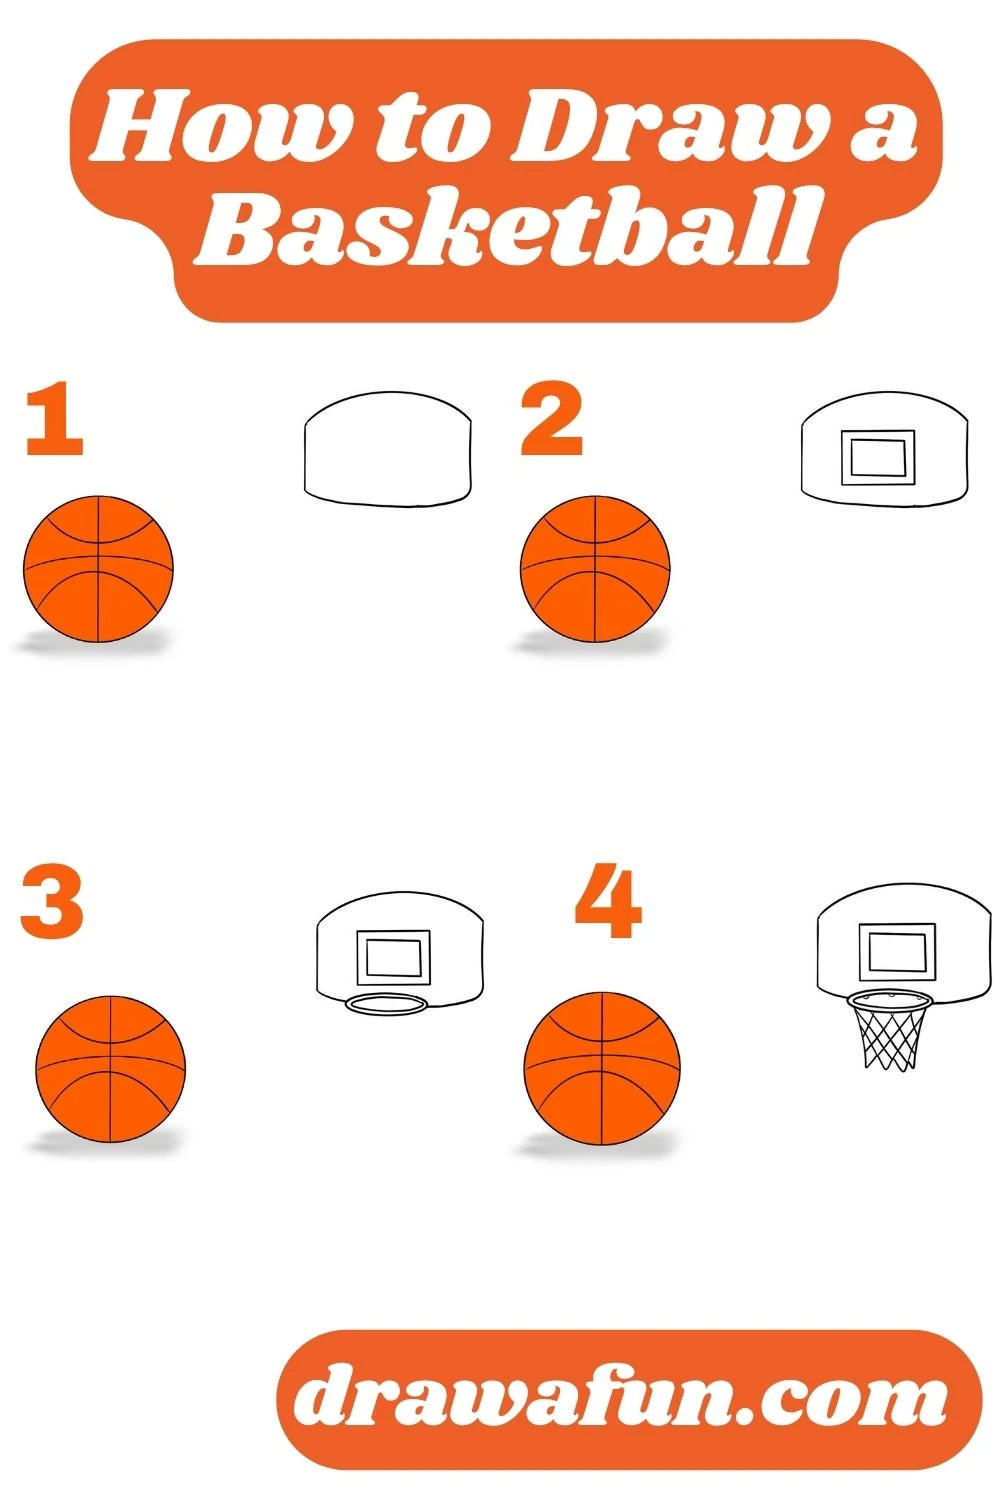
Using basic shapes like circles and rectangles, we simplify the process of basketball and hoop drawing for young artists.
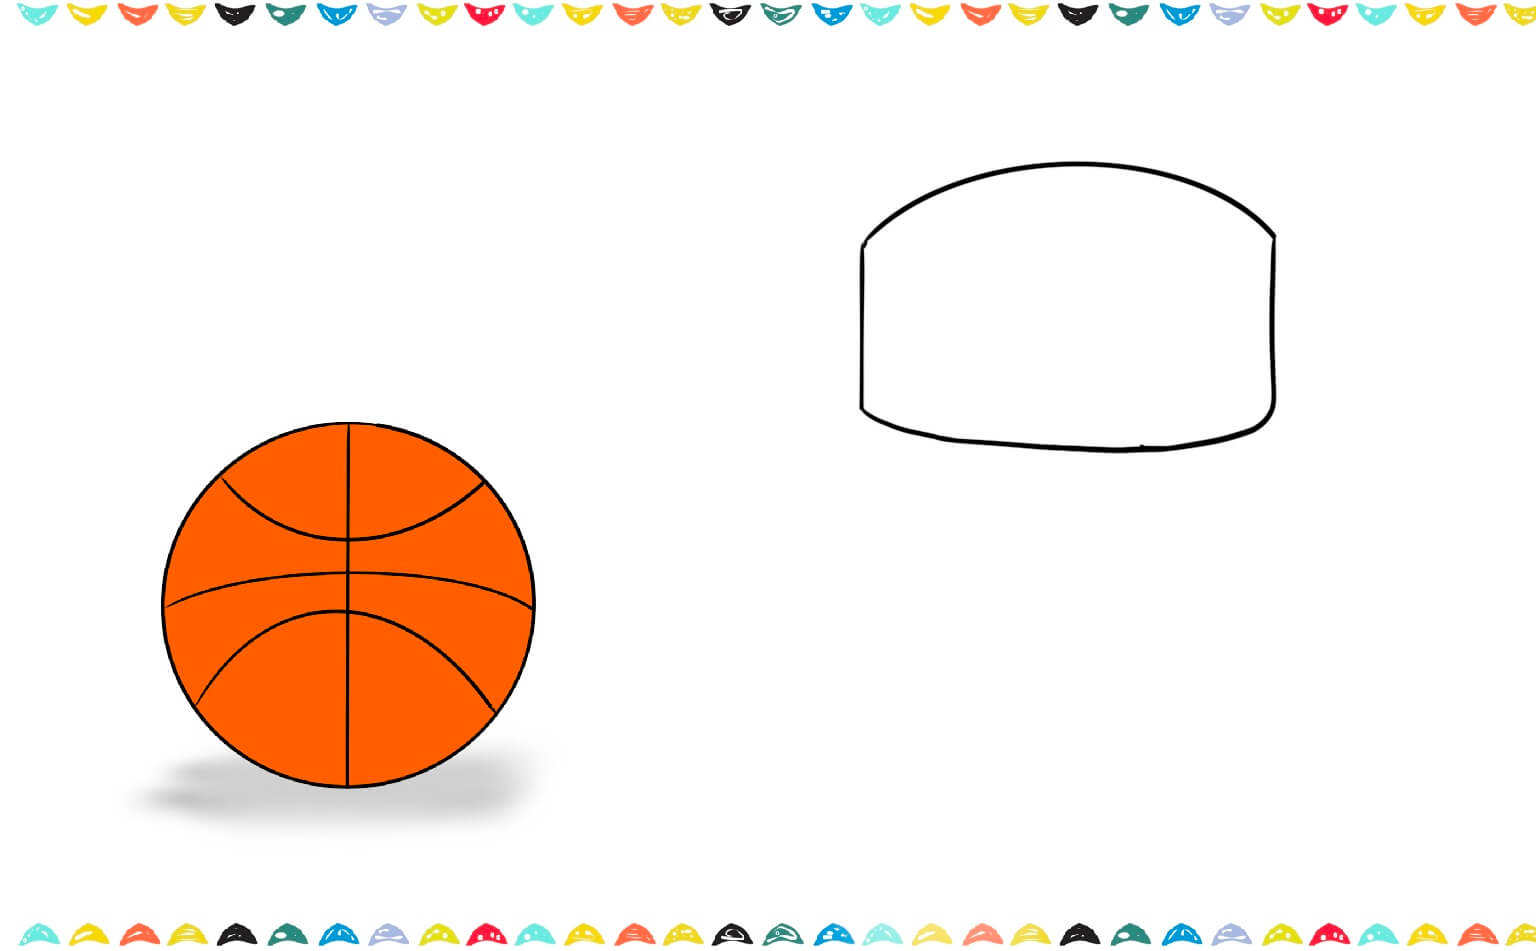
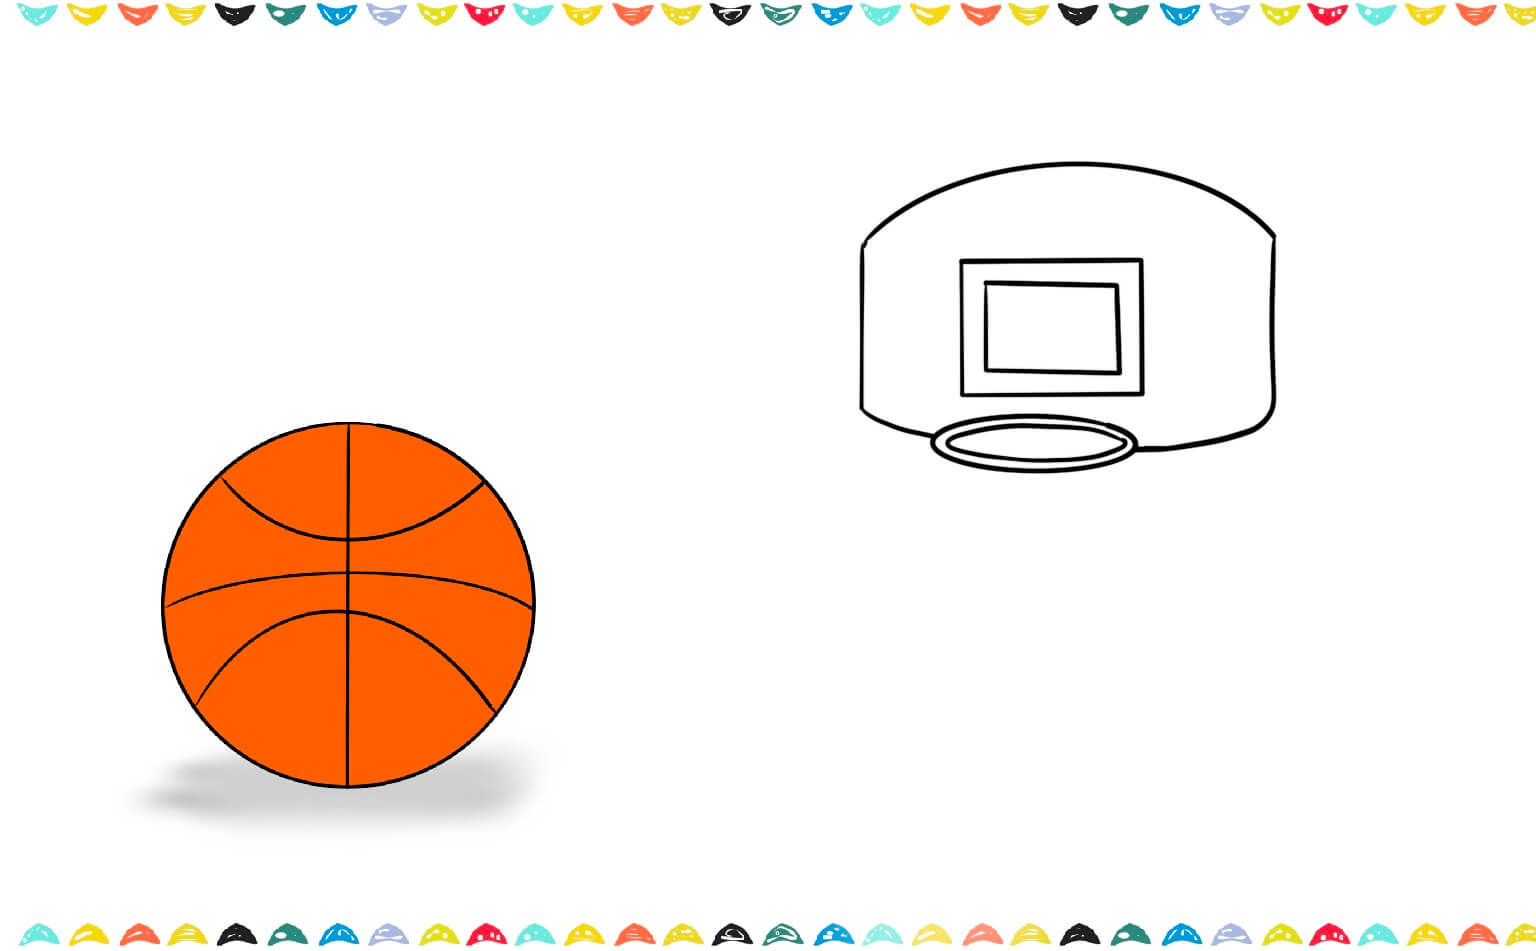
✏️ Step 1: Draw the Backboard
1️⃣ Start by drawing a big curved rectangle – this will be the backboard of the hoop. Make the top rounded and the bottom flat.
✏️ Step 2: Add the Inner Rectangle
1️⃣ Inside the backboard, draw a smaller rectangle near the bottom middle. This helps players aim their shots. Keep it straight and centered.

✏️ Step 3: Draw the Rim (Hoop)
1️⃣ Below the small rectangle, draw an oval that overlaps slightly with the bottom of the backboard. This is the rim where the ball goes through.
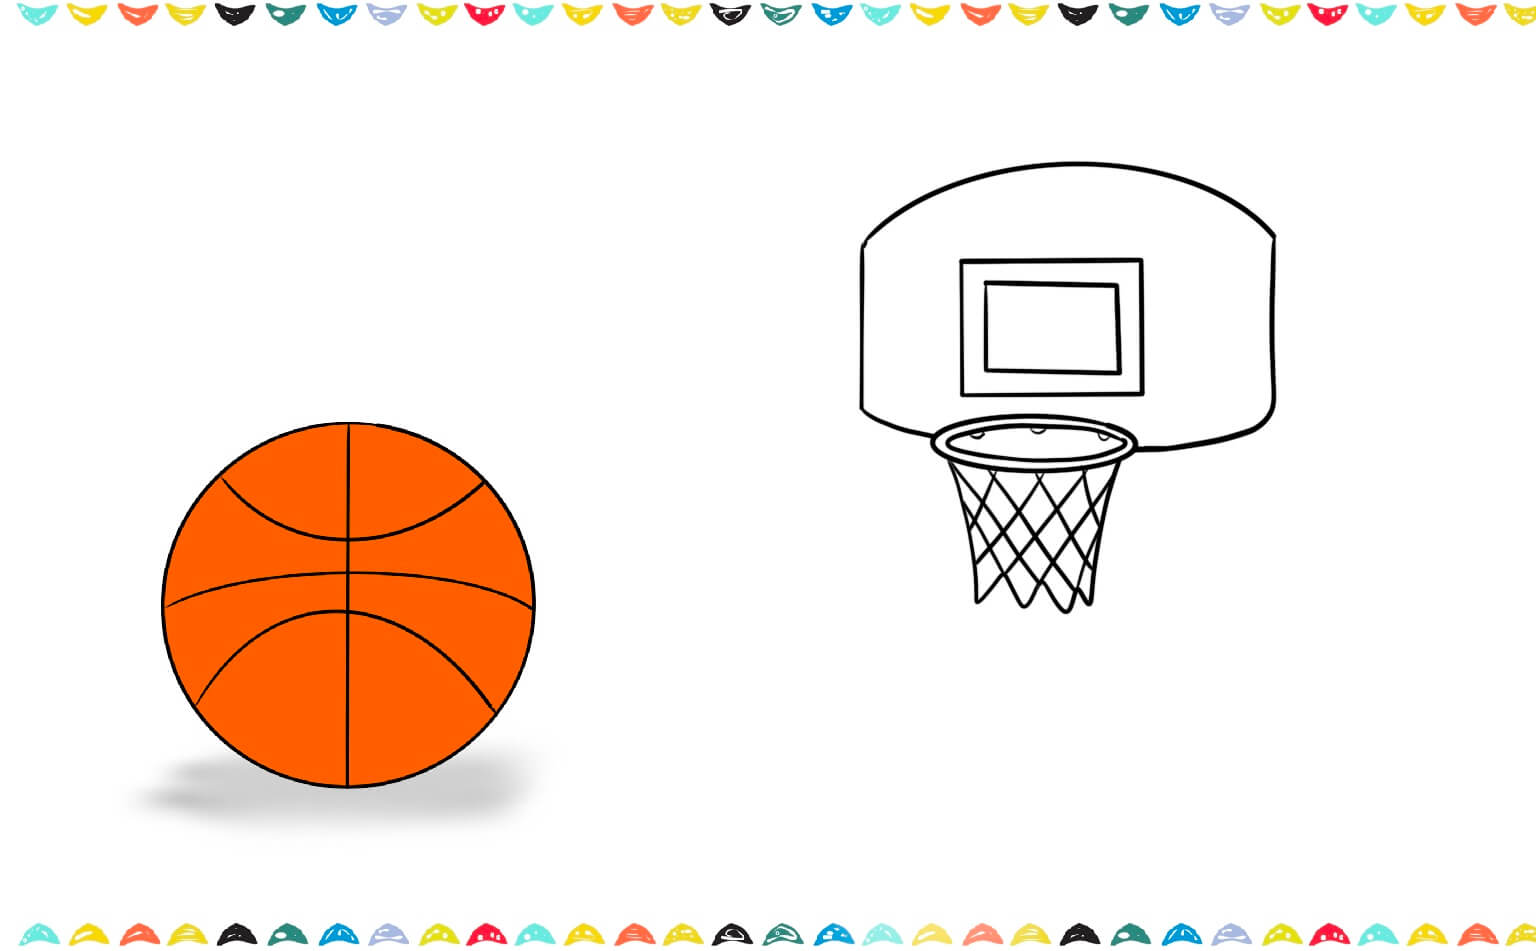
✏️ Step 4: Add the Net
1️⃣ From the rim, draw two curved lines hanging down from the circle. The lines should get closer to each other as they go down. Connect the bottom of the lines by drawing a zigzag line.

2️⃣ Draw several lines going down in a criss-cross (X) pattern to form the net. Make sure the net looks like a diamond mesh and gets narrower toward the bottom.
Want to create a cool basketball drawing with motion effects? Add shadow lines to show the ball in action!
🎨 Final Touches:
Now you’ve drawn your basketball hoop! You can color the backboard grey or white, the rim orange or red, and the net white. Don’t forget to draw a basketball if you want to complete the scene!
You’ve done it! And that’s it! You now know how do you draw a basketball ball step by step! 🎉 If you like this tutorial you may also like our step by step drawing tutorials about
Fun Facts About 🌟
Now that you know how to draw a basketball ball and basketball hoop let’s explore some fun basketball facts!
- 🧡 Basketballs are usually orange to make them easier to see on the court.
- ⛹️ The first basketball game was played with a soccer ball!
- 🏀 The lines on the ball help players grip and control it better.
To explore more about basketball, you can read its history through this link: History of Basketball.
Frequently Asked Questions ❓
Q: How can I draw a basketball easily as a beginner?
A: To draw a basketball easily, start with a perfect circle for the main shape. Then, add curved lines inside the circle to create the iconic basketball pattern. This simple approach is great for beginners and kids!
Q: Can I also learn how to draw a basketball hoop along with the ball?
A: Absolutely! Once you’ve mastered the basketball, you can draw a rectangular backboard and a simple net beneath it to complete your basketball scene. You can even illustrate the ball going through the hoop for added dynamism!
Q: What are the best colors to use for a basketball drawing?
A: The most classic colors for a basketball are bright orange for the main body and bold black lines for the seams. However, feel free to get creative and experiment with different color combinations to make your basketball unique!
Q: Is this tutorial suitable for beginners and kids?
A: Yes, this tutorial is specifically designed to be simple and fun for kids. It uses basic shapes and clear steps to ensure young artists can easily follow along and enjoy the drawing process.
Conclusion: You Did It, Artist! 🎨
Now you’ve mastered how to draw a basketball! Try drawing a basketball in motion, in a hoop, or next to your favorite player. Keep practicing and have fun creating sporty artwork!
For more step-by-step drawing tutorials for kids, explore our blog and discover endless fun with pencils and paper! ✏️🏀
Looking for creative inspiration? Check out our Pinterest page for some magical ideas!
Keep drawing and having fun with it, just like playing your favorite game every day! The more you draw, the better you’ll get, and you might even discover new ways to draw that you never knew before. Check out our blog post about Drawing Ideas for Beginners – 100 Easy and Fun Things to Draw for more inspiration about drawing.
Share Your Drawing With Us! 💯🎁
We’d love to see your amazing artwork! When you finish your drawing, send us a picture of it. Whether it’s your first try or your masterpiece, we’re excited to cheer you on. Your creativity could even be featured on our site – so grab your crayons and show us what you’ve made! 🎉🖍️
Looking for more step-by-step drawing tutorials? Visit the A-Z Drawing Tutorials Index to browse all lessons, organized alphabetically.